Spider Man Web Throw
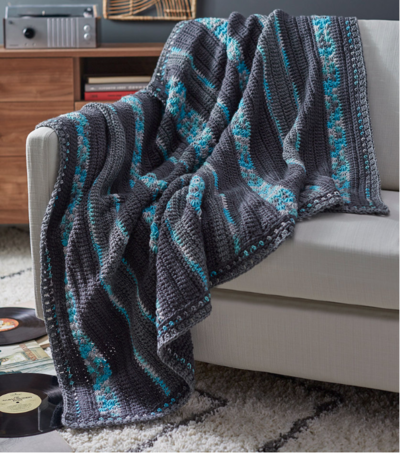
Easy crochet projects for kids, like this awesome Spider Man Web Throw from Red Heart Yarns, are great for boys and men alike. With a flick of the wrist and a twist of a hook, you can have this crocheted afghan pattern worked up in no time.

Materials:
- RED HEART® Super Saver® (4 skeins 319 Cherry Red A, 2 skeins 385 Royal B, and 1 skein 312 Black C)
- Crochet Hook: 6.5mm [US K-10½]
- Stitch marker, yarn needle
Notes:
- GAUGE: 11 sts = 4”; 7 rows = 4” in dc. CHECK YOUR GAUGE. Use any size hook to obtain the gauge.
- Blanket diameter is 53”.
- To Change Color in Dc: Work last dc before color change until 2 loops remain on hook, drop color in use, with next color to be used yo and draw through 2 loops on hook; continue with new color.
- Special Abbreviation: V-st = (dc, ch 1, dc) in indicated st or space.
Instructions:
Wedge A (make 5)
-
Row 1: With B, ch 3 (counts as dc); dc in 3rd ch from hook; turn – 2 dc.
-
Row 2 (Right Side): Ch 3 (counts as dc), dc in first dc, dc in top of beginning ch; turn – 3 dc.
-
Rows 3-7: Ch 3, dc in first dc, dc in each dc across; turn – 8 dc at the end of Row 7.
-
Row 8: Ch 3, dc in first dc, skip next dc, V-st in next dc, * skip 2 dc, V-st in next dc; repeat from * to last 2 sts; skip next dc, dc in last st; turn – 2 V-sts.
-
Row 9: Ch 3, dc in first dc, dc in each dc and space across changing to A in last st; turn – 10 dc. Cut B and continue with A only.
-
Row 10: Ch 3, dc in first dc, dc in each dc across; turn – 1 dc.
-
Rows 11–37: Repeat Rows 8-10 – 38 dc at end of Row 37.
-
Row 38: Repeat Row 8.
- Row 39: Repeat Row 9 – 40 dc. Do not fasten off.
Wedge Edging
- Row 1: With right side still facing, and working down long edge of wedge toward point, ch 1, place 2 sc in side of each row, ch 1 at point, working up the opposite long edge, place 2 sc in side of each row to top – 78 sc each long edge and 1 ch at point. Fasten off. Do NOT work across top of wedge.
Wedge B (make 5)
-
Rows 1-7: Work same as Wedge A.
-
Rows 8 and 9: Ch 3, dc in first dc, dc in each dc across; turn – 10 dc at end of Row 9.
-
Row 10: Ch 3, dc in first dc, skip next dc, V-st in next dc, * skip 2 dc, V-st in next dc; repeat from * to last 4 sts; skip 2 dc, 2 dc in next dc, dc in last st; turn – 3 V-sts.
-
Row 11: Ch 3, dc in first dc, dc in each dc and space across; turn – 12 dc.
-
Row 12: Ch 3, dc in first dc, dc in each st across changing to A; turn – 13 dc. Cut B and continue with A only.
-
Row 13: Repeat Row 10.
-
Rows 14 and 15: Repeat Rows 11 and 12.
- Rows 16–39: Repeat Rows 10-12 – 40 dc at end of Row 39. Do not fasten off.
Wedge Edging
- Work same as for Wedge A.
Assembly
- Alternating Wedge A and Wedge B as shown, with wrong sides together, join A in first st after the ch at points; ch 1, sc through the back loops of the edgings from point to outer edge. Fasten off – 78 sc. Repeat assembling all wedges together in same manner.
Blanket Edging
-
Round 1: With right side facing, join C in any seam; ch 1, * sc in seam, sc in edging, work sc in next 40 dc, sc in edging; repeat from * around; join with a slip st in first sc – 430 sc. Fasten off.
-
Round 2: Join B in any sc; ch 3, dc in next sc and in each sc around; join in top of ch-3.
-
Round 3: Ch 4, dc in same st as joining (counts as first V-st), skip next dc, * V-st in next dc, skip next dc; repeat from * around; join in 3rd ch of ch-4 – 215 V-sts.
- Round 4: Ch 3, dc in each st and space around; join – 645 dc. Fasten off.
Center Edging
-
With right side facing, join C with sc in any ch-1 space of any wedge point; sc in each ch-1 space, and in an sc on either side of the space; join with slip st in first sc – 30 sc.
- Fasten off.
Center Insert
- Round 1: With C, ch 6; join with slip st to form a ring; ch 4 (counts as first tr), 19 tr in ring; join with a slip st in top of ch-4. Fasten off leaving a long end for sewing. Using yarn needle and C, whipstitch insert into center hole.
Surface Slip Stitch
-
Using photo as guide for placement and holding slip knot on the wrong of the fabric, use hook to pull loop through to the right side (slip st made), slip st in between dc rows traveling across wedges all the way around. Remove hook from final loop, with hook on the wrong side of the fabric, pull the final loop through to the wrong side and fasten off.
- Continue for second slip st round.
Read NextLavender Shell Afghan
icebam0214 5098176
Nov 13, 2014
I am confused on how to or when do I do black down the seams of blanket? From what I can figure out is that after I go around the blanket in black it says to do blue but it looks like more red first! Is there a utube tutorial to help? I am just not sure how to go down the seams or when to. HELP THANKS MARY
metrevor972
Nov 06, 2012
Have good and fun project to do. It does take sometime but it is werth it. Just read the assembly part very carefully, because it took me sometime to get that part right.
Report Inappropriate Comment
Are you sure you would like to report this comment? It will be flagged for our moderators to take action.
Thank you for taking the time to improve the content on our site.


