Pink Pompom Crochet Beanie Hat

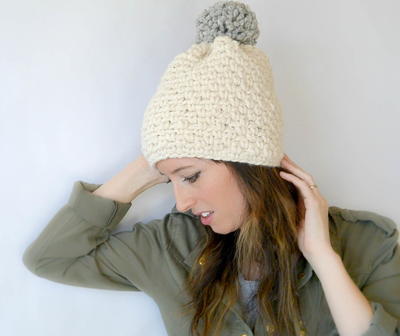
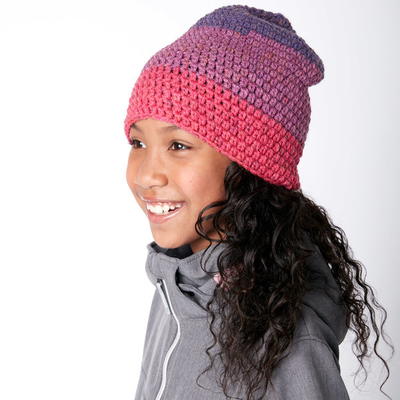
Cold weather has never been so exciting. Make a Pink Pompom Crochet Beanie Hat and wear it all season - it's a perfect way to add a pop of color to any outfit. Free crochet hat patterns should always be practical and stylish, and this project really fits the bill. In fact, your free crochet hat pattern will certainly stick out from a sea of black and gray winter accessories. The pink color and cute pompon topper makes this one of the most unexpected crochet beanie patterns there is. Using single crochet and half double crochet stitches, you can quickly work up this adorable winter hat and wear it all winter long.

Yarn Weight(6) Super Bulky/Super Chunky (4-11 stitches for 4 inches)
Crochet HookN/15 or 10 mm hook
Materials:
- 10.00mm Crochet Hook
- 150g Bulky Yarn {12ply} - I used Lincraft Veronica
- Scissors
- Tapestry/Wool Needle
Finished Size
Fits 13 Years & Up
Instructions:
- Taking your 10.00mm crochet hook and bulky yarn, start of by making a Slip Knot, then crochet 28 Chains.
- Row 1 Chain 2. Crochet 1 Half Double Crochet into the fourth chain from your hook. Then crochet 1 Half Double Crochet into the next 19 chains. Crochet 1 Single Crochet into the next 7 chains. You should have 28 stitches now.
- Row 2 Crochet 1 Slip Stitch into every stitch across.
- Row 3 Chain 2. Crochet 1 Half Double Crochet into the back loop of the next 20 stitches. Crochet 1 Single Crochet into the back loop of the next 7 stitches.
- Row 4 Crochet 1 Slip Stitch into every stitch across.
- Row 5 Chain 2. Crochet 1 Half Double Crochet into the back loop of the next 20 stitches. Crochet 1 Single Crochet into the back loop of the next 7 stitches.
- Row 6 - 45 Repeat rows 4 - 5. {Note: You can either add or take away a couple sets of rows 4 - 5, depending on your head's circumference.}
- Fasten off, and weave in loose ends.
- Now taking the yarn and tapestry needle, thread the yarn through the ends of the rows along the edge. {Note: Be sure to thread the yarn through the ends consisting of single crochets, not the ends with half double crochets.}
- Once you've threaded your needle along one side, pull the yarn tightly to gather all the edges together until the hole at the top is closed.
- Now, sew the two short sides of the hat together to complete your beanie.
- Fasten off, and weave in loose ends.
- Now flip up the brim of the hat 2 inches.
- Then make a Pom Pom using your bulky yarn. I used a pom pom maker, but if you don't have one you can easily make one with this helpful article from AllFreeCrochet on How to Make a Crochet Pom Pom. {Note: My pompom measured 4 inches x 4 inches.}
- Taking your tapestry/wool needle, attach the pom pom to the very top of your hat.
aleeshadodd 269970 9
Jul 18, 2015
whenever i try to re-do it, it ends up with one end getting longer. either the edge or the top. i really dont know what im doing wrong, im not very good at this /
lcarr
Jan 13, 2017
Make sure that you are counting your stitches for each row. For this hat, the chain 2 counts as the first half double crochet in those rows. There is no turning chain for the slip stitch rows. It is easy to end up missing a stitch at the beginning of a row or adding an extra stitch at the end of a row in the initial chain 2, especially when you are not used to working with slip stitches. Make sure that you are only making 1 slip stitch in the top of the chain 2 on those rows, as the chain 2 only counts as one half double crochet stitch. It might also help you to use a stitch marker on each end to keep track of working stitches.
Report Inappropriate Comment
Are you sure you would like to report this comment? It will be flagged for our moderators to take action.
Thank you for taking the time to improve the content on our site.

