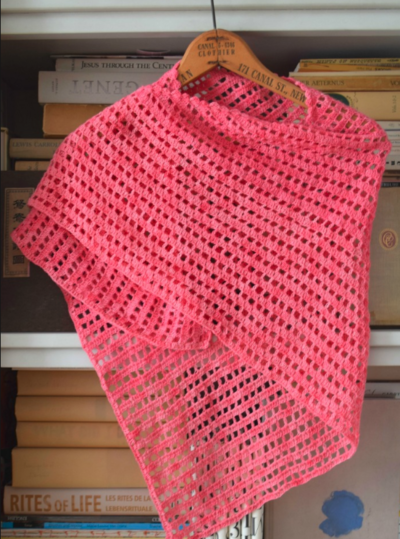
Wrap with Flower
This is the perfect wrap to wear out over the weekend. It's just the right amount to keep you warm and the flower embellishment is a great way to finish it.

Materials:
- Caron International's Simply Soft (100% acrylic; 6 oz/170 g, 315 yds/288 m): #9730 Autumn Red (A), 2 skeins (for Wrap and Flower), #9742 Grey Heather (B), 2 skeins. N
- ote: Hold one strand of each color together throughout for Wrap; use single strand for Flower.
- One size US K/10.5 (6.5 mm) crochet hook for Wrap. One size US 7 (4.5 mm) crochet hook for Flower
- Tapestry needle (tn), Five 4mm round dark grey beads, for Flower, Sewing thread and needle, for Flower, Pin back – 1 1/4" long, for Flower
GAUGE
Not critical for this project
SPECIAL TERMS
V-st: Work [dc, ch 1, dc] in next st.
STITCHES USED
Chain (ch), Double crochet (dc), Half double crochet (hdc), Single crochet (sc), Treble crochet (tr). Three and Two Stitch (multiple of 6 sts + 2; 2 row repeat) Work base chain.
Foundation Row (RS): Beg in fifth ch from hook, work V-st in fifth ch, * skip 2 ch, work 3 dc in next ch, skip 2 ch, work V-st in next ch; rep from * across to last 5 ch, skip 2 ch, work 3 dc in next ch, skip 1 ch, dc in last ch, turn.
Row 1: Ch 3, *skip 2 sts, work 3 dc in center of dc-3 of previous row, work V-st in ch-1 space of V-st of previous row; rep from * across, end dc in top of turning ch, turn.
Row 2: Ch 3, *work Vst in ch-1 space, 3 dc in center of next dc-3; rep from * across, end dc in top of turning ch, turn. Repeat Rows 1 and 2 for Three and Two st.
NOTE: Wrap is worked from end to end.
WRAP
Base Chain: Using 1 strand of each color held together, chain 22. (RS) Beg Three and Two st; work even for 15 rows, counting Foundation Row.
Shape Sides: Cont as est, inc one pattern (V-st or dc-3) at beg and end of this row, then every other row twice—3 patterns increased each side; place a marker (pm) each side. Work even until piece measures 30" from markers; pm each side.
Shape Sides: Cont as est, dec one pattern (V-st or dc-3) at beg and end of this row, then every other row twice—3 patterns decreased each side. Work even until piece measures same as first end to markers. Fasten off.
FINISHING
Edging - Shaped sides: Join 1 strand each color with a slip st to corner of base ch; work Shell st evenly along shaped side as follows: Ch 1, * work 3 dc, sc; rep from * to opposite end.
Edging - Ends: Join 2 strands A with a slip st to corner of one end; work Picot edging as follows: Row 1: Ch 2, * hdc, ch 1; rep from * across end, turn.
Row 2: Ch 1, sc in each st across, turn.
Row 3: Ch 1, * sc in next st, [ch 3, slip st in third ch from hook (picot made)]; rep from * across, end sc in last st. Fasten off. Using tn, weave in all ends.
FLOWER PIN:
Chain 2.
Rnd 1: Beg in the second ch from hook, work 8 sc in second ch; join with a slip st to form a ring.
Rnd 2: Ch 1, work 2 sc in each sc around; join with slip st to first st—16 sc.
Rnd 3: Working in front loop only of each sc of Rnd 2, ch 5 (counts as sc, ch
4), * slip st in next st, ch 4; rep from * around, join with a slip st to first ch of beg ch-5—16 loops.
Rnd 4: Working in back loop of each sc of Rnd 2, ch 1, sc in each st around, join with slip st to first st—16 sc. Rnd 5: Working in front loop of each sc of Rnd 4, * ch 4, dc in next st, ch 4, slip st in same st, slip
st in next st; rep from * around, join with a slip st to first ch of beg ch-4.
Rnd 6: Slip st in back loop of first sc of Rnd 4, * [ch 5, tr in same st, ch 5, slip st in same st], slip st in next st; rep from * around.
Fasten off.
FINISHING
Using tn, weave in all ends.
Attach Beads: With WS facing, using sewing needle and matching thread, attach thread to center of flower. * Insert needle through center of flower to RS, thread on first bead, bring needle and thread to WS; rep from * for each bead, forming a circle of beads in the center of the flower, using photo as a
guide. Sew pin back to center of flower on WS.
CARE INSTRUCTIONS
Hand Washing And Drying: Turn inside out and wash gently in warm water using a mild detergent.
Gently rinse well in cold water. Lay flat on a towel and roll in towel to remove excess water. DO NOT WRING,
STRETCH OR HANG TO DRY.
Handling Instructions: When using the yarn be sure to tie a knot at the beginning of each skein and at both yarn ends when joining. A small amount of shedding can be expected when using this yarn under normal conditions.
Read NextJustine Crochet Prayer Shawl Pattern
Your Recently Viewed Projects
Report Inappropriate Comment
Are you sure you would like to report this comment? It will be flagged for our moderators to take action.
Thank you for taking the time to improve the content on our site.

