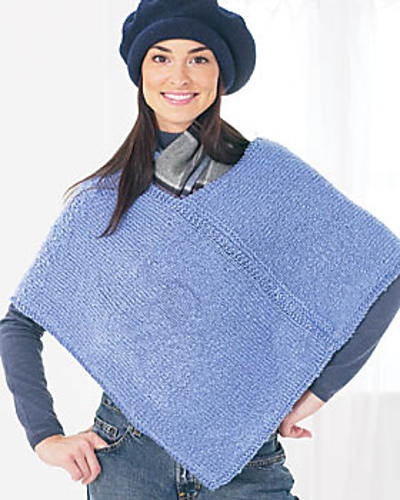
Drape Sweater
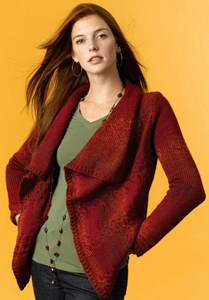
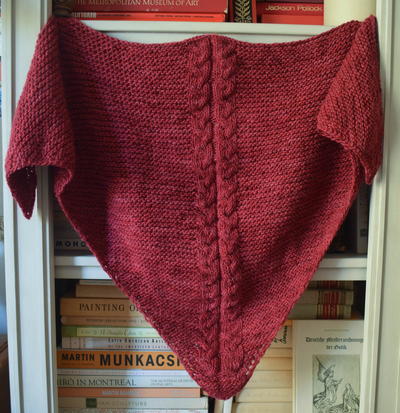
This intermediate sweater knitting pattern creates a lovely draping front. The yarn used in this sweater knitting pattern leaves subtle designs throughout.

Materials: Small (Medium, Large, 1X, 2X)
- Caron International's Simply Soft Shadows (100% Acrylic, 3oz/85g, 150yds/137m): #0004 Autumn, 8 (9, 10, 11, 12) skeins
- One pair needles size US 8 (5 mm) needles, or size to obtain gauge
- Cable needle
- Crochet hook size US H-8 (5 mm)
- Stitch markers
- Yarn needle
FINISHED MEASUREMENTS Small (Medium, Large, 1X, 2X)
Bust 36 (40, 44, 47 1/2, 51 1/2)"
Length 21 1/2 (22 1/2, 23, 24, 25)"
GAUGE
In Stockinette stitch, 17 sts and 23 rows = 4"/10 cm; 12 st cable = 2 1/2" wide
NOTE
Back is worked from lower edge to shoulders; Fronts are worked from side to side. The cables on the front will appear horizontal when sweater is assembled
SPECIAL TERMS
C4B: Slip 2 sts to cable needle and hold in back, k2, k2 from cable needle.
STITCHES USED
Stockinette stitch (St st): Knit on RS, purl on WS.
1X1 rib (multiple of 2 sts + 1)
Row 1 (RS): K1, * p1, k1; repeat from * across.
Row 2:Knit the knit sts and purl the purl sts as they face you.
Repeat Row 2 for 1X1 rib.
Chain (ch)
Reverse single crochet (Rev sc)
Single crochet (sc)
Cable (Panel of 12 sts)
Row 1 (RS): C4B, k4, C4B.
Row 2 and all WS rows: Purl.
Rows 3 and 7: Knit.
Row 5: K4, C4B, k4.
Row 8: Purl.
Repeat Rows 1 – 8 for Cable.
NOTE
Back is worked from lower edge to shoulders; Fronts are worked from side to side.
BACK
Cast on 77 (85, 93, 101, 109) sts.
(RS) Begin 1 x 1 Rib; work even for 4 rows, end with a WS row.
(RS) Change to St st; work even until piece measures 13 (14, 14, 15, 16)" from beginning, end with a WS row.
Shape Armholes
(RS) Bind off 5 (6, 7, 8, 9) sts at beginning of next 2 rows—67 (73, 79, 85, 91) sts remain.
(RS) Dec 1 st each side every other row 6 (7, 8, 9, 10) times—55 (59, 63, 67, 71) sts remain.
Work even until armhole measures 8 (8, 8 `/2, 8 1/2, 8 1/2)" from beginning of shaping, end with a WS row. Shape Shoulders and Neck
Bind off 5 (6, 6, 7, 8) sts at beginning of next 2 rows, then 5 (5, 6, 6, 7) sts at beginning of next 2 rows for shoulders—35 (37, 39, 41, 41) sts remain for neck.
Bind off remaining sts.
LEFT FRONT
Beginning at center Front, cast on 83 (87, 89, 93, 97) sts.(RS) Begin 1 x 1 Rib; work even for 4 rows, end with a WS row.(RS) Change to St st; work even for 4 rows, end with a WS row.
Establish pattern: (RS) K2 (keep in St st throughout), * work Row 1 of Cable across next 12 sts, work 10 (11, 12, 12, 12) sts in St st); repeat from * 2 times, work Row 1 of Cable across next 12 sts, work 3 (4, 3, 7, 11) sts in St st.
Shape Neck
(WS) Continuing in pattern as established, at neck edge (beginning of WS rows), inc 1 st this row, then every 8 rows 8 times, working increased sts in St st—92 (96, 98, 102, 106) sts, end with a RS row.
Change to St st on all sts; work even for 7 (9, 9, 11, 11) rows.
Shape Shoulder
(WS) At shoulder edge, dec 1 st this row, then every 4 rows 2 times—89 (93, 95, 99, 103) sts remain. Work even for 3 (5, (7, 9, 11) rows even, end with a RS row.
Shape Armhole
(WS) Bind off 26 (24, 24, 23, 21) sts, work to end.
Work 1 row even.
(WS) At armhole edge, beginning this row, dec 1 st every row 8 (9, 11, 12, 14) times—55 (60, 60, 64, 68) sts.
Work even for 7 (8, 10, 11, 12) rows.
Bind off all sts.
RIGHT FRONT
Beginning at center Front, cast on 83 (87, 89, 93, 97) sts.
(RS) Begin 1 x 1 Rib; work even for 4 rows, end with a WS row.
(RS) Change to St st; work even for 4 rows, end with a WS row.
Establish pattern: Work 3 (4, 3, 7, 11) sts in St st, * work Row 1 of Cable across next 12 sts, work 10 (11, 12, 12, 12) sts in St st); repeat from * 2 times, work Row 1 of Cable across next 12 sts, k2 (keep in St st).
Work as for left Front, reversing all shaping by working shaping at beginning of RS rows.
SLEEVES
Cast on 39 (41, 43, 45, 47) sts.
(RS) Begin 1 x 1 Rib; work even for 4 rows, end with a WS row.
(RS) Change to St st; work even for 10 (8, 6, 6, 4) rows, end with a WS row.
Shape Sleeves
(RS) Beginning this row, inc 1 st each side every 14 (14, 12, 10, 10) rows 7 (8, 9, 10, 11) times—53 (57, 61, 65, 69) sts.
Work even until sleeve measures 18 (18 1/2, 19, 19 1/2, 20)" from beginning, end with a WS row.
Shape Cap
Bind off 5 (6, 7, 8, 9) sts at beginning of next 2 rows—43 (45, 47, 49, 51) sts remain.
(RS) Dec 1 st each side every other row 6 (7, 8, 9, 10) times—31 sts remain.
(RS) Work 4 (2, 4, 2, 0) rows even.
(RS) Dec 1 st each side every 4 rows 3 (3, 5, 5, 5) times, every other row 4 (4, 0, 0, 0) times—17 (17, 21, 21, 21) sts remain.
Bind off remaining sts loosely.
COLLAR (Worked from right Front, across Back to left Front)
Cast on 41 sts.
(RS) Begin 1 x 1 Rib; work even for 4 rows, end with a WS row.
Change to St st.
Shape Collar
(RS) At neck edge, beginning this row, dec 1 st every 4 rows 16 times—25 sts remain; pm at neck edge. Work even until piece measures same as Front neck shaping to beg of shoulder shaping; pm for beginning of Back neck.
Work even until piece measures 8 (8 1/2, 9, 9 1/2, 9 1/2)" from neck marker; pm for end of Back neck.
Work even until piece measures same as right Front from beginning of neck marker to end of shaping marker, end with a WS row.
(RS) At neck edge, beginning this row, inc 1 st every 4 rows 16 times—41 sts.
Change to 1 x 1 rib; work even for 4 rows.
Bind off all sts loosely.
FINISHING
Sew shoulder seams. Set in sleeves; sew side and sleeve seams.
With RS of Collar facing WS of garment, sew Collar around neck shaping, easing to fit. Turn Collar to RS of garment.
With RS of Collar facing, using crochet hook, join yarn with a slip st to outside edge of left Front Collar; ch 1, work 1 row sc evenly around outer edge of Collar, do NOT turn.
Working from left to right, work 1 row reverse sc along same edge.
Using yarn needle, weave in ends.
1. MACHINE WASH and DRY INSTRUCTIONS: Machine Wash, warm water, gentle cycle. Machine Dry, low heat, delicate cycle.
2. HAND WASHING and DRYING: Wash gently in warm water using a mild detergent. Gently rinse well in cold water. Lay flat on a towel and roll in towel to remove excess water.
DO NOT WRING, STRETCH OR HANG TO DRY.

Read NextSimple Men's Knit Sweater Pattern
Your Recently Viewed Projects
uom60t 0577779
Mar 13, 2013
Question: If the fronts are positioned sideways with the ribbing running vertically, what keeps what is now the hem from rolling up since the ribbing is elsewhere? This is not referred to anywhere in the instructions.
Report Inappropriate Comment
Are you sure you would like to report this comment? It will be flagged for our moderators to take action.
Thank you for taking the time to improve the content on our site.

