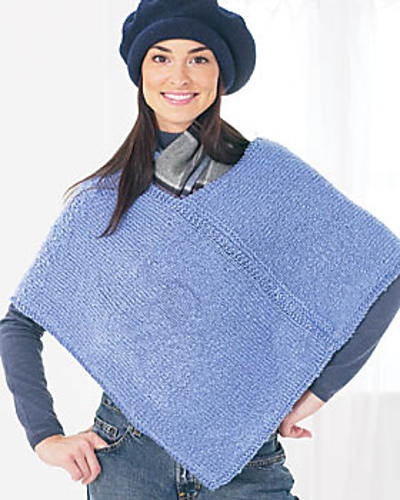
Soft Lapel Jacket
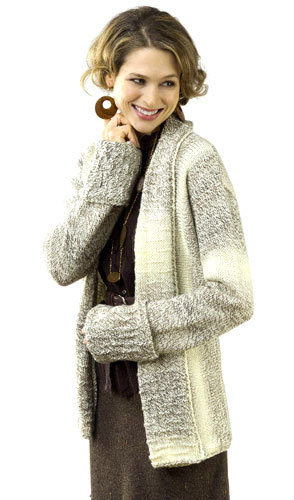
This intermediate knitting pattern creates a cozy, tunic-length jacket with folded cuffs and lapel. Snuggle up and keep warm this winter with this sweater jacket knitting pattern. You will love the soft, acrylic yarn used in this pattern. Find full schematic below.

Materials: S (M, L, 1X, 2X)
- Yarn: Caron International's Simply Soft Shadows (100% acrylic; 3 oz/85g, 150 yds/137m ball): #0001 Pearl Frost, 9 (9, 10, 11, 12) balls
- Knitting Needles: One pair US size 8 (5 mm) needles, or size to obtain gauge
- Crochet hook: size US H-8 (5 mm)
- Yarn needle
- Row counter
Measurements: S (M, L, 1X, 2X)
Bust: 36 1/2 (40 1/2, 44 1/2, 48 1/2, 52 1/2)"/92.5 (103, 113, 123, 133.5) cm
Back Length: 26 (27, 28, 29, 30)"/66 (68.5, 71, 73.5, 76) cm
Gauge: In Stockinette stitch, 17 sts and 23 rows = 4"/10 cm
Stitches:
Stockinette stitch (St st)
Horizontal Dash Stitch (multiple of 10 sts + 6)
Row 1 (RS): P6, * k4, p6; rep from * to end.
Row 2 and all WS rows: Purl.
Row 3: Knit.
Row 5: P1, * k4, p6; rep from * across, end last rep p1.
Row 7: Knit.
Row 8: Purl.
Rep Rows 1 – 8 for Horizontal Dash st.
Single crochet (sc)
Reverse single crochet (rev sc)
NOTE: Back and Fronts are worked side to side; Sleeves are worked from lower edge to upper edge.
Instructions:
BACK
(RS) Beginning at side edge, CO 113 (117, 121, 125, 130) sts.
Begin St st; work even until piece measures 18 1/2 (20 1/2, 22 1/2, 24 1/2, 26 1/2)" from beg.
Bind off all sts; place a marker 5 (6, 7, 8, 9)" from each side edge for shoulders .
LEFT FRONT
(RS) Beginning at side edge, CO 113 (117, 121, 125, 130) sts.
Begin St st; work even for 5 (6, 7, 8, 9)" from beg for shoulder, end with a WS row.
Shape Neck
(RS) At neck edge, dec 10 (12, 14, 16, 16) sts beg next row, then 11 sts every 4 rows 5 times—48 (50, 52, 54, 59) sts remain for center Front.
Bind off rem sts.
RIGHT FRONT
(RS) Beginning at side edge, CO 113 (117, 121, 125, 130) sts.
Begin St st; work even for 5 (6, 7, 8, 9)" from beg for shoulder, end with a RS row.
Shape Neck
(WS) At neck edge, dec 10 (12, 14, 16, 16) sts beg next row, then 11 sts every 4 rows 5 times—48 (50, 52, 54, 59) sts remain for center Front.
Bind off rem sts.
SLEEVES
(RS) Beginning at lower edge, CO 53 (53, 53, 57, 62) sts.
Begin St st; work even for 30 (16, 12, 8, 10) rows, end with a WS row.
Shape Sleeve
(RS) Beg this row, inc 1 st each side every 30 (14, 10, 8, 10) rows 2 (5, 7, 8, 7) times—57 (63, 67, 73, 76) sts.
Work even until sleeve measures 15 1/2" from beg, end with a WS row.
Shape Dolman Cap
(RS) CO 1 st beg next 8 (8, 10, 12, 12) rows, 2 sts beg next 2 rows, 1 st beg next 2 rows, 2 sts beg next 6 (6, 4, 2, 2) rows, 3 sts beg next 0 (0, 2, 2, 2, ) rows, 4 sts beg next 2 rows and 6 sts beg next 2 rows—103 (109, 117, 121, 124) sts.
Work even until piece measures 21" from beg.
Bind off all sts loosely.
CUFFS (Make 2)
Beginning at side edge, CO 26 sts.
Begin Horizontal Dash st; work even until piece meas 12 (12, 12, 13, 14)" from beg.
Bind off all sts.
COLLAR/FRONT BANDS (Make 1)
Beginning at lower edge, CO 26 sts.
Begin Horizontal Dash st; work even until piece meas same as center Front and neck edges (up right Front, around Back neck and down left Front to lower edge).
Bind off all sts.
Note: It will be helpful to sew Collar/Front Bands around Front and Neck edges before binding off sts. This will make it easier to add or delete a few rows, if necessary.
FINISHING
Sew shoulder seams; pm on Back and Fronts 12 (12 3/4, 13 1/2, 14, 14 1/2)" down from shoulder seam on each side for armhole. Aligning center of sleeve with shoulder seam, sew sleeves in place. Sew side and sleeve seams.
Collar/Front Bands: With RS's facing, sew piece around Front and neck edges.
Cuffs: Sew Cuff seam; sew in place, adjusting fold back of Cuff as desired.
Edging: Work 1 row sc and 1 row Rev sc around upper edge of Cuffs, around Collar/Front Bands and along lower edge of Jacket.
Using yarn needle, weave in ends.
Read NextSimple Men's Knit Sweater Pattern

