Monogram Plate for Mom
Kate of Centsational Girl shares this easy painting project, perfect for Mother's Day. Using foam alphabet stamps and a stylized stencil stamp, monogram a clear plate with Mom's initials or a club name. Kate uses this technique to paint a series of clear plates for her Martini Book Club "MBC." How chic!

Materials:
- Clear Plate
- Paint for Glass/Ceramics

- Foam Alphabet Stamps (not italicized or script)- The letters are reversed in their application to the back of the plate, therefore you must invest in a font that can be rotated on the vertical for it to read correctly as a monogram.

- Q-tips
- Very Fine Tip Paintbrush
- (optional) stencil background stamp for monogram
Instructions:
As you can see in the next photo, the stamps are applied in reverse. What you’re looking at is the backside of the stamp I am using (showing the outline option) sitting on top of the back of my clear glass plate.

Applying the Paint: Choose your color for your middle foam stamp. It is always best to do the middle initial first in order to center it properly. In my situation, my center initial was a “B” and I had to apply my paint in two steps, because a “B” does not translate in reverse. I had to apply the upper part of the “B”, stamp, then come back and apply the lower part of the “B” and stamp again. The “M” and the “C” were much easier, since they can be flipped either way and will stamp in reverse just fine. If this all sounds confusing, it is! I had to go through it several times with the foam letters in my hand to grasp this. Remember, you are basically rotating your letter on the vertical, like you would if you held it up to a mirror.
Here I am, stamping my plate with the brown paint I applied to the foam letters. (I applied it with a Q-tip.) Because your plate is clear, it is best to press the plate on top of the stamp, rather than the stamp on the plate. This way, you can position it perfectly, and you can add pressure by pressing on the plate to make the paint adhere better.

After your foam letter is applied, you will see that the paint is not uniform. You will need a very fine tip paintbrush to fill in the uneven spots. The higher the quality of your paintbrush the better, because you’ll be able to stay within the lines more precisely. Let your monogram dry for 1 hour. After an hour, apply a second layer of paint with your fine tip brush by filling in the monogram again. You’ll be pleased that you applied a second coat because it makes for a bolder statement. Let dry for 1 hour. Repeat this step for however many plates you want to complete.
Simple letters would be fine, but I chose to add a second background layer for interest. I found a large foam stencil style stamp and chose to add it in a separate color for a bigger impact. Remember, you must apply your letters first, because your second layer will be hidden behind the monogram and this is the look you’ll want to achieve. Do not do the decorative layer first! Don’t be shy about mixing your colors that come with this kit. I didn’t like the pastel pink that came with it, so I simply mixed a bit of red into the pink and came up with a fresher pink color for my decorative background stamp. Apply the second color of paint to the decorative stamp with a Q-tip or second paintbrush (other than your fine tip brush).

Again, lay the stamp paint side up on your newspaper, and press the plate directly on to the stamp.

Again, you’ll see that the paint does not apply evenly, but it does give you the shape you desire. Fill in the design with your fine tip paintbrush.

Let first layer of paint dry 30 minutes. Come back and fill in a second layer with your paint color and brush. Now you’re done ! Let all plates dry overnight.
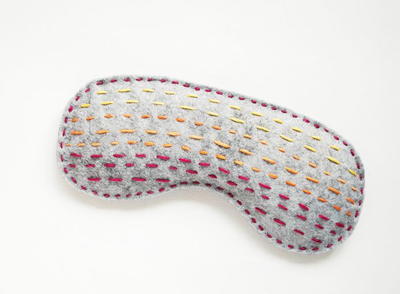
Read NextCute Homemade Eye Mask

