Pretty Fabric and Ribbon Notebook
Use your favorite fabrics and shiny ribbon to create a beautiful notebook for jotting down notes on the go. Give as a gift to someone special.

Project time: 2 hours
Materials:
- Note Pad, size 5" x 8"
- 2 pieces Matboard, 6" x 8½" each
- 2 pieces Cardboard, 8½" x 5½" each
- 1 piece Batting, 12½" x 8½"
- ¼ yd. Fabric A - Cut: 1 piece 11" x 4" (book binding), 2 pieces 9½" " x 7½" each (inside cover)
- ¼ yd. Fabric B - Cut: 1 piece 8½" x 2" (inside spine), 2 pieces 11" x 6½" each (book cover)
- 1 yd. of 1" Grosgrain ribbon
- ½ yd. 3/8" Grosgrain ribbon
- Dritz® Sewing/Craft Fabric Glue Stick
- Dritz® Glasshead Pins
- Collins Binding and Hem Clips
- Dritz® Spray Adhesive
- Fray Check™
- Craft scissors
- Fabric scissors
- Hot glue gun
- Ruler, mat and rotary cutter (optional)
- Sewing Machine with matching thread
Instructions:
Stitching: Use ¼" seam allowances.
- Cut fabric pieces and set aside.

- Working on a protected work surface, place matboard side by side, leaving a ½" space between two pieces. Spray with temporary Spray Adhesive and place batting evenly on top. Trim to fit. Set aside.
- To create one fabric piece for the book cover with contrasting binding, pin 11" x 6½" fabric “B" piece and 11" x 4" fabric “A" piece on 11" side with right sides together. Machine stitch using a ¼" seam allowance. On remaining 11" side of fabric “A" piece, pin and stitch additional piece of 11" x 6½" fabric “B" , again using a ¼" seam allowance. Press seams open. Embellish book cover with beading, machine embroidery, or appliqués, if desired.
- Spray top of batting covered boards with temporary Spray Adhesive. Center stitched fabric cover on batting with contrasting fabric centered to create binding. (Refer to finished photograph for placement.)
- Using Fabric Glue Stick, secure excess fabric to back of boards; Miter corners. Use Binding and Hemming Clips to hold in place until glue has dried.
- To cover inside spine, fold a ¼" hem on each 2" end of 8½" x 2" fabric “B" piece. Glue hem in place with Fabric Glue Stick.
- Working on backside of boards (inside of book), glue hemmed strip between matboard pieces, wrong side down. Secure with hem clips and allow to dry. To reinforce spine of book, carefully machine stitch through center to secure. Be sure to guide machine stitches in ½" opening between the matboard. (See Step 2 for reference.)
- Turning to inside of book, create a pen or pencil holder by cutting a 4" piece of 1" ribbon and horizontally position across center of spine. Glue 1" ends to boards to form an open loop.
- Cut the remaining 1" ribbon in half and glue ends to edges of book. Make sure the ends are centered and extend out to create ribbon closure.
- Center and glue each 9½" x 7½" piece of fabric "A" to the remaining cardboard pieces following the instructions in Step 5.
- Create a notepad holder by cutting a 10" piece of 3/8" ribbon and position across one fabric covered cardboard piece, 1 “ from top. Secure in place by gluing the ends of ribbon to back of covered board.

- Using a hot glue gun, attach the covered cardboard pieces to the inside of the book, covering raw edges and centering on all sides. Note: Be sure to position the notepad holder on right side.
- Place purchased notepad and matching pen or pencil through the ribbon holders. Close notebook and adjust ribbon ties to correct length. Seal ends of ribbon ties with Fray Check™.

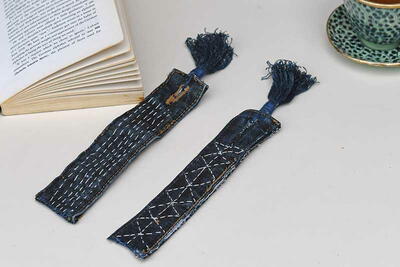
Read NextEmbroidered Denim Bookmarks
Your Recently Viewed Projects
Weberme
May 03, 2016
Okay. This is such a easy and cute project. What person does not want one of these notebooks. My granddaughter loves her notebooks to write in all the time and they are so plain. We will be making some of these. A great summer or school project. I love that you have added a pen and pencil pocket so they do not get lost. Love the tutorial. I am going to use some waterproof fabric so if she puts it near water or forgets it outside(yes she has forgot her notebooks outside when playing) it will not get ruined. I am going to add one in Moms toe we are making for Mother's Day. Thanks.
granny40
Dec 10, 2010
Pretty! I think putting a pencil/pen pocket on the outside might be good as well.
NHCrafter
Nov 19, 2009
I will be making a lot of these I think. However, I am more of a visual person so I would like more step by step pictures... I think I will be alright on this particular project though.
Report Inappropriate Comment
Are you sure you would like to report this comment? It will be flagged for our moderators to take action.
Thank you for taking the time to improve the content on our site.

