Aging, Antiquing and Distressing Tools, Techniques and Tips
Use this guide to help you give a vintage look to your next craft projects. First, learn what tools are best for aging and distressing, then pick a technique and make sure to follow our quick tips and antiquing instructions. You can create some beautiful projects this way.
Aging, Antiquing & Distressing Tools
Acrylic Paints: Water down the paint to an inky consistency, which creates what is called a wash (1 part paint to 3 parts water). Colors of dark blue, patina green, rust, black and burnt umber work best on light color papers while white, light gray and light blue work best on dark colors. Brush light coats onto the paper until happy with the hue. Most craft acrylic paints are acid free. An acrylic paint wash can be used on any surface that paint can be used on.
Antiquing Gel: This is a thick liquid or gel that is brushed on and then rubbed off leaving a thin film that makes an object look older. There are a variety of colors from white to black. For hard surfaces like charms you can age the item by using antiquing gel. You will rub or brush on a small amount of the gel and then immediately brush the gel off with a paper towel. The gel will stick in the cracks and crevices to give the item an antique look.
Chalks or Pastels: Chalks and pastels can be used to age paper. Use darker colors and dust chalk around edges, over sanded portions, or all over the surface. Chalks and pastels need to be “sealed” with a spray finish, fixative or sealer.
Chalk Inks: A pigment ink that is usually light in saturation and hue. When dry, it leaves a chalky-like finish. Lightly sponged onto a paper or surface to antique or age it. Lightly sponge chalk ink over paper in aged colors like mustard, brown, rust, black or patina green. Keep adding color until happy. Light layering of color works best. A final dab of metallic ink adds richness to the antiquing.
Coffee and Coffee Grounds: Coffee can be used for aging and staining just like tea. Brew up a strong, dark batch of coffee and then you can soak, spray, dribble, or puddle the coffee onto the paper. Coffee grounds can also be used. Sprinkle coffee grounds over wet paper and allow to dry. You’ll end up with speckles of dark color.
Fine Grit Sandpaper or Emery Board: Use the sandpaper or emery board to sand away layers of the paper to give a weathered effect. Use fine grit sandpaper or emery board and sand lightly over different areas of your paper. Sand edges and skip sand interior of paper. To skip sand, bounce your sand paper over a small area.
Hammer or Mallet: Here’s a chance to get out all that frustration! Simply pound areas to give a dented, abused, and ‘seen a few years’ look to paper, metals, fabrics, and plastics. Some altered artists also use heavy chains to give the same look. Use a mat under the paper to protect your work surface and pound away!
Inks: Inks used in rubberstamping can be used to antique paper and other surfaces. Select colors that lend to aged looks like dark yellows, rusty orange and browns, patina greens, dark blacks and off-white whites. Best application is to lightly sponge ink onto paper in light layers. Both pigment and dye inks can be used.
Ink Sprays: Diluted inks in spray bottles used to spritz color onto a surface. Shade and intensity vary.
Steeped Tea: Place several tea bags into a bowl and add hot water. You want at least 3 tea bags to each cup of water. In other words, you want a strong batch of tea. Avoid teas that don’t give rich color like green teas. Spray a mist of strong tea onto the paper and iron it. The straining will make the paper look old. Repeat misting until the paper is aged to your perfection.
Walnut Ink: This is an ink that is speckled, dripped or brushed onto paper that gives a sepia or brown wash to the paper. Usually a powder that you mix with water, but is also available in liquid form and in a variety of colors.
Aging, Antiquing & Distressing Techniques
Bleach It!: Brush or lightly spritz paper with bleach. Allow colors to fade, dab off any excess. Lemon juice can also be used. Heat set once dry.
Coaster It!: Using a messy cup of coffee or tea, use your paper as a coaster or saucer and let it soak up the coffee or tea that has puddled at the bottom of the cup or glass. It’s an interesting, realistic touch of distressing.
Crush It!: You can ball up the paper and then smooth out to give aging lines and some instant wear and tear to paper. The more you crumple it, the more aged and soft the paper will look. You’ll have a paper with a fine webbing of age lines.
Ink it!: Spill a little ink on that paper! Dribble it! Puddles of ink are perfect touches of aging. Allow ink to dry completely before adding any embellishments or photos.
Iron it!: For a more polished look, iron distressed paper. Always use an ironing cloth to protect your ironing board surface and your iron! Do your best to crush, ink, rip, sand, and more, then use the iron on a warm setting to smooth it all out.
Sand It!: Using sanding paper, fine steel wool, or an emery board, sand the edges of paper or embellishments. Skip the sanding paper or emery board over the body of the surface too. This gives the effect of weathering and aging by wind, sun, and time.
Speckle or Splatter It!: Using an acrylic wash or ink, take an old bristle brush or toothbrush and dip into liquid. Lay background paper or scrapbook page on newspaper or other covered work surface. Flick brush or toothbrush with your thumb and this sends a fine mist of paint over the paper. Repeat until you are happy.
Sponge It!: Sponge on hints of color using inks, pastels, chalks, paints, tea, coffee, glazes, and watercolors. Add layer upon layer of color until happy.
Spray It!: Spray surface with diluted ink, paint, even strong tea or coffee. Intensify color by repeated spraying.
Tear or Rip It!: Tearing and ripping paper gives it an aged or distressed look. You can rip along an edge or right down the middle! Practice ripping with scrap papers to get a feel of how different papers will rip and tear. You can also chalk or ink the ripped paper edges to give a more earthy aging effect.
Antiquing and Distressing Tips
- Age builds up on surfaces so to create a realistic aged surface slowly “build” layers of color, stain and paint. Then sand or pound. Then repeat layering of color.
- Step back from your work occasionally and look at the aging effects from a distance. Up close your project may look done, but at a distance you may see it in a different light.
- Gold ages with brown tones, silver with black tones.
- Add shadow with dark hues, highlights with light hues.
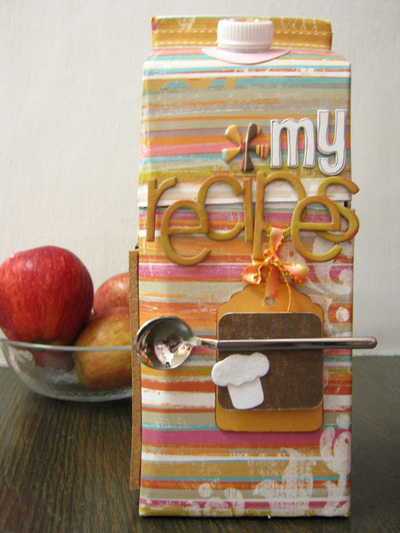
Read NextAltered Art Milk Carton
Your Recently Viewed Projects
flowergirl
Jul 13, 2018
So many creative tips and tricks. If you've never tried creating a vintage decor look or just any vintage project then you need to look here first. My favourite must be chalky finish and I didn't know about the burnt umber colour, thanks for that. Distressing a new nightstand after painting it is the easiest part when making an antique piece.
Weberme
Aug 10, 2016
I wish I saw this tutorial a long time ago. This aging,antiquing and distressing techniques will save you a lot of money by showing you how to use things you may have on hand. I know the distressed ink can get costly if you need lots of colors and same with the special paints. Anyone new to this must read this tutorial andyou will be glad you did. Anyone Agree?
Report Inappropriate Comment
Are you sure you would like to report this comment? It will be flagged for our moderators to take action.
Thank you for taking the time to improve the content on our site.

