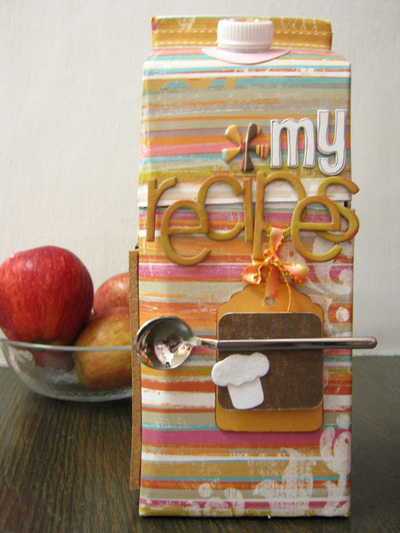
Altered Clipboard
Here's an altered art project perfect for the holiday season: a secret clipboard for making wish lists or gift lists. Recycle a tin container found in your own basement, at a thrift store, or a craft store, then decorate it with embellishments of beads and Kreinik metallic thread.
Front Design Materials:
- Original object- tin containing child's magnetic play set
- Cafe Paper- Far & Away Scrapbooks #7006
- Black Thin Stripe paper- 5306-014 Frances Meyer
- Chai Latte Cobblestone paper- Fibermark
- Passion Red Quills paper, Fibermark
- "Recycled" Brown paper- Paper Reflections Naturals
- Black & Silver Star paper- Die Cuts with a View Specialty Mat Stacks- Designer Premium Silver/Gold
- Red Stripe paper- Sizzix Little Sizzles Classics by Provo Craft
- Silver textured paper- Etal metallic ES3-A Tinted Silver
- Triangle shape- Tokens & Trifles Confection shape
- Silver label holder- JoAnn Scrap Essentials Silver Book Plates
- McGill Craftivity Punch, 1 9/16" Stamp
- Fiskers Wide Scallop paper edgers
- 8x10 Treasure Tape sheet from Kreinik
- 1/4" Treasure Tape roll from Kreinik
- Diamond Beadlets from Kreinik
- Kreinik #8 Braid- 3228 Topaz
- Kreinik #12 Braid- 061 Ruby, 3503 Red Flamenco
- Kreinik 1/8" Ribbon- 080C Garnet Cord
- Kreinik 1/16"- 001J Japan Silver
- Font- Font Diner, Fontdiner.com
Instructions:
-
Cut out all pieces of your design first. Assemble your label strip. Use eyelets to attach the label holder to the brown and red paper strips.
-
Apply your tape to both sides of the tin. Press as you go to prevent air bubbles. Peel back one corner of the red liner on the back of your tin and line up your Passion Red paper with the tape. Press to adhere securely, then peel the remaining red liner back and attach the rest of your paper.
-
Peel back the red liner on your tin cover. Begin placing your pieces on the tape- the three background strips first, Black stripe paper, Cafe paper, and Silver Etal paper. Apply a strip of 1/4" Treasure Tape to the edge of the silver and black stripe papers. Peel back the liner and begin embellishing with your threads, applying stripes of each color along each piece of tape. When the tape is completely covered, trim all ends even.
-
Continue adding elements to your design. The scalloped cream strip is next, and the black starry paper. Add two more pieces of treasure tape to your design, cut into wavy shapes. Use your threads to create a loop design across each piece. Place your tin in a shallow tray or Ziploc baggie and pour diamond beadlets over the tape. Swirl with your fingers to cover fully and tap to remove excess beadlets.
- Place your last design elements on your tin. After attaching your label, use 1/4? Treasure Tape to cover the edges of your design. Finish your tin by embellishing with more thread.
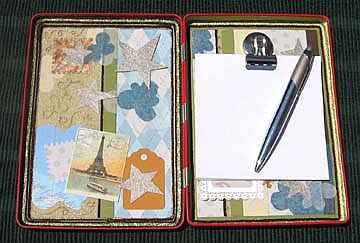
Interior Design Materials:
- Scrappin' Creations Power Pad - green polka dot, aqua plaid, yellow card stock
- Spring Green, Brown cardstock
- Gold wrapping paper
- White & Turquoise tissue paper (or vellum)
- Silver paper- Etal metallic ES3-A Tinted Silver
- Gold textured paper- Fibermark, Serendipity, Moccasin
- Wubie Prints Caribbean Map
- Tokens & Trifles Eyelet Rectangle from Kreinik
- Eiffel Tower card- Heartwarming Vintage Cuts, Travel and Adventure, Crafty Secrets
- McGill Craftivity Punch, 1 9/16" Stamp
- Marvy Uchida Clever Lever Craft Punch Mega- Tag Punch
- Yellow satin ribbon, 1/2"- Nicole
- 8x10 Treasure Tape sheets from Kreinik
- 1/4" Treasure Tape from Kreinik
- Diamond Beadlets from Kreinik
- Kreinik #8 Braid- 002V Vintage Gold
- Kreinik #12 Braid- 002V Vintage Gold
- Kreinik 1/8" Ribbon- 201C Chocolate Cord, 015 Chartreuse, 091 Star Yellow
- Silver Clip- Staples Magnetic Bulldog clip
Instructions:
-
Cut out all pieces of your design. Line the interior of your tin with Treasure Tape. (Keep the tape clear of the hinges and latching area, so your tin will close.)
-
Peel back the red liner on the left side of your tin. Begin applying your background paper- Aqua Plaid, Spring Green cardstock, and Yellow card stock. On the left side of your design, cover the yellow cardstock completely with another sheet of Treasure Tape. Outline the edge with your Chocolate ribbon. Begin layering your pieces over the tape- two white vellum cloud shapes, your map shape, two stamp shapes, and a star. Use your #8 Vintage Gold braid to create a design on the tape around your design elements. Finish layering all your remaining pieces on the design. Temporarily replace the red liner to protect your exposed tape. Begin covering the tape around the edges of your tin with thread, in rows of ribbon and braid. Once finished, remove the red liner from the center and place your tin in a shallow tray or Ziploc baggie and pour diamond beadlets over the tape. Swirl with your fingers to cover fully and tap to remove excess beadlets.
-
Begin the right side of your design. Peel back the red liner from the center and lay down your backing papers- Green Polka-Dot, Brown, and Yellow cardstock. Place a strip of 1/4" Treasure Trim along the edge of your yellow cardstock. Peel back the liner and embellish with threads. Place a strip of Spring Green cardstock alongside the tape. Peel back the red liner around the edges of your tin and begin covering it with thread and your yellow 1/2" ribbon. When all of your tape is covered, attach the rest of your design elements. Then place your tin in the tray or baggie and apply beadlets again.
- To finish your "secret" clipboard, place your magnetic clip inside the tin- add some note paper and a pen, and you are ready to make wish lists or gift lists!
Read NextGlittery Buttons
Your Recently Viewed Projects
kzoboe 4294039
Jun 19, 2015
a photo of the outside would have been nice. Rating does not reflect having done the project, because I did not do it, but can't seem to enter a comment without a rating
Report Inappropriate Comment
Are you sure you would like to report this comment? It will be flagged for our moderators to take action.
Thank you for taking the time to improve the content on our site.

