Simple Marbled Christmas Ornaments
These DIY marbled Christmas ornaments are a must for everyone to make at some point in life!
For thrifty teachers' gifts or other gift recipients this Christmas, make simple but elegant marbled ornaments with this tutorial from Stacy Schlyer of Stacy Sews. Get the kids involved in making these swirled ornaments.
Materials:
- Clear glass ornaments
- Vinegar
- Acrylic paint in various colors
- Dixie bathroom size cups
- Gift tins or boxes
Instructions:
-
Before working with your ornament, you should remove the hanger and clean the inside of the bulb with vinegar. Swirling around a small amount of vinegar inside the bulb will help remove any dust, dirt, and glass particles that my have gotten trapped inside and will help the paint stick. Make sure that the ornament is completely dry before preceding to the next step. You can skip this step, however, if the bulb is too dirty, the paint will not adhere to the glass properly.
-
Next take the dry ornament and squirt a stream of acrylic paint inside the bulb. Do this several times, alternating desired colors and creating 'stripes' inside the ornament. Do not cover the entire bulb with paint - make sure that there is some glass peaking through!
-
Now rotate the ornament so that the paint begins covering all of the glass surface. You'll notice that you're already getting a marble effect!
-
After the inside of the bulb is coated in paint, drain the ornament upside down in a bathroom size Dixie cup. If you're in a hurry, you can stop here. However, for more dramatic swirled effects, allow the paint to drain approximately 30 minutes (it may talk longer if you used a lot of paint or a shorter amount of time if you used less. I tend to use a lot of paint and 30 minutes allows for most of the paint to drip out, but is not completely gone) and begin rotating the bulb again. You can do this by resting the bulb on it's side or right side up for several hours. Each time you rotate the bulb, you'll get more swirling in that area.
-
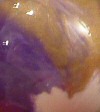
For a soft marbleized look like the image on the left (where colors gently blend together into each other), rotate the bulb gradually until the ornament is dry.

-
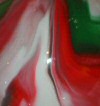
However, for dramatic marbleization such as the photo on the right, make sharp rotations. I do this by making 180 degree turns after it has sat for several hours.

-
After the bulb has dried, replace the ornament top and package in a pretty gift box. Don't forget to make a few extras for yourself to hang on your tree.
Love these marble Christmas ornaments? Find more marbling tutorials below!
These mirrored swirl ornaments add a metallic texture to the lovely marbling effect.
If you love the look of nail polish marbling, specifically the organic and free form feel of the end result, give these mugs a try!
If you're a fan of polymer clay, try a marbling tutorial using this happy medium! These clay pens would make excellent stocking stuffers.
Add a touch of marbling to your home for any season! Learn how to create a marbling effect on pillows.
Make lovely marbled bowls to go with your new marbled mugs! These make great planters and could be used to store other decorations as well.
Create a lovely wall hanging for one of your loved ones this season with a heartfelt sentiment and a marble texture.
Marble contact paper is your ticket to an awesome set of faux marble coasters!
Make this monogram for your child's room, an office, or any other room that could use a touch of marble. The colorblocked look is a lovely addition.
Start with a basic, inexpensive acrylic frame and end with a pretty marble tray! This project looks pricey but it won't cost much, and the effect is so lovely.
With its marble design, these sunglasses give a cool summer vibe. Try this marbling tutorial, and you'll look super fashionable! These marble sunglasses will also complement any outfit.

