Book Wreath Tutorial
Learn how to make a paper wreath from book pages with this easy tutorial
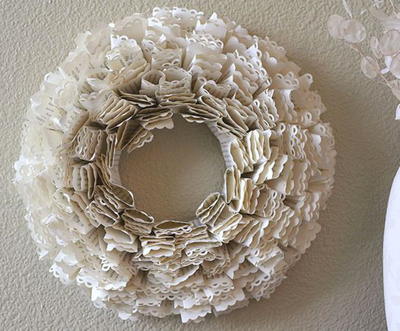
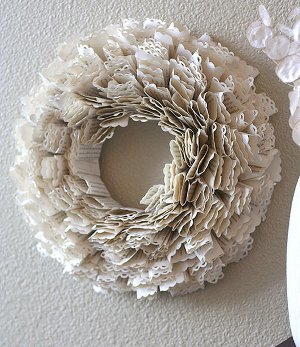
This beautiful Book Wreath is a great way to decorate your reading nook or library. Made with a cardboard frame and pages from a book, this DIY wreath is so simple to make, yet gives any room in your home a stunning accent piece that everyone will love. You could also use this technique to create a wreath using magazine pages, comic book pages, or even tissue paper or construction paper. Let your creativity run wild with this easy and fun paper wreath.
Estimated CostUnder $10
Time to CompleteIn an evening
Main MaterialPaper
MaterialsPaper, Recycled Materials

Materials List
- Apron Lace Border Punch
- Scalloped Sentiment Border Punch
- Retractable Fingertip Detail Knife
- Crafting Rotary Paper Trimmer (12")
- Chipboard base
- Old book pages
- Glue gun/glue sticks
How to Make a Paper Wreath from Book Pages
Instructions:
-
Begin with a chipboard base. I created mine using the largest Super Sized Circle Template for the outer edge and a smaller one for the interior ring.
-
Tear out pages from a book (mine is from the dollar store) and run a border punch along the straight edge of each page. This went much quicker than I anticipated as I was able to run three pages through at a time.
-
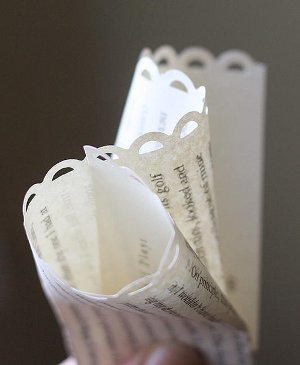
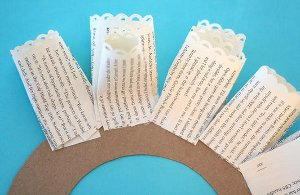
You can use the pages at the size they come or trim down for a smaller wreath. I trimmed my pages down to three inches wide after punching. Now it's time to start gluing on your pages. I used a glue gun with a low temperature setting so I wouldn't have to worry much about burning myself. You can fold or roll each page any way you wish. I recommend experimenting a little. The important thing is not to crease any folds so the wreath will be full. Here's the fold I ended up going with:
-
I rolled the page in one time and accordion "folded" the rest. I rolled one time so that text would be showing in front instead of the blank edge of the paper.
-
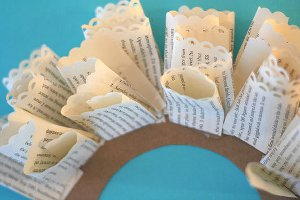
Glue sections along the edge of your wreath base being sure to get glue in between the layers. Once you have the perimeter covered, come back around with an overlapping layer, folding a "tab" over at the bottom of each section to glue on for fullness.
-
Once you get to the center, fold your tab through the center and glue to the back to cover the chipboard.
-
At this point you will want to go back and fill in spots with individual sections to get the wreath full and evenly spread. Just keep going until you're happy. It's quite addictive and I had to tell myself to walk away. I guess that's a good sign that this is a fun craft!
Why You'll Love This Recycled Craft
1. Personalized Home Decor: The Book Wreath allows you to add a touch of your own personality to your home decor. Choose a book that holds meaning for you, whether it's a favorite novel, a beloved children's book, or a special gift. Displaying this unique wreath in your reading nook or library will not only add a pop of creativity to the room, but also spark conversations and memories.
2. Budget-Friendly DIY Project: Most of the materials needed for the Book Wreath can be found around your home or purchased at a low cost. Using cardboard, book pages, and glue, you can create a beautiful wreath without breaking the bank. Plus, the versatile nature of this craft means you can easily adapt it to fit your style and preferences, giving you a custom decor piece without the hefty price tag.
3. Fun and Easy to Make: This craft project is perfect for crafters of all skill levels, from beginners to experienced DIY enthusiasts. The step-by-step tutorial makes it simple to follow along and create your own Book Wreath in no time. Whether you're looking for a relaxing weekend activity or a creative outlet to express yourself, this wreath is a fun and fulfilling project that will leave you with a gorgeous piece of handmade decor to enjoy for years to come.


