Artistic Tile Coasters and Magnets
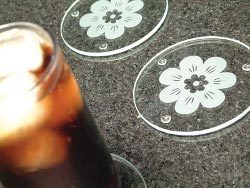
Hand made tile coasters are a great way to personalize your home. These Artistic Tile Coasters and Magnets are simple to make when you follow this tile coasters tutorial. All you need is some cheap back splash tile, stamps and a little Mod Podge.

Materials:
- 1 sheet of backsplash tile
- Rubber stamps
- Black stamping ink
- Mod Podge (in Satin finish)
- Super glue
- Strong magnets
- Cork protectors or felt pads
- Rafia string
Instructions:
- Purchase a sheet of backsplash from your local hardware store. The ones with different sized tiles are great because they let you create multiple coaster and magnet sets of varying sizes.

- Stamp each tile using black stamping ink and your favorite rubber stamps.

- Allow the ink to completely dry.
- Apply two coats of Mod Podge (in Satin finish) to seal them.
- Once the Mod Podge is dry, peel off the cardboard and the webbing underneath each tile.
- Using super glue, attach the magnets to the bottom of the smaller tiles and attach either cork protectors or felt pads to the bottom of the larger tiles.

- Tie each coaster set together using the Rafia string.
Notes:
- Know your stamps: Some rubber stamps have weak spots, where no matter how hard you push down, the stamp still doesn't show up completely. Test your stamps on paper before applying to the tiles. If you don't like the way it stamps on paper, you won't like the way it comes out on the tile.

- Match your stamp to the tile: Make sure you choose the correct size stamp for where you are stamping. Some tiles may have chunks missing, and if you use a big stamp that covers most of the tile, the design might call more attention to the tile's imperfections than you would like. You can also try to position your stamps so that they don't cover imperfections in the tile.


