Chic Bohemian DIY Necklace

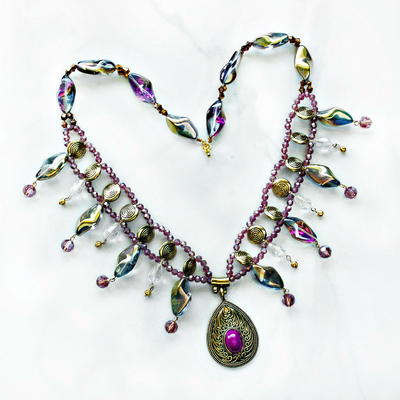
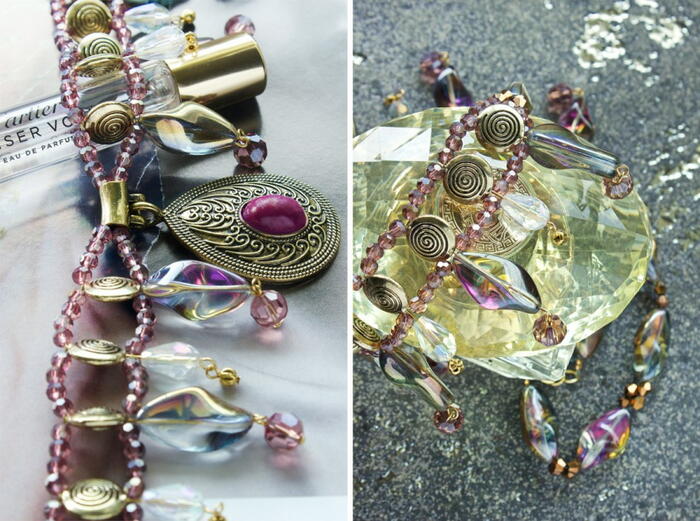
If you need a new accessory to spice up an old outfit, try making this Chic Bohemian DIY Necklace. The webbed pattern gives it a sort of free-spirited feel. This tutorial makes this DIY statement necklace simple to put together. These jewelry making ideas combine metal and bead work to add texture and dimension to the piece. Use a large metal filigree pendant as the centerpiece of your necklace to draw the eye. The colorful crystal beads set against the gold of the metal creates an elegant look.
What’s great about this DIY jewelry project is that you can use really any sort of beads you have in your stash. If you keep the technique the same, then your end result will mimic the necklace shown!

Time to CompleteIn an evening
Main MaterialBeads

Materials List
- Amethyst 4mm crystal faceted rounds
- 10mm metal swirl disc beads
- 10mm amethyst crystal rounds
- 4mm copper bicone crystals
- Clear monofilament
- Gold headpins
- Gold crimp beads
- A gold clasp
- Gold 6mm jump rings
- 3mm gold metal beads
- 23X13mm twisted glass beads
- A large metal filigree pendant
- Flat nose pliers
- Round nose pliers
- Wire cutters
- Nail polish (optional)
Instructions
-
Create the beaded ladder. Cut a 4 foot piece of monofilament. Thread on 7 4mm crystal rounds. Thread on a swirl bead. Thread the other end of string through the swirl bead, in the opposite direction of the first. Pull tightly, making sure these beads are in the center of your string. Thread four crystals on both sides of monofilament. Thread a swirl bead on the bottom piece, then thread the top piece through the swirl again, in the opposite direction. Keep repeating until you are 7 swirl beads long. Thread 4 crystals again on both threads, but don’t thread on another swirl.
-
Thread on your metal pendant, grouping both strings together. Now, just as you’ve done before, create your pattern 7 swirl beads long, to repeat the other side. When you’ve reached the end (7 swirl beads on), thread three crystals on each side. Take one crystal, and thread both sides through it, as if it were a swirl. Thread each side down the three beads, and secure with a crimp to end the beaded panel. Cut off the excess thread. To make the rest of the sides, cut a 2 foot piece of monofilament. Thread through the forth bead in the last loop you just beaded. Add two 4mm bicones to each side, and then group together and thread on the glass oblong bead.
-
Continue threading two bicones per side, then grouping together for the oblong bead. Repeat until you have four oblong beads. Repeat with the other side. To finish these strands, close by adding crimp beads and a clasp. Cut off the excess monofilament.
-
To add the charms, start by laying out which beads you’ll be using. You don’t know how many times I have started beading without counting my beads first, then regretted it! Make sure you have enough before you start. I alternated the glass oblong beads with the crystal teardrop beads. Take your heading, and thread from top to bottom in the swirl bead. Create bottom loops this time – we will be adding charms next step! Repeat this, making sure you alternate beads correctly.
-
Finish off by creating charms out of the 4mm metal beads and 8mm crystal beads. Attach the top loops of these charms to the corresponding beads we added in the last step.
-
Finally, if needed, paint your metallic pendant with nail polish for a faux enameled look. I’ll often use nail polish in a pinch to paint over metals – it’s a quick and easy technique if you want to secretly change the color of something!


