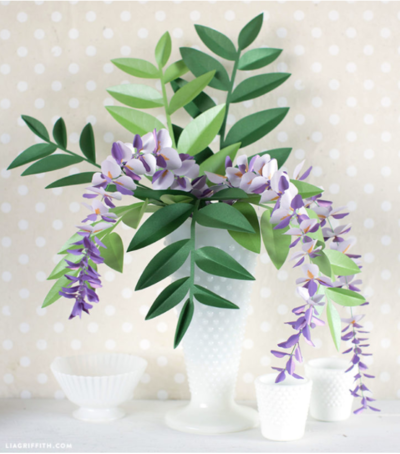
Paper Wisteria Plant

"It may seem a bit daunting at first because wisteria has so many little petals (a cutting machine will definitely come in handy for this one), but the process is simple and the result is stunning. We teamed up with our friends at Paper-Papers to use the best paper possible in bringing these to life! Tools: Scissors Low Temperature Hot Glue Gun Paintbrush 1/16″ Hole Punch Materials: Text Weight Metallic Paper [Lilac, Violet Satin, Fairway, Botanic] 20 Gauge Floral Wire (3 pieces) Art Marker [Light Orange] Yes! Paste Steps: Gather the tools and materials listed above. Cut the petals according to the SVG or PDF template at the bottom of this post. Punch a hole in the middle of each petal. Color a fan shape on one side of the lilac colored petals. Using the edge of your scissors, curl all of the petals in the same direction, curl the lilac colored petals on the side that was not colored. Using a small paintbrush, put a dab of Yes! Paste in the center of the lilac petals on the side that is colored, glue the violet petal in the corresponding size to the lilac petal so they curl away from each other. Place a small dot of hot glue on the end of the wire and slide a small violet petal facing down on top of the glue dot to hold it in place. Repeat this 6 times, spacing them about a 1/2″ apart. Glue 4 small flowers onto the wire with violet petals facing down and spacing them about a 1/2″ apart. Glue 4 more medium sized flowers onto the wire, increasing the spacing to 3/4″ apart. Glue the last 4 largest flowers onto the wire, spacing them 1″ apart. Using the hot glue gun, glue a wire down the center stem of the leaves. Use the edge of the scissors to score along the score marks and curl the leaves. Head over to Paper-Papers blog to follow along with our photo tutorial for this paper wisteria!"
NotesEnjoy!
