Dutch Flower Quilt Block
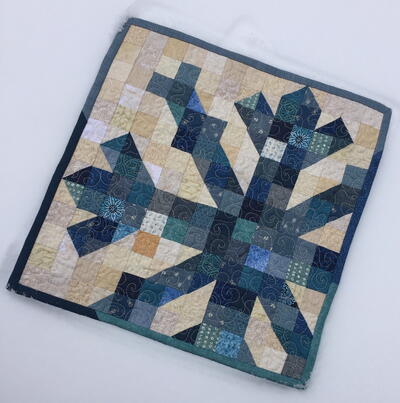
Make a single block mini-quilt or combine this flower quilt block with others for a larger quilt. Whether framed or unframed, this flower quilt block makes a beautiful statement. This project is excerpted from Flower Festival by Kim Schaefer published by C&T Publishing.

Materials (Materials listed are for 1 single-block quilt):
- 1/3 yard light for appliqué block background
- A variety of scraps for appliqué pieces
- 3/8 yard green for backing and binding
- 1/4 yard paper-backed fusible web
- 10? × 10? batting
Cutting
- Cut 1 square 81/2? × 81/2? from the light for the appliqué block background.
Appliqué
-
Cut out the appropriate appliqué pieces for your chosen block. Use the pattern.
- Appliqué the pieces onto the background. putting it all together
Finishing
-
Layer the quilt with batting and backing.
-
Quilt as desired, and bind.
- Hang the quilt as it is, or mat and frame it as desired.
Rotary Cutting
- I cut all the fabrics used in the pieced blocks, borders, and bindings with a rotary cutter, an acrylic ruler, and a mat. I trimmed the blocks and borders with these tools as well.
Piecing
- All measurements for piecing include ¼ ? seam allowances. If you sew an accurate ¼ ? seam, you will have happiness, joy, and success in quilting. If you don’t, you will have misery, tears, and the seam ripper.
Pressing
- Press seams to one side, preferably toward the darker fabric. Press and lift the iron. Avoid sliding it over the pieces, which can distort and stretch them. To reduce bulk when you join two seamed sections, press the seams in opposite directions so they nest together.
Applique
-
All appliqué instructions are for fusible web with machine appliqué, and the appliqué patterns have been drawn in reverse. If you prefer a different appliqué method, you will need to trace a mirror image of the pattern and add seam allowances to the appliqué pieces.
- A lightweight paper-backed fusible web works best for machine appliqué. Choose your favorite fusible web, and follow the manufacturer’s directions.
General Applique Instructions:
-
Trace all parts of the appliqué design 1. on the paper side of the fusible web. Trace each layer of the design separately. For example, trace all the petals on a flower as one piece, and trace the center as another. Whenever two shapes in the design butt together, overlap them by about ? ? to help prevent the potential for a gap between them. When tracing the shapes, extend the underlapped edge ? ? beyond the drawn edge in the pattern. Write the pattern letter or number on each traced shape.
-
Cut around the appliqué shapes, leaving a ¼ ? margin around each one.
-
Iron each fusible web shape to the wrong side of the appropriate fabric, following the manufacturer’s instructions for fusing. Cut on the tracing lines, and peel the paper backing off the fusible web. A thin layer of fusible web will remain on the wrong side of the fabric—this layer will adhere the appliqué pieces to the backgrounds.
-
Position the pieces on the backgrounds. Press to fuse them in place.
-
Machine stitch around the appliqué pieces using a zigzag, satin, or blanket stitch. Stitch any detail lines indicated on the patterns.
- My choice is the satin stitch. I generally use beige thread for all the stitching. Sometimes the stitches blend with the fabric, and sometimes they don’t. Using one color throughout gives the quilt a folk art look. However, on the Tulip Lap Quilt (page 81), I used black thread, and you can see how changing the thread color changed the entire look of the quilt. As always, the type of stitching you use and the thread color you select are personal choices.
Read NextHalfsies Pincushions
Your Recently Viewed Projects
nannygranny01 9191 820
Nov 07, 2011
this is going to be my first project it looks easy enough famous last words lol
Report Inappropriate Comment
Are you sure you would like to report this comment? It will be flagged for our moderators to take action.
Thank you for taking the time to improve the content on our site.

