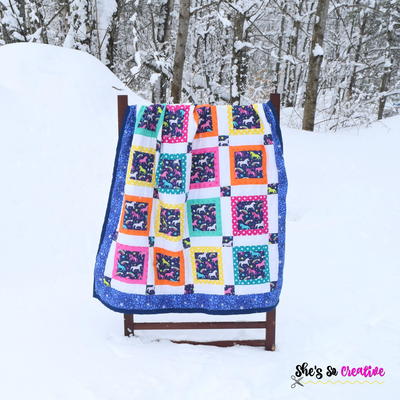
Tuscan Quilt
Use fabrics with images such as grapes and sunflowers to create a rich quilt reminiscent of Tuscany. This intermediate quilt pattern features a unique lattice design.

Materials:
- Fabric A: Lg. Packed Allover (1487647) 1 yard
- Fabric B: Lattice Ironwork (1487696) 11/3 yard
- Fabric C: Suflower Daisies (1487695) ½ yard
- Fabric D: Tuscany Weave (1487694) 2¼ yards
- Fabric E: Grapes Tossed (1487688) 2 yards
- Fabric F: Diagonal Stripe (1487687) 1¼ yards
- Backing: Your Choice 4 yards
NOTE: All seam allowances are ¼”. Please read all directions before beginning and press carefully step-by-step. Border measurements are approximate, always measure your quilt top before cutting border lengths.
Cutting Directions:
- Fabric A: Fussy cut nine 8½” squares, making sure the image is on point (see quilt photo).
- Fabric B: Cut (128) 2” x 3½” strips. Cut seven 2½” x width of fabric (WOF) strips. Piece them together into two 2½” x 54½” strips and two 2½” x 50½” strips.
- Fabric C: Fussy cut sixteen 3½” squares, centering one sunflower in each square.
- Fabric D: Cut eighteen 2½” x 12½” strips and eighteen 2½” x 8½” strips and (320) 2” squares. Cut seven 2¼” x WOF strips. Piece them together for the binding.
- Fabric E: Cut sixty-four 3½” squares. Cut seven 4½” strips. Piece the strips into two 4½” x 62½” strips and two 4½” x 54½” strips.
- Fabric F: Cut eight 2” strips from the width of fabric (WOF). Cut sixty-four 2” x 5” pieces from the strips. Cut three 5” strips from the WOF. Cut these strips into sixty-four 2” x 5” pieces.
- Backing: Sew together into one 70” square for the backing.
Assembly Instructions:
- Place one 2” Fabric D square on top left side of one 2” x 5” Fabric F rectangle, right sides together. Make sure direction of the stripes on the fabric match the diagram in Figure 1. Sew across the diagonal of the square from the upper right corner to the lower left corner (fig 1). Flip open the triangle formed and press (fig 2).
- Place another 2” Fabric D square on top right side of the 2” x 5” Fabric F rectangle, right sides together (fig 3). Sew across the diagonal of the square from the upper right corner to the lower left corner (fig 3). Flip open the triangle formed and press (fig 4). Make sixty-four of Unit A.
- Place one 2” Fabric D square on top left side of one 2” x 5” Fabric F rectangle, right sides together. Make sure the direction of the stripes on the fabric match the diagram in Figure 5. Sew across the diagonal of the square from the upper left corner to the lower right corner (fig 5). Flip open the triangle formed and press.
- Place another 2” Fabric D square on top right side of the 2” x 5” Fabric F rectangle, right sides together. Sew across the diagonal of the square from the upper left corner to the lower right corner. Flip open the triangle formed and press (fig 5). Make sixty-four of Unit B.
- Sew One Unit A and Unit B together (fig 6) to make a set. Make a total thirty-two sets.
- Follow the block layout and sew together sixteen Pieced Blocks.
- Sew one 2½” x 8½” Fabric D strips to each side of one 8½” Fabric A square. Sew one 2½” x 12½” Fabric D strip to the top and bottom of the Fabric A square. Repeat to make nine Main Block squares.
- Follow the quilt photo and sew the Pieced Blocks and Main Blocks together into diagonal rows. Sew the rows together to make the quilt top.
- Follow the quilt photo and trim the quilt top to measure 50½” square.
- Sew one 2½” x 50½” Fabric B strip to each side of the quilt top. Sew one 2½” x 54½” strip to the top and bottom of the quilt top.
- Sew one 4½” x 54½” Fabric E strip to each side of the quilt top. Sew one 4½” x 62½” Fabric E strip to the top and bottom of the quilt top.
- Layer, quilt and bind as desired.

Read NextGreek Cross Quilt Block
Your Recently Viewed Projects
CCUK 2272297
Feb 02, 2013
It would be nice to have a picture! Thank you if one can be supplied.
rockmist 2361393
Jan 06, 2013
I think, from the tiny pic in the newsletter, that it 'appears' to be a nice looking quilt I may want to make, but there is no quilt image at all, let alone larger, that I could get to appear. Since this was an issue long ago as well as now, I guess I won't be seeing it soon either. Too bad.
deantheresa 405262 3
Jan 06, 2013
I'm using an iPad and can see the image clearly. It is lovely and is definitely on my list of quilts to make.
bonniesbeads5 2740 821
Feb 02, 2013
Try doing a control+ several times, that will enlarge the picture. When you are done, do a control- to bring the page back to it's usual size
bigbee02 6807046
Jan 04, 2013
there is a cross in the top left hand corner = broken link....cant see pic - I notice people having this problem for 2 years, surely we ALL cant be wrong :(
jennbenn1 6684915
Jun 02, 2012
There is no image. Please update all quilt patterns because many of them do not have photos. And it's not the browser, unless the images are set to only show in Firefox or something.
Julia L
May 09, 2011
Hi beverlyr 3354455, You may need to update your current browser. The photo takes a few second to load on the latest version of Firefox, so for an older browser it would probably take longer. Thanks!
Julia L
Mar 30, 2011
Hi judyvan999 9927425, I can see the picture in Firefox. Perhaps your connection is just loading the photos slowly or you might consider switching web browsers. Thanks!
judyvan999 9927425
Mar 30, 2011
Can"t see photo of the quilt. Also couldn't find area to print this quilt on the area shown. Like easy print!! Also was trying to find pattern 494 of AllPeopleQuilt and so far that has not come up. Web site too difficult when in a hurry.
Crafter 7511160
Feb 18, 2010
Hi to you !! I wnat to do this quilt and have bought fabric. the only thing is, that the insrutions are hard to understand. It would much better if they were writen for one block at a time Is their anyway I can get that? thank you !!
Report Inappropriate Comment
Are you sure you would like to report this comment? It will be flagged for our moderators to take action.
Thank you for taking the time to improve the content on our site.

