Faux Polished Stone Technique
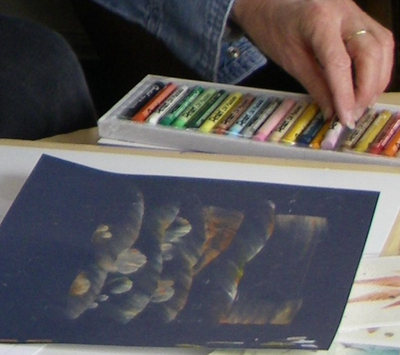
Learn how to create beautiful polished stones in just six easy steps. Faux polished stones are fun to make and are great for rubber stamping or photo matting.
Faux Polished Stone Technique
Materials
- Square of white felt and applicator like Velcro square on bottle cork
- Alcohol inks (2-3 colors)
- Glossy cardstock, domino, tile, metal tin, or other non-porous surface
- Krylon Leafing pen
- You may wish to protect your hands
- You MUST protect and cover your work area.
Please Note:
You must use a leafing pen; metallic paint pens DO NOT work for this technique.
Step by Step
- Read all instructions first and understand each step. You need to work quickly and smoothly since leaf pen and alcohol inks will dry quickly.
- Prime leafing pen if new or shake leafing pen if it has already been primed.
- Put a small amount of ink directly on the felt. You don’t need a ton of ink, just enough to cover your surface. Remember you will be using 2-3 colors of ink. Apply all colors of ink to felt. Try to avoid overlapping the inks, but do not worry if inks do overlap, this just means the colors will mix on the felt.
- Take the leafing pen, and make random dots of ink on the glossy cardstock or whatever surface you are using. The smaller the surface the less dots are needed. You don’t want to over-do the metallic ink. For a domino, you need 1-2 dots of ink, for a piece of glossy cardstock (8 1/2 x 11) you’ll need 8-10 dots of ink.
- Immediately after applying the leafing ink, dab the felt (with the ink) onto the gold dots. Continue and dab the ink randomly around the surface. Do not RUB, dab! You need to get the ink onto the surface quickly before either the ink or the gold leafing dries. The idea is to get the gold leafing to move in the ink and feather creating the polished stone look. The gold leafing should not be covering the ink in a consistent layer, but should make veins throughout the paper.
- Once everything is dry, polish with tissue paper to bring out the colors.
Tip: Faux Polished Stone makes a great background for rubberstamping or a colorful paper for matting a photo.

