Jewelry Making Basics
Jewelry making includes so many different mediums and techniques that it’s almost impossible to cover each one in detail. However, here you will find the basic information about jewelry techniques in this article from resident craft expert Maria Nerius.
Jewelry Jargon to Know
Bail: Finding that allows a pendant to be attached to a jump ring or necklace.
Bezel: A setting that has a collar instead of prongs to secure.
Brooch: A large pin that is usually assembled or has several elements in one piece
Clasp: Finding that is used for necklaces and bracelets to secure. May come as a set like toggle clasp or separately as in lobster claw or C clasp, which are used with jump rings.
Eye Pin: A connecting finding that is a length of metal with a loop at one end
Findings: Term for the attaching, connecting and finishing parts used in jewelry making like earring wires, clasps, toggles, eye pins, bails, pin backs, and head pins. Also used for special components like eyeglass holders or pendant holders.
Head Pin: A connecting finding that is a length of metal with a small metal head at one end.
Gauge: Usually abbreviated to g in project instructions this number gives the size or weight of a material like wire comes in 20 g or 22 g.
Jump Ring: Oval or round wire ring used as a connector or attaching aid.
Millimeter: Abbreviated to mm, which is the way many jewelry components like beads, jump rings, and chain are measured.
Jewelry Assembly
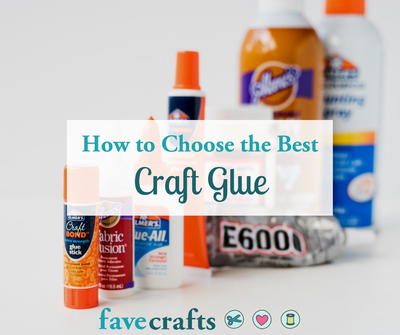
Jewelry findings like pin backs, shoe or button clips, and post earring backs can be adhered with jewelry glues. In some cases you can use a tack stitch and sew findings to the finished piece
Techniques and Mediums
Clays
Always read manufacturer’s labeling and instructions for any type of clay you are using. Most clay needs to be conditioned. To condition clay you place a small amount in your hands to warm it, then begin to knead it until the clay is soft and pliable. Many polymer clay artists use a dedicated pasta machine to condition polymer clay. Keep in mind that any tool that is used when working with polymer clay should never be used in any fashion in food preparation or consumption. Never leave polymer or silver clay unattended while baking or firing.
Embossing
A term used for the method of using pigment ink, embossing powder and a heat tool. An image is stamped or drawn, embossing powder sprinkled onto the ink, excess powder removed, then a heat tool is used to heat and melt the powder. You can overheat embossing powder so once powder has melted and has shine, you are done embossing.
You can also dry emboss. This method uses a texture plate or brass template to raise a design on paper and clays. A texture plate is placed under paper and on top of clay. You rub over the surface of the paper to raise the design and you press the texture plate into the clay to get a pattern. If using a brass template, you place template on a light source (window or light table), top with paper, and use a stylus to outline the design or pattern, remove paper and turn!
Felting
There are two main ways to hand felt using wool roving. The first is the wet method where soap and water are used as well as agitation to bond the wool fibers creating a solid fabric. The second is to use felting needles (long needles with sharp barbed ends and no eye). You poke and jab the needle into the wool roving to agitate the fibers letting them bond and for a solid fabric. Fiber artists sometimes combine the two methods or use pre-felted squares or blanks.
Glass
Cold Glass: When working with glass be aware that cut glass has sharp edges. Window glass (also called floating glass) is used for most cold glass projects and a glasscutter will cut the glass easily. A diamond drill bit is needed for drilling glass. Glass should be placed on a wet sponge in a shallow pan of water and then touching diamond drill bit to glass gently drill hole.
Hot Glass: There are a variety of torches and kilns designed for working with glass. To melt or fuse two pieces of glass together all pieces must have the same COE (coefficient of expansion). COEs vary with common fusing COEs of 90 or 96 and torch work glass with COEs of 32.5 to104. Hot glass must also be annealed before used in jewelry to avoid cracking and shattering.
Metals And Wire
Always use tools designed for metalsmithing and wire techniques. Metal can be shaped, formed, hammered, curled, and more. Have metal files on hand to smooth any rough or sharp edges or points in metal or wire. Although called beading wire, most beading wire is for stringing elements and not used to create elements in jewelry. Wire comes in different gauges (abbreviated to g in most instructions) and it’s important to use the gauge recommended in a project for best results.
Needlepunch
Also called punchneedle, this technique uses a special needle tool that when threaded needs to be threaded through the needle tube and then through the needle eye. Unlike other needle arts, you work from the back of the design, not the top. The pattern you see or draw is on the backside of the cloth. The needlepunch needle tool is then punch up and down through the cloth making small loops to the front to the design. You must use a fray stopping liquid to secure the threads at back of design. A hoop is needed to keep the cloth taunt as you punch it.
Rubber Stamping
Apply ink to image and bring stamp directly down onto surface. Avoid rocking or shaking the stamp until you have pulled it straight up from surface. Dye inks are usually more colorful and quick drying. Pigment inks are slow drying and used with embossing powders. Alcohol inks are very quick drying and usually applied from the bottle. Permanent inks are just that permanent and you should always check the labeling to make sure you are using permanent ink when one is called for in a project. Permanent inks offer the best results on nonporous surfaces. If stamping on fabric use an ink designed for fabric stamping and remember to heat set. Clean stamps immediately after use and store in a cool place out of direct sunlight.
Soldering
Soldering is used several ways in jewelry making. Some artists solder jump rings for added security. Charms are sometimes given decorative edging with solder techniques. Stain glass pieces are soldered. You need a soldering iron, solder, and flux if it’s not already in your solder. Allow iron to warm up, make sure all components are clean (oil and dust free), hold solder to tip allowing some solder to melt, then touch tip to piece to be soldered. Keep the flow smooth and even for best results. Soldering is a technique that requires practice to perfect and should always be done in a well-ventilated area.
Shrink Plastic
Shrink plastic does have a grain so note the grain before stamping or drawing on a sheet. You want the images to all flow the same way into the grain or you may end up with different sizes at the end of heating. Sand plastic lightly before stamping or coloring. If a hole is needed for an item, punch hole before you heat plastic. Use permanent ink when stamping and color with oil based pencils or alcohol-based inks for best results. Heat in oven or with embossing heat tool. Never leave baking plastic unattended and read all manufacturers’ instructions.
Stitches
Jewelry making uses a variety of needles including beading needles, quilting needles, and embroidery needles. Most are long, sharp, and have small eyes making it possible to sew even a seed bead in place. Have a threader handy. Usually a single thread is required unless multi-strands of floss are specifically asked for in the supply list. Always knot one end of thread before you start to stitch and you’ll end your stitch by knotting off at the back of the material. The most basic stitch of jewelry making is the running or basting stitched used to gather fabric, ribbon, or lace. Just sew in and out of fabric in a line, and then pull on one end of thread to gather material. A running or basting stitch can also loosely hold materials together, but if you need a strong hold use a backstitch.
Woodburning
Allow Woodburning tool to warm up before you start using. Use a pair of pliers to remove a hot tip and place hot tip on a tile. Lightly touch tip to wood surface and keep tip moving for best results. Lower temperatures are used for detail work or on soft woods. You can woodburn on raw wood or painted wood. Take care with hot tips and never leave a hot woodburning tool unattended.
Your Recently Viewed Projects
Report Inappropriate Comment
Are you sure you would like to report this comment? It will be flagged for our moderators to take action.
Thank you for taking the time to improve the content on our site.

