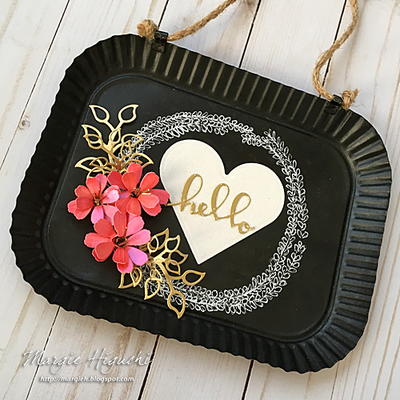
DIY Hello Chalkboard Sign

From the Designer: "When you see a sale that is too good to pass up, buy it! Margie Higuchi found this metal chalkboard tray sign for under $2. It already had the twine to hang so this home décor piece came home with her to create something fun and trendy. Just doodle and die-cut painted and colored white cardstock, and you’re ready to go with your DIY Hello Chalkboard Sign! Give it a try...it's easy and a great way to personalize a gift for someone special."

Materials List
- Testors®: Intense Glitter Paint in Silver
- Sakura® of America: Gelly Roll® Classic™ White Pen (10 Bold)
- Marvy® Uchida: DecoColor™ Liquid Gold
- Plaid®: Plaid's FolkArt® Color Shift™ Paint (Pink Flash)
- Scrapbook Adhesives by 3L®: Adhesive Dots 3D, E-Z Runner® Micro and 3D Creative Foam Sheets
- Spellbinders® Creative Arts: Classic Hearts, Rolled Flowers, Layered Leaf Vines and Hello Geo Heart
- Chalkboard Tray Sign
- White Glittered Cardstock
- White Cardstock
- Foam Brush
Instructions
-
Using white glittered cardstock, apply 3D Foam Creative Sheet on the back by taking off the liner and placing the cardstock on top. Next, die-cut a heart shape. To add more sparkle and interest, foam brush Intense Glitter Paint in Silver. Once dried, it gave a more sparkly effect to the die cut.
-
With the Gelly Roll® Classic™ White Pen (10 Bold), hand draw circles by placing the heart die cut in the middle as a guide. The circles don't have to be perfect - no one will see after leaves are drawn ;) This pen is fantastic - it writes on metal...painted metal! After drawing in the leaves, set aside.
-
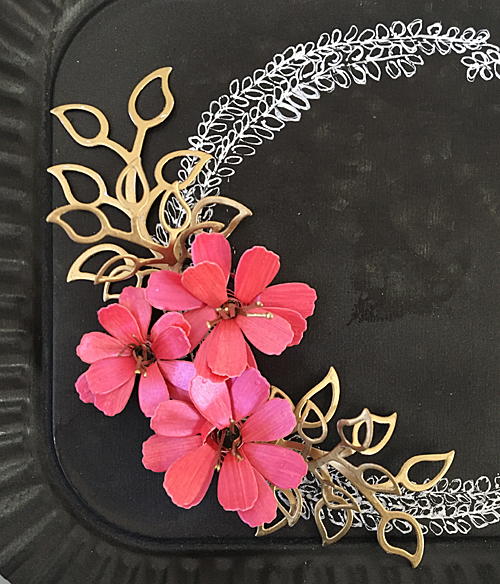
Let's start with the flowers. Let me just say I love Plaid's FolkArt® Color Shift™ Paint in Pink Flash!! It's a thick paint that creates metallic lusters with colors that sift in changing light. Really cool and dries fast. Perfect for my flowers! I used white cardstock as my painting surface.
-
Die-cut the painted cardstock with Rolled Flowers etched dies in small and medium size. This is a clever set designed by talented + sweet friend, Marisa Job. All you have to do is roll the flower - it includes the stamens, petals and leaf. For this project, I took off the leaves.
-
With the flower die cuts, I colored the stamens with DecoColor™ Liquid Gold. Goodness! I wanted to paint EVERYTHING in gold. This paint marker goes on smoothly and it leaves a beautiful gold color behind. LOVE! Set aside to dry.
-
Using the leftover from cutting the heart die cut, I cut Hello Geo Heart's hello die and painted it gold with DecoColor™ Liquid Gold. After it dried, I centered the sentiment onto the heart shape.
-
Next die-cut the Layered Leaf Vines' small and large outline vine dies with white cardstock and paint in gold with DecoColor™ Liquid Gold. I cut two sets to layer. Set aside to dry.
-
While the vines are drying, I rolled my flower die cuts and secured the bottom edge with E-Z Runner® Micro. Perfect adhesive for narrow areas! Fluff up the flowers - the petals have a coating to them so they are protected and sturdy but not stiff. I used an Adhesive Dot 3D for the bottom of each flower to adhere to the tray. Keep the liner on them for now until placement.
-
Place an Adhesive Dot 3D in two areas where the vine tips will be attached. Shape the vines first for dimension. Place the larger vine first and then layer the smaller one. Repeat in the second area.
-
Next, take the Adhesive Dot 3D liners off the flowers and place them between the two sets of vines. Adjust the petals and vines until you achieve your look.
-
For the finishing touch, take the bottom liner off of the glittered heart and center it inside the wreath. It's ready to be displayed!

