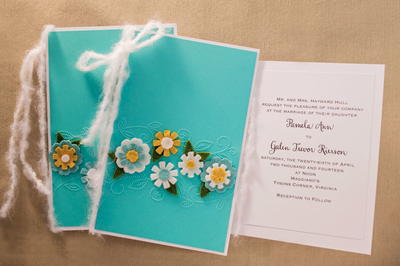
How to Make Wedding Invitations and Programs

Many brides-to-be are asking How to Make Wedding Invitations and Programs that are unique enough to reflect their style but don't cost an arm and a leg. That's where this DIY wedding video tutorial comes in.
Learn how to use embossing and die cutting techniques to make absolutely adorable and spring-themed wedding invitations and programs. Wedding crafts like the ones featured in this DIY craft video help you save money while still adding a personal touch to your big, beautiful day.
Time to CompleteIn an evening
Primary TechniqueGeneral Paper Crafting

SeasonSpring
Project TypeMake a Project
Materials List
- Sizzix machine
- Flower shaped die cuts
- Felt pieces in different colors
- Glue
- Embossing pattern
- Double sided tape
How to Make Wedding Invitations and Programs
Embossed Wedding Invitations Instructions
-
Cut out some flowers from felt on the sizzix machine. Lay down your multipurpose platform with all the tabs down, then lay down the precision base plate, and then a piece of your felt, and the die cuts on top. Run that through your machine.
-
Assemble the flowers using glue to secure them in place.
-
Print the program on a card stock, score it, and fold it down the middle. Take a piece of matching paper and cut it to fit the front of the program or invitation.
-
Emboss the paper by taking your design, centering it where you want it to go, and running it through your sizzix machine. Repeat until your card is embossed to your liking.
-
Add some adhesive to the side that you want to stick down onto the program or invitation and place that flat down onto the front of your invitation or program.
-
Taking your flowers glue those down where you woud like them on your project. Do this by adding a small drop of glue on the bottom of the flower and stick it down.
