Wall Art Fall Wreath
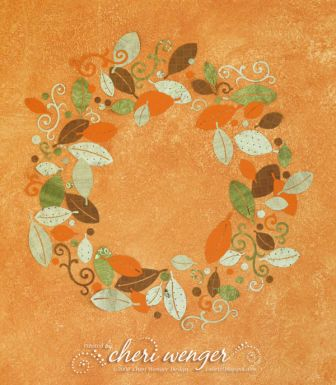
Here is a fun decorative fall wreath project that scrapbook enthusiasts who love patterned papers and cardstocks will love.
.jpg)
Materials:
- Adhesive: Glue Arts™ Wall Art Décor Adhesive (12” x 12 sheets ”)
- Cardstock: (Deja Views) Global Views Double Sided Paper Pack (available at Michael’s)
- Cutters: (QuicKutz®) Silhouette™ Digital Craft Cutter; (Fiskars) Paper Trimmer and (Xacto) cutting knife
Instructions:
- This first step assumes that you have installed and launched the ROBO Master software provided with your Silhouette digital craft cutter. Choose the leaf 0026 graphic from the pattern library. Cut and paste Into a new letter size document, name and save the file. Now, you can begin to layout your document. Stretch and scale the leaf to make varied sizes and widths. You can also flop the direction to make it face the opposite way. Next, open the flourish 0009 file, cut & paste design, ungroup elements and scale choices to desired sizes and directions. Create ½” – ¾” circles in empty spaces. Position these on page to fit multiple designs on one page. Save final file.
- Trim cardstock to 8-1/2” x 12”. You will need about 4-5 different sheets of coordinating colors and patterns. Apply the first sheet to a sheet of Wall Art adhesive making sure that the side you want to show is face up. If you are adhering to something reflective or clear, you will need to make sure that the colors and patterns on the back side of your papers coordinate.
- Use your paper trimmer to trim excess Wall art adhesive and carrier sheet away from patterned cardstock. Do not remove white top sheet yet. Flip over and rub back side to transfer adhesive to the cardstock. Now turn over and remove top white sheet and place the cardstock with clear carrier sheet face down onto the Silhouette cutting pad and rub to make sure it is attached and that there are no bumps.
- You will need to insert and align the carrier sheet with your patterned cardstock into the Silhouette per the directions provided with the software.
- Choose FILE > CRAFT ROBO… from pull down menu to cut out the graphics. Next, select Cardstock 40-60lb from the pull down menu in the pop up window. (If you are using heavier cardstock, you will need to change out this setting and the recommended cutting blade). Once all your settings are done, choose cut. When finished cutting use left hand wheel on the Silhouette to remove the carrier sheet with patterned paper.
- Leave patterned cardstock on carrier sheet. Using the point of a cutting blade, remove each digital graphic. Make sure the clear adhesive carrier sheet is not still attached to the back side or it will not stick. Start randomly placing leaves and swirls onto wall in a rough circular shape. See below.
- Repeat steps 2-6, applying each sheet of patterned graphics to the wall, one sheet at a time. You will be able to rearrange images as you work, but caution not to do this too often, or your graphics may no longer want to stick. You will want to make sure that your wreath doesn’t have any obvious holes or gaps and that the colors are well balanced.
An Additional Side Project Created from Left Overs: FALL CANDLE HOLDER

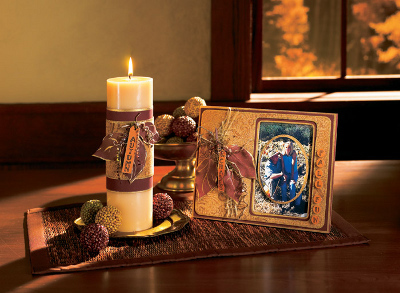
While I was working on the wreath project, I decorated a glass candle holder with some of the remaining diecut graphics. This is a very fun project because you can enjoy both sides of the patterned papers. Keep this idea in mind while you are working on your wreath. You can use some of the graphic elements to decorate a vase, candle holder or glass bowl.
See this project and more in 16 Decorative Front Door Wreaths for Fall.
Read NextPinecone Sunflowers

