Spiral Snowman
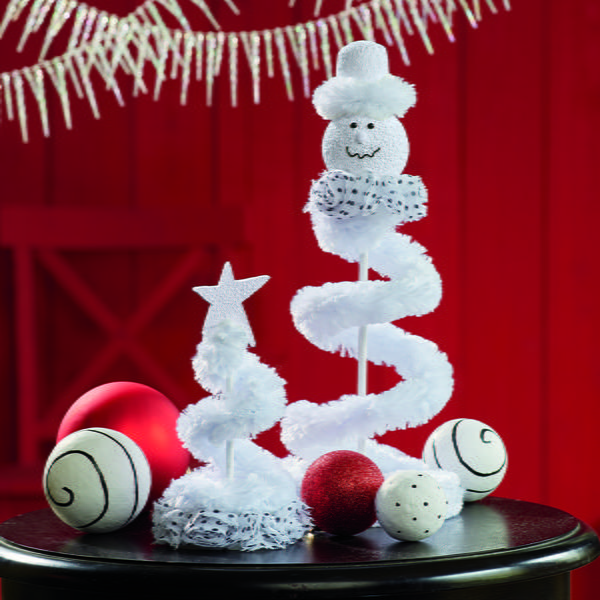
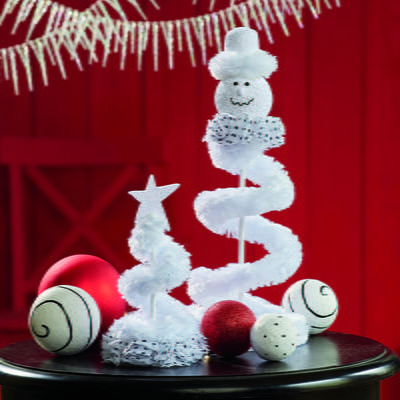
For a fun Christmas decoration that will spread a little holiday cheer, look no further than this easy DIY Spiral Snowman from Floracraft! This adorable snowman will bring a smile to your face and will brighten up your holiday decorations. This project is easy to make and looks great on a mantel or on a side table. It is made of durable craft foam, so you can be assured that it will last you for many Christmases to come. This piece is easily customizable, so you can play around with the fabrics to make it fit your décor.

SeasonWinter
HolidayChristmas
Materials List
- FloraCraft® Make It: Fun® Foam Discs: (2) 3”x1”
- FloraCraft® Make It: Fun® Foam Balls: (2) 2”
- FloraCraft® Make It: Fun® Foam Sheet: 12”x12”x½”
- FloraCraft® Make It: Fun® Foam Cone: 9”
- 2) 6-½ ft. White Jumbo Chenille Stem
- Iridescent Fine Glitter
- White Acrylic Paint
- Thin Wood Dowels: 10” and 6” Lengths
- Rosette Fabric Trim: White/Black Polka Dot
- Tiny Black Eyes
- Tiny Black Eyes
- Tiny White Pompom
- Thin Black Wire
- Low-Temp Glue Gun
- Scissors
Project Instructions
-
Draw a small star shape, about 2-½”, onto the ½” foam sheet. Use the knife to cut out the star shape. Roll one 2” ball firmly back and forth on the table to create a barrel shape for the hat.
-
Paint the hat, the 2” ball head, the two discs, the star and the wood dowels white.
-
Paint them one at a time and while they are still wet sprinkle each part with glitter. The paint will secure the glitter in place as it dries.
-
Insert the wood dowels into the middle of the discs. Glue to secure in place. Glue the star to the top of the 6” dowel and glue the 2” head to the top of the 10” dowel.
-
Double the chenille stem and twist it together to create one thick 3ft. piece of stem. Spiral the stem around the 9” cone to form the shape. Remove the cone and place the chenille spiral over the 10” dowel. Glue the top of the spiral to the top of the dowel under the head. Secure the bottom of the dowel at the back of the disc.
-
Cut the second chenille stem in half. Double the chenille stem and twist it together to create one 18” length. Spiral the stem around the cone as before to create the shape. Place the chenille spiral over the 6” dowel. Glue in place under the star. Glue the bottom of the spiral to the top back of the disc
-
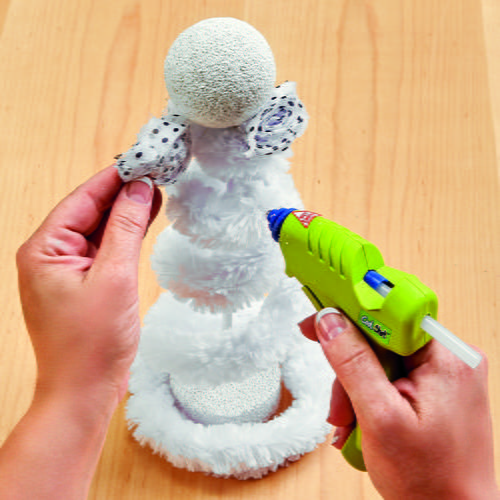
Cut a piece of fabric trim to glue around the disc of the tree and around the neck of the snowman.
-
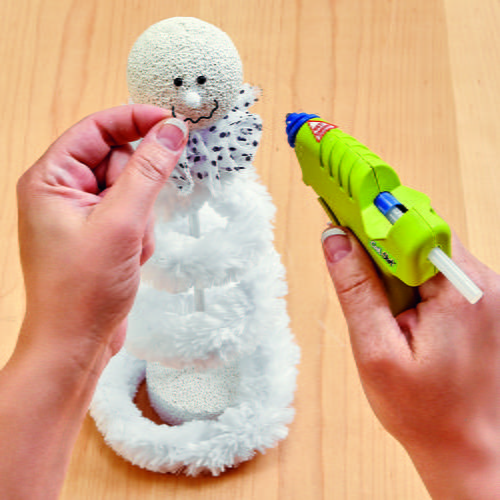
Glue the eyes and the pompom nose in place. Bend a squiggle in a length of wire for the mouth. Bend the ends of the mouth inward toward the face. Insert the ends of the wire into the face and secure with glue.
-
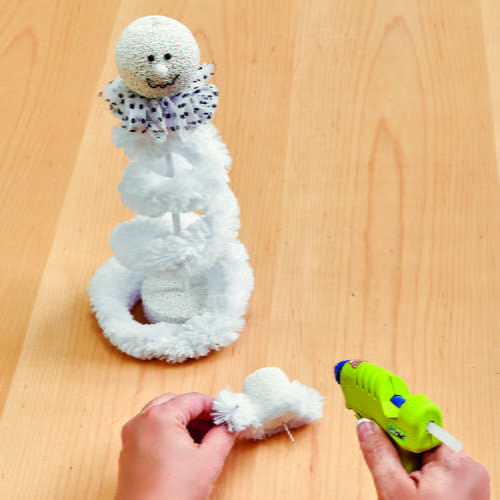
Cut a length of chenille stem to glue around the base of the hat. Glue the hat in place on top of the head
Your Recently Viewed Projects
mulberrygalprinces s
Nov 15, 2016
What an adorable little guy. I have to make a couple for the grand kids. They will love them. And next I think a spiral Santa will be in order. Just change up the colors and add a few things and there he will be. I can't wait to get started. I love making things for them to enjoy year after year.
Report Inappropriate Comment
Are you sure you would like to report this comment? It will be flagged for our moderators to take action.
Thank you for taking the time to improve the content on our site.

