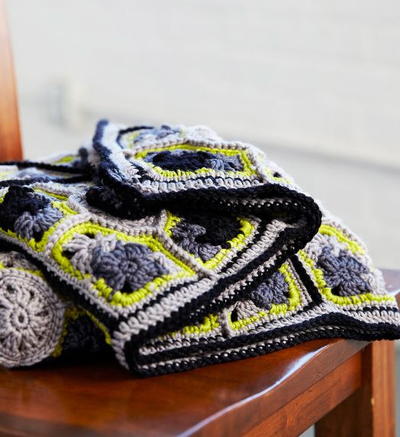
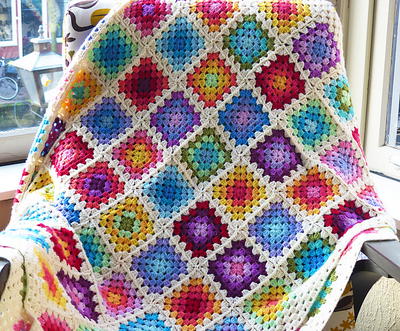
Christmas Noel Afghan
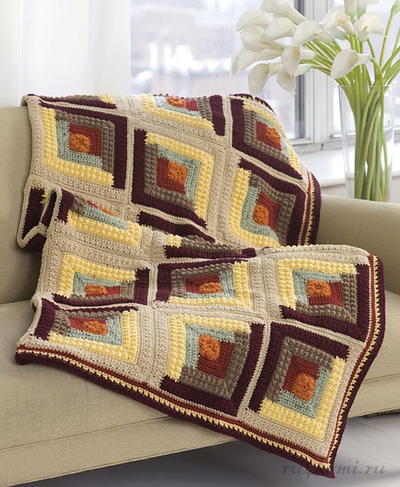
Small and large granny squares come together in this fun Christmas afghan crochet pattern. The holiday yarn colors in this Noel afghan are festive yet refined, perfect for any decor. Find more crochet patterns at Red Heart Yarn.

Materials:
- Yarn: RED HEART® “Holiday™”: 6 skeins in 6560 Hunter with Gold (A), 3 skeins in 1360 Aran with Gold (B), 1 skein Wine with Gold (C)
- Crochet hook: 5mm [I-9] crochet hook
- Yarn needle
GAUGE: Small square = 5”; Blocks = 10”. CHECK YOUR GAUGE. Use any size hook to obtain the specified gauge.
SMALL SQUARES (Make 12 of each color combo; total of 48)
Square 1
With B (A, C, A), ch 4, slip st in first st to form a ring.
Round 1: Ch 3 (counts as dc here and throughout), work 2 dc, ch 3, [3 dc in ring, ch 3] 3 times, slip st in top of beginning ch to join. Fasten off.
Round 2: With C (C, A, A), join yarn in any ch-space, ch 3, (2 dc, ch 2, 3 dc) in same space, ch 1, [(3 dc, ch 2, 3 dc) in next ch-3 space, ch 1] 3 times, slip st in top of beginning ch to join. Fasten off.
Round 3: Join B in any ch-2 space, ch 1, sc in same space, *ch 1, (3 dcs, ch 2, 3 dcs) in next ch-1 space, ch 1, sc in next ch-2 space; repeat from * 2 more times, ch 1, (3 dcs, ch 2, 3 dcs) in next ch-1 space, ch 1, slip st to first sc to join. Fasten off.
BLOCKS (Make 12)
After making Small Squares through Round 3, join 4 Small Squares together on Round 4 to make a Block. Add color combos in same order for all 12 Blocks.
First Square
Round 4: Join A in center dc of 3-dc group to left of any corner ch-2 space, ch 1, *sc in center dc of 3-dc group, ch 1, [(sc, ch 2, sc) in next ch-1 space] twice, ch 1, skip next dc, sc in center dc of 3-dc group, ch 1, (sc, ch 2, sc, ch 4, sc, ch 2, sc) in corner ch-2 space, ch 1; repeat from * around, slip st to first sc to join. Fasten off.
Second Square
Round 4: Work as for First Square to third corner-space, *(sc, ch 2, sc in Second Square, ch 2, drop loop from hook and pull through ch-4 space in corresponding corner of First Square, ch 2, sc, ch 2, sc in Second Square), ch 1, sc in center dc of 3-dc group, ch 1, [(sc, ch 1, drop loop and pull through corresponding ch-space on First Square, ch 1, sc) in next ch-1 space] twice, ch 1, skip next dc, sc in center dc, ch 1, (sc, ch 2, sc in Second Square, ch 2, drop loop from hook and pull through ch-4 space in corresponding corner of First Square, ch 2, sc, ch 2, sc in Second Square), ch 1, slip st to first sc to join.
Third Square
Round 4: Work as for Second Square, joining last side to lower edge of First Square.
Fourth Square
Round 4: Work as for Second Square to second corner space, (sc, ch 2, sc in Fourth Square, ch 2, drop loop from hook and pull through ch-4 space in corresponding corner of Second Square, ch 2, sc, ch 2, sc in Fourth Square), ch 1, sc in center dc of 3-dc group, ch 1, [(sc, ch 1, drop loop and pull through corresponding ch-space on Second Square, ch 1, sc) in next ch-1 space] twice, ch 1, skip next dc, sc in center dc, ch 1, (sc, ch 2, sc in Fourth Square, ch 2, drop loop from hook and pull through ch-4 space in corresponding corner of First Square, ch 2, sc, ch 2, sc in Fourth Square), ch 1, sc in center dc of 3-dc group, ch 1, [(sc, ch 1, drop loop and pull through corresponding chspace on Third Square, ch 1, sc) in next ch-1 space] twice, ch 1, skip next dc, sc in center dc, ch 1, (sc, ch 2, sc in Fourth Square, ch 2, drop loop from hook and pull through ch-4 space in corresponding corner of Third Square, ch 2, sc, ch 2, sc in Fourth Square), slip st to first sc to join.
LARGE SQUARE (Make 13)
With B, ch 4, slip st in first st to form a ring.
Round 1: Ch 3 (counts as dc), work 15 dc in ring, slip st to top of beginning ch to join – 16 dc.
Round 2: (Sc, ch 2, sc) in same space, *ch 1, skip next dc, (sc, ch 2, sc) in next dc; repeat from * around, ch 1, skip last dc, slip st to first sc to join. Fasten off.
Round 3: Join A in any ch-2 space, ch 1, sc in same space, *ch 1, (3 dc, ch 2, 3 dc) in next ch-2 space, ch 1, sc in next ch-2 space; repeat from * around to last ch-2 space, ch 1, (3 dc, ch 2, 3 dc) in next ch-2 space, ch 1, slip st to first sc to join. Fasten off.
Round 4: Join C in any ch-2 space, ch 3, (counts as dc), (2 dc, ch 2, 3 dc) in same ch-2 space, *[ch 1, 3 dc in next ch-1 space] twice, ch 1, (3 dc, ch 2, 3 dc) in next ch-2 space, ch 1; repeat from * to last 2 ch-1 spaces, [ch 1, 3 dc in next ch-1 space] twice, ch 1, slip st to top of beginning ch. Fasten off.
Round 5: With wrong side facing, join B in any ch-2 space, ch 3, (counts as dc), (2 dc, ch 2, 3 dc) in same ch-2 space, *[ch 1, 3 dc in next ch-1 space] 3 times, ch 1, (3 dc, ch 2, 3 dc) in next ch-2 space, ch 1; repeat from * to last 3 ch-1 spaces, [ch 1, 3 dc in next ch-1 space] 3 times, ch 1, slip st to top of beginning ch.
Round 6: Ch 1, turn, 2 sc in next ch-1 space, [ch 2, 2 sc in next ch-1 space] 3 times, *ch 2, (sc, ch 2, sc) in corner ch-2 space, [ch 2, 2 sc in next ch-1 space] 4 times; repeat from * around, ch 2, (sc, ch 2, sc) in corner ch-2 space, ch 2, slip st to first sc to join. Fasten off.
Round 7: Join A in any corner ch-2 space, ch 3 (counts as dc), (dc, ch 2, 2 dc) in same space, dc in first sc, *[2 dc in next ch-2 space, dc in next 2 sc] 4 times, 2 dc in next ch-2 space, dc in next sc, (2 dc, ch 2, 2 dc) in corner ch-2
space; repeat from * around to last side, [2 dc in next ch-2 space, dc in next 2 sc] 4 times, 2 dc in next ch-2 space, dc in next sc, slip st to top of beginning ch to join – 24 dc
each side. Round 8: Sc in each dc around, working (sc, ch 2, sc) in each corner ch-2 space, slip st to first sc to join – 26 sc each side.
ASSEMBLY
Following Assembly Diagram, arrange Blocks and Squares.
First Motif
Round 9: Slip st to corner ch-2 space, *(sc, ch 2, sc, ch 4, sc, ch 2, and sc) in corner ch-2 space, ch 1, skip next sc, sc in next sc, ch 1, skip next sc, (sc, ch 2, sc) in next sc, ch 1, skip next sc, (sc, ch 2, sc) in next sc, ch 1, skip next sc, sc in next sc, ch 1, skip next sc, (sc, ch 2, sc) in next sc, ch 2, skip next 2 sc, (sc, ch 2, sc) in next sc, ch 1, skip next sc, (sc, ch 2, sc) in next sc, ch 1, skip next sc, sc in next sc, ch 1, skip next sc, (sc, ch 2, sc) in next sc, ch 1, skip next sc, (sc, ch 2, sc) in next sc, ch 1, skip next sc, sc in next sc, ch 1, skip next sc; repeat from * around, slip st to first sc to join.
Repeat Round 9 on remaining Motifs, joining Squares and Blocks in ch-2 spaces and corner ch-4 spaces on one or two sides as for Small Squares.
BORDER
With right side facing and A, join yarn top right corner ch-4 space, ch 1, (sc, ch 2, sc) in same space and in each chspace around, working ch 2 over each ch-1 space, slip st to first st to join.
Fasten off.
TOP BORDER
Row 1: With right side facing, join A in top corner chspace, work (sc, ch 2, sc) in each ch-2 space across.
Row 2: Ch 1, turn, sc in first ch-2 space, *ch 2, sc in next ch-2 space; repeat from * across.
Row 3: Ch 1, turn, (sc, ch 2, sc) in each sc across.
Row 4: Repeat Row 2.
Rows 5-10: Repeat Rows 3-4 for 3 more times. Fasten off.
For other great crochet afghan patterns, check out this collection.
For more even more awesome crochet afghan patterns, head over to AllFreeCrochetAfghanPatterns.com.
Read NextLavender Shell Afghan
kathy1209
Nov 29, 2015
I love this afghan but have all but given up on making it. I didn't like the pattern for the granny squares. I thought they were more difficult than they needed to be for the effect.
lyseclment89 95432 11
Jan 20, 2013
Bonjour! J'aimerais savoir s'il y a quelqu'un qui aurait traduit ce patron en franais Merci! Bonne journe!
ellend0506 0550036
Oct 06, 2012
I agree there are 26 sc per side and instructions use only 24 sc
Lacemaker527
Nov 22, 2011
I thought this would be a fast and easy Christmas gift; however, there were some errors in the pattern directions. The color called for to border the small squares is Aran - in the picture it is Hunter Green. The instruction for the border around the large squares doesn't work out. I had to rework this to make it come out right. Also, directions are given for the border and a top border, but nothing for a bottom border, which makes the afghan look unfinished. I added a bottom border to mirror what was called for in the top border. It did make up quickly.
Stitchin Crazy
Jul 11, 2010
This afghan pattern is getting very popular! I would like to try it for an American Holiday such as 4th of July or Veterans Day and change the colors to red, white, and blue. Then it can be displayed more often! Stitchin' Crazy
Report Inappropriate Comment
Are you sure you would like to report this comment? It will be flagged for our moderators to take action.
Thank you for taking the time to improve the content on our site.

