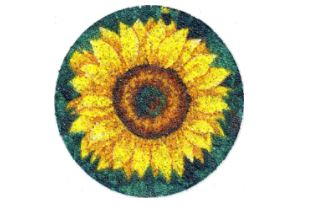
Beaded Sunflower Coasters
These beaded coasters from Art Glitter are a quick easy gift or great decorations for a summer cocktail party!

Materials:
- Art Glitter Large Clear Glass Micro Beads, 2 oz. jar
- Large tray to catch excess beads
- Art Glitter Opaque Ultrafine Glitter: color to match fabric background
- Fabric Dries Clear Adhesive and plastic tray
- Black Permanent Marker
- Quilter’s Fabric
- 1” Sponge Brush
- 1/4” Paint Brush
- 4” Cork Coasters
- Fabric Scissors
Instructions:
- Select a design on fabric for coaster. Place coaster underneath design, hold in place and turn upside down. Trace around coaster with permanent marker by holding marker perpendicular to fabric. It will make a circle approximately 1/8” larger than coaster. Cut out circle and lay upside down.
- Pour Fabric Dries Clear into plastic tray. Brush an even layer onto one side of cork coaster with sponge brush. Lay coaster onto fabric circle, glue side down, turn over and smooth out any wrinkles.
- Turn coaster over and trim off excess fabric. (Wipe off any glue on your scissors with a damp cloth). Brush on another layer of adhesive on top of fabric. Make sure adhesive layer is even and slightly thick. Spoon on beads while glue is wet, white and shiny. Flatten bead layer by placing coaster, bead side down, onto table and tap down lightly. Wipe away any beads hanging off the edge of fabric. Let dry in sun (bead side up), for 1/2 hour to an hour.
- Paint glue around side of coaster with 1/4” paint brush and sprinkle with opaque glitter, (Work in 2 or 3 sections so glue does not start to dry). Sprinkle a little more glitter over top of beads, tap off excess. Let dry in sun for several hours; brush off more excess glitter before using.
Tip: When picking out fabric: go with a light colored design, it shows up better through the beads.
Variations: Use #89 Martini Ultrafine Transparent glitter (the clearest of all our glitters), instead of beads. Then apply 3 to 4 thin coats of spray acrylic before using. Or add beads to the side of the coaster.
Read NextRuffled Throw Blanket

