Reverse Applique Scarf
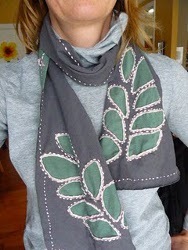
 This sewn scarf pattern is perfect for bundling up during the cold winter months. Since the main fabric is a recycled t-shirt, the Reverse Applique Scarf is cheap and easy to make. This how to make a scarf tutorial is the perfect combination of upcycling and style. In fact, this free sewing project idea actually makes those old t-shirts look even better than before. The applique technique used in this pattern is actually referred to as reverse applique. Reverse applique refers to a type of applique that is created by cutting holes into the top layer of fabric instead of sewing shapes onto the project. So, with this project, you not only get a brand new DIY scarf, but learn how to applique in a brand new way, as well.
Find even more sewing project ideas and free sewing patterns in our Sewing for Beginners, free eBook.This free downloadable collection of sewing patterns is full of sewing project ideas perfect for the brand new seamstress.
How to Reverse Applique a Scarf
Materials:
- Old, large-sized t-shirts in assorted colors
- Scissors
- Embroidery thread and needles
- Stencils
- Chalk
Instructions:
- Cut t-shirt through the front and back leaving the shoulder seam intact

- Cut two t-shirts (two different colors) the same way, then layered them together, shoulder seams facing in.
- Using embroidery thread, sew the two layers together using a basting stitch around the outside edge.
- Using chalk, draw a simple pattern onto the top layer of our material. You can use a stencil or freehand this.
- Stitch around the pattern using large stitches in a contrasting embroidery thread then cut out the center of the top layer, revealing the layer of fabric underneath.
- You can use your imagination when it comes to stitches, patterns and colors.
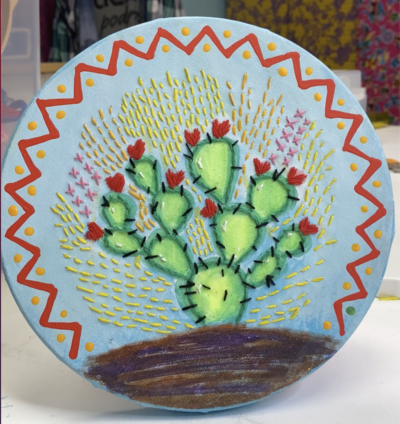
Read NextHow to Embroider on Canvas
Your Recently Viewed Projects
AmyBaby
May 16, 2011
This is a really great idea. I purchased turtle necks on clearance ($1) in 4x size in several bright colors and whipped out a few long ones. I made a stencil for leaves and a stem and made a rose yo-yo and tacked it on. They are so quick and easy you just cant go wrong and my friends loved them. Thank you Jennifer!
Report Inappropriate Comment
Are you sure you would like to report this comment? It will be flagged for our moderators to take action.
Thank you for taking the time to improve the content on our site.


