Glittery Bottle Cap Magnets
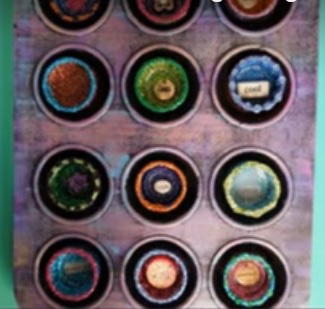
Plastic bottle cap crafts are a great excuse to reduce, reuse and recycle! Turn a boring fridge into a sparkly surface with Glittery Bottle Cap Magnets from Tiffany Windsor. This colorful project is simple and fun - make a bunch and create cool designs!

Materials:
- Aleene’s Magnetic Tacky Dots
- Aleene’s Original Tacky Glue
- Tulip Fashion Glitter (24 pack)
- Plastic bottle caps
- Glue brush
- Cardstock or plain white paper (to catch glitter)
- Wax paper
- Fine sandpaper
- Charms, buttons, beads
- Optional: muffin tin
Instructions:
- Apply Aleene’s Tacky Glue to inside of cap with brush.

- Hold cap over paper and sprinkle with glitter. Shake excess glitter onto paper and return excess glitter to container. Set bottle cap aside to dry.

- To apply glitter along the front edge of cap, pour a small amount of glitter onto wax paper and spread with fingers to create a circle of glitter slightly larger than cap. Next, pour a small puddle of Aleene’s Tacky Glue on wax paper. Dip cap into glue.

- Check to be sure that glue has applied all along the edge. If needed, dip into glue several times.

- Press glued edge into glitter.

- If needed, dip again into glitter to cover all exposed glue. Set aside to dry.

- Brush glue along outside edge of cap. Sprinkle with glitter. Set aside to dry.

- Rub sandpaper on back side of cap to roughen surface. Apply Aleene’s Magnetic Tacky Dot to back of cap.

- If desired, glue charms, buttons, and scrapbook embellishments into center of magnets. I love the effect when you place your embellishment in the cap and secure or cover it with 3D Lacquer. I also like to display my magnets in an upcycled muffin tin. I used the EcoHeidi Drybrush technique to paint my muffin tin.

For a comprehensive video tutorial of this project, check out How to Make Glitter Your Garbage Magnets.
Read NextPine Cone Angel Wings

