Look of Embossing with Glue Frame
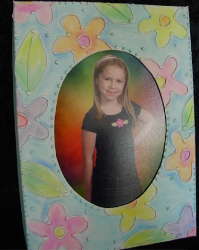
Are you ready to get creative and make cereal box crafts? Create a keepsake with this Look of Embossing with Glue Frame from Heidi Borchers. No one will know this project was created from the remnants of your favorite breakfast cereal.

Materials:
- Aleene’s Original Tacky Glue in the gold bottle
- Cereal box cardboard – 6” x 8” for each frame
- Stylus – for scoring cardboard
- Pencil
- White spray paint (I use Rustoleum Flat White)
- Tape
- Chalks – either decorator chalks or the pastel chalks (sticks)
- Brush – hard bristle (like a stencil brush)
- Aleene’s Matte Spray Sealer
- Clothespins
Instructions:
- To shape the cardboard into a frame, use a ruler and a stylus.Place the ruler ½” from the edge. Score the cardboard, by carefully running the stylus along the edge, keeping the ruler straight. Repeat on each side.

- Cut at each edge to make a flap.

- Place glue onto the flap.

- Line up flap edges.

- Use a clothespin at each corner to help hold the frame together until glue dries.

- Draw your pattern or design onto cardboard and cut out. Place pattern onto the frame and trace lightly with pencil.

- For a finer line of glue, make a nozzle from tape. Place a 2-½” piece of tape onto the existing plastic nozzle.

- Outline the pencil pattern on the frame with the glue. Hold the tip of the tape nozzle about ½” from the frame and let the glue flow onto the pattern.

- Add additional dots onto the pattern.

- Let the glue dry completely until clear.

- Paint the entire frame with the white paint.Let dry completely.

- You can use either pastel chalks (sticks) or decorative chalks and the hard bristle brush.Rub your brush over the chalk to pick up the chalk ‘dust’. Then place brush onto your prepared frame. ‘Scrub’ the chalk dust into each area. Then lightly blow off the excess dust.

- Color in each area.Clean or rub your brush on a paper towel in between each color.

- Fill in the background and sides. If desired, spray entire surface with spray sealer.

Read NextPine Cone Angel Wings

