Spooky Bat Necklace
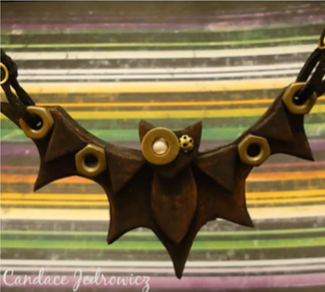
Scare up some fun this Halloween and create a super simple Spooky Bat Necklace from Candace Jedrowicz. DIY steampunk jewelry is a cool way to incorporate a rough industrial look into your wardrobe. This project is so easy, even kids can give it a try.

Materials:
- Aleene’s Super Thick Tacky Glue
- Craft foam – I used black, but any color would work
- Metallic Past – copper
- Washers – No larger than 1/3″ wide
- Nuts -no larger than 1/4″
- Scissors
- Bead for one eye – should fit into the center of the washer
- Tiny bead cap for the other eye – it needs to fit next to the washer on the bat’s face
- Craft knife
- Hole punch – 1/8″
- String or ribbon
- Wire – I used 20 gauge, but most any size will work
- Bat Necklace Template
Instructions:
-
Cut out the bat necklace template, trace on the foam and cut out.
-
Cut the gray areas out of the paper bat, keeping the head and body as one pieces. Trace all the pieces on the foam and cut out.
-
Cut out the head on the paper bat, trace on the foam and cut out.
-
Rub copper paste on the foam pieces. Do a tiny bit at a time. You can add more if you desire.
-
Cut a tiny x on one side of the individual bat head. Cut just large enough for the eye bead.
-
Place a tiny drop of glue on the cut x and push the bead in.
-
Glue all the foam pieces in place.
-
**You may want to cut the ears off the whole bat piece and the body with head piece, if they don’t line up with the individual head piece**
-
Punch holes just to the outsides of outer foam triangles.
-
Glue the metal pieces according to the photo above, making sure to glue the outer metal pieces over the holes. Allow to dry.
- Thread string through the holes. Tie knots and wrap the wire around the string tails and trim off excess.
For a comprehensive video tutorial of this project, check out How to Make a Steampunk Bat Necklace.
Read NextThe Walking Dead Dog Bed

