Cross Framed Embossing Card
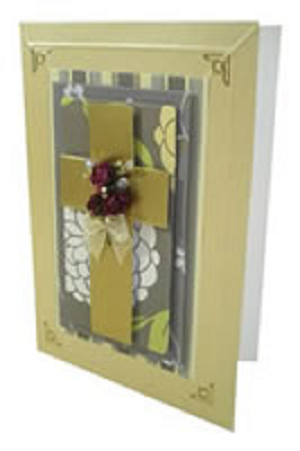
This framey embossed board card is a great way to celebrate Christmas, Easter or a Communion! By using the Illusion Embossing Board you can create this beautiful and unique card for a special occasion or holiday.
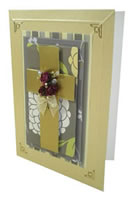
Materials:
- Illusion Embossing Board
- 6mm Embossing Tool
- 1 Sheet Of Letter Size Card
- Pieces Of Scrap Card Or Design Paper
- Metallic Card
- Drier Sheet Or Candle
- Embellishments
- Foam Pads
Step 1
Take a piece of cardstock and lay this face down on the board butted up against the raised upstands in the top left hand corner.
Rub the drier sheet or candle onto the wrong side of the card which is facing you. This will make the reverse of the card slippy, and enable the tool to glide smoothly over the sheet.Take the embossing tool and insert into the leader channel at the top of the board.
Step 2
Taking the embossing tool; push it into the leading channel at the top left of the board. Pull the tool towards you until you feel a resistance; this usually means the channel has changed direction or pattern.
Feel you way with the tool until you have completed the outer design of the frame. Push the tool into the leader channel again pulling it down the board until it locates in the second frame, now emboss the second frame. Leave this to one side for later.
Step 3
Take a sheet of Design paper large enough to fit over the second frame design. Hold it in place with low tack tape so the paper doesn’t move when you emboss it. Locate the tool into the leading channel and with an even pressure pull the tool towards you until you are lined up to emboss the second frame.
Emboss the second frame then cut it out on the outside of the embossing. Tip If you use a heavily patterned paper it may be difficult to followthe embossed line so turning it over to cut it out may be easier.
Step 4
Take a second sheet of design paper and once again; locating the tool into the lead channel; pull the tool towards you until you have located the 2nd inner frame. Emboss around this frame then cut out around the outside of the embossed line again. Repeat this once more locating the tool into the inner frame channel and cutting out around the embossed line.
Stick the design paper on top and you have instant created a matting and layering effect.
Step 5
Take 2 sheets of scrap paper and lay them on the opposite sideboard as shown in the picture. This leaves only a cross section of the pattern. Lay the metallic card onto the top right of the board (over the exposed shape) then emboss the cross shape omitting the centre score line on both the vertical and horizontal lines from the leading channel.
Cut around the cross on the outside of the embossed line. Add foam pads to the back of the cross and stick into place. Embellish the cross with a small display of paper flowers and sentiments.
Read NextThanksgiving Planner

