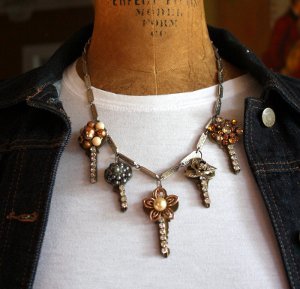
Vintage Look Blooms & Buttons Necklace
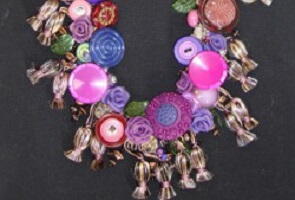
Did you know you can make an awesome jewelry craft made out of bread? That's not the only ingredient, but this Vintage Look Blooms & Buttons Necklace from Heidi Borchers uses bread dough to create a cool look. Check out this free craft tutorial and learn how to make it!

Materials:
- White bread- 1 slice
- Aleene’s Tacky Glue
- Zip Loc Bag- 2
- Tablespoon
- Acrylic paint
- Craft stick
- Cold cream (like Ponds)
Instructions:
- Remove the crusts from the bread and discard.

- Tear bread in to small pieces and place into a plastic bag.

- Add 1 Tablespoon Glue into the bag with the bread.

- Add several drops of acrylic paint into the bag (add more for a deeper color- less for a lighter color).

- Close bag and ‘knead’ the bread, glue and paint together.

- Remove from the bag with fingers (put on some cold cream first). It will be sticky, but it will come off after kneading for several minutes in your hand.

- Continue to knead the dough until it is off of your hands and the color is solid not mottled.

- Place the dough into a clean zip type bag. Let it set for several minutes.
- This is an air dry dough, be sure to keep in the bag while making flowers. Only remove what you are immediately using, then seal the bag.
- For each petal, you will need a small ball of dough. For each rose the small balls of dough need to be the same size. If you think the size of a garden pea, and continue with each ball of dough, it makes it easier. Flatten the first ball of dough between your fingers until it is almost paper thin (the thinner your petal, the more porcelain or ceramic the finished flower will be.)

- Take the first flattened piece of dough and roll from one side to the other to create the bud or center of the flower. As you roll the petal, slight push top edge of the petal back.

- Flatten another piece of dough for the second petal. Place this petal around the bud, slightly pushing back the sides at the top of petal. Pinch slightly to help hold petal in place.

- Flatten another piece of dough for the third petal. Place this petal opposite the second petal. Again slightly push dough at top edge of petal, to create the look of a real rose.

- Flatten another piece of the dough for the fourth petal. Place on the side in between the second and third petals but not directly behind either petal.

- Continue to add petals, until the rose is the size you want. When finished adding the petals, cut the bottom of the flower flat, so it will glue on the necklace.

- To create the necklace, use a braided trim with tassels. Sew the buttons in place and glue the roses around the buttons and beads. Add a clasp to create the necklace.
For a comprehensive video tutorial, check out How to Make a Vintage Inspired Blooms and Buttons Necklace.
Read NextCross Necklace Kids Craft
Your Recently Viewed Projects
gfann002 6877131
Feb 10, 2012
I made these bread dough roses many years ago from a recipe from the old Workbasket magazines. I made candle holders out of them. Lots of uses for bread dough roses.
Report Inappropriate Comment
Are you sure you would like to report this comment? It will be flagged for our moderators to take action.
Thank you for taking the time to improve the content on our site.

