Latch and Window Stamp Card
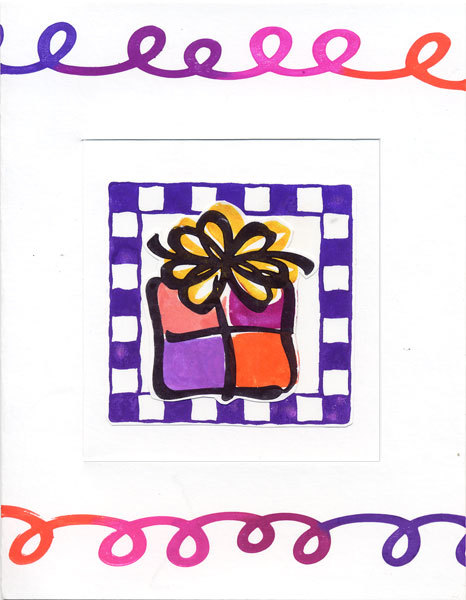
Though the picture does not do the card justice, the design is very clever. You create a latch that looks as though it's on the inside of the card and one card side slips into a slot creating a window. Borders and stamps can be used as you like, from Posh Impressions.

Materials:
- Posh Impressions stamps
- Marvy brush art markers
- 12” x 12” cardstock (you will get two cards out of this)
- opaque sticker paper
- X-acto knife and cutting board
- scissors
- cleaning tray and damp rag
- template
Use the template to do the following:
Steps:
- Cut card stock to measure 12" wide x 5 1/2" tall. You can cut two from a 12" x 12" paper, leaving a strip 12" x 1" that will be discarded.
- Score card stock at 4 1/4" and then 8 1/2" to give you 3 panels measuring 4 1/4" x 4 1/4" x 3 1/2".
- Copy the latch guide onto your card stock and cut out an inside square, making a template. Place the template on panel 1, trace (lightly) the top, bottom and right side of the square. . Cut on the line using a straight edge ruler and x-acto knife. DO NOT cut the left side of the square. Fold card on score lines and slip the "latch" of panel 1 under the edge of panel 3.
- Stamp a pattern like the curly lines on the top and bottom border of what is now the front of your card. Then stamp the frame and an image of your choice inside the frame on opaque sticker paper. Or, you can stamp the frame on sticker paper and inside image on separate sticker paper if you want more sticker paper layering. Cut so to leave a tiny bit of white around all images. Peel the backing from the sticker paper and place it on the front of your latch on the front of the card. Later you can do more elaborate cards using the fold to make the latch.
Read NextFree Printable Scripture Dolls

