Paper Covered Picture Frame
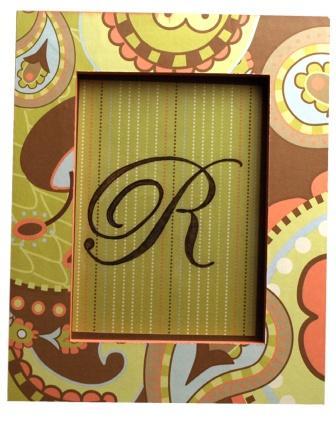
Two coordinating sheets of decorative paper help frame a letter in this pretty wood frame. Make one for every member of the family or give as a gift.

Materials:
- Walnut Hollow® #27753 Wood Frame – Small
- Walnut Hollow® #9912 Oil Colored Pencils
- Alphabet Stencil
- Paint (color of choice)
- 2 Sheets of coordinating Decorative Paper, 1 sheet of plain Construction
- Paper
- Other Supplies: brush, craft glue or paper glue, paper towel, pencil, Phillips screwdriver, ruler, sandpaper, scissors or X-acto knife, spray varnish
Instructions:
- To prepare wood for painting, use Phillips screwdriver to remove screws holding tabs on back of frame. Remove tabs, backing, and glass. Use sandpaper to lightly sand wood surface. Remove dust with paper towel.
- Use brush to apply a coat of paint to entire wood surface. Let dry. Apply second coat. Let dry.
- Apply 2-3 coats of spray varnish to frame. Let dry.
- Use ruler to measure decorative paper the same size as the front of frame. Use scissors to cut paper to size. Use glue to adhere paper to frame. (Another option) Apply glue to frame front. Place a piece of paper that is larger than frame on glue. Press in place. Place frame, paper side down, on cutting mat. Use X-acto knife to cut along outer edges and frame opening. Let dry.
- Use scissors or X-acto knife and ruler to cut construction paper to size of glass. Cut coordinating decorative paper slightly smaller than the frame opening so a quarter inch of construction paper shows around frame opening.
- Choose stencil alphabet letter to trace. Place stencil on the smaller decorative paper. Use pencil to trace letter. Use colored pencils to color in letter. Use glue to adhere initialed paper to construction paper.
- Replace glass in frame. Insert initialed paper. Replace backing. Use Phillips screwdriver to replace screws.
Read NextHow to Make Shaker Cards

