Cookie Decorating Party Decor
Gather the kids together for a fun cookie decorating party! This Cookie Decorating Party Decor is easy to make and is a great way to keep the kids entertained during a birthday party or gathering. You could even have the kids help you decorate your holiday cookies by hosting the cookie decorating party right before the holidays. With directions on how to make the invitation, decorations, and even a few party favors, this project is a one-stop shop for an awesome cookie party.
Primary TechniquePaper Crafts

Materials:
- That’s Amore Squeeze Punch (Extra-Large)
- Seal of Approval Squeeze Punch (Large)
- Seal of Approval Squeeze Punch (Extra-Large)
- Round ’n Round Squeeze Punch (Extra-Large)
- Round 'n Round Squeeze Punch (Large)
- Corner Squeeze Punch (1/4 Round)
- 1/4" Circle Hand Punch
- 1/4" Rectangle Hand Punch
- Circle Shape Template (8 1/2" x 11")
- Ultra ShapeXpress™ Shape Cutter
- Micro-Tip® Scissors (No. 5)
- Razor-edge Softgrip® Scissors (8")
Instructions:
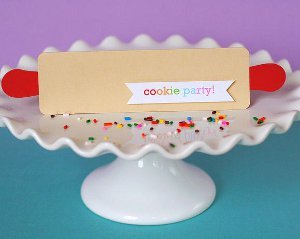
Rolling Pin Invitation

- Trim tan cardstock to 6.5 x 4 inches and fold in half.
- Round all corners with Corner Squeeze Punch.
- Punch two XL hearts from red cardstock and trim off one hump from each with scissors.
- Adhere trimmed heart to each side of invitation for rolling pin handles.
- Adhere sentiment printed on white cardstock to front of invitation to complete.
Monogram Cookie Aprons

- Embellish aprons for guests with monogrammed “cookies” frosted with sprinkles. Begin with an apron blank, or create your own as I’ve done here with the easiest DIY apron. Just fold back the corners of a dish towel, iron creases, trim and turn under twice to sew hem, and sew on washable ribbon for ties.
- Hand-draw letter-shaped “cookie” backwards onto non-adhesive side of iron-on adhesive sheet with permanent marker. Make corners rounded to give more of a cookie feel.
- Apply iron-on adhesive sheet to back of light brown fabric (follow manufacturer’s directions).
- Once cooled, cut out letter with Razor-edge Softgrip Scissors and iron onto front of apron per manufacturer’s directions.

- Once cooled, draw along cookie edges with fabric puffy paint to mimic frosting.
- Hand sew bugle beads to cookie to mimic sprinkles.

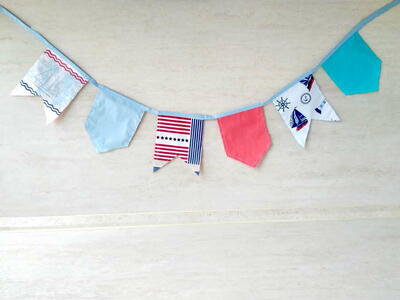
Cookie Banner

- The new 4XL Lever Punches are a great size to create party banners! I used the 4XL Pretty Scallops punch to create frosting for a super easy cookie banner.
- Cut 4-inch circles from assorted brown cardstocks using the Ultra ShapeXpress with Circles template on a cutting mat for desired length of banner. Cut 2-inch circles in the same manner from assorted colors for sprinkles.
- Punch 4XL scalloped circles from assorted colorful cardstock.

- Punch ‘sprinkles’ into scallops using Rectangle hand punch.
- Assemble cookies in order shown.
- Punch another set of rectangles on sides of cookie to string ribbon to tie bows for assembly.
Cookie Straws

- Punch L circle from brown cardstock.
- Punch L scalloped circle from assorted frosting-colored cardstock.
- Adhere circles together and punch 1/4 inch circle at center and take a ‘bite’ from cookie using the scalloped circle punch to complete.
Cookie Tag for Take-Out Boxes

- Repeat cookie straws directions using XL punches, omitting punched center.
- Punch 1/4 inch rectangle at top to string ribbon for hanging on handle.

