Polymer Clay Cookie Buttons
Make your own delicious looking buttons and add them to all of your favorite wearables. Polymer Clay Cookie Buttons from Candace Jedrowicz look good enough to eat and add a fun touch to everyday items. Button craft ideas don't get much cuter than this.

Materials:
- Aleene’s Paper Glaze
- Brown acrylic paint
- Polymer clay – white, brown, gold metallic, yellow and orange
- 20 Gauge wire
- Round nose pliers
- Chain nose pliers
- Wire cutters
- Needle tool or tooth pick
Instructions:
-
I used a mold making medium to make a mold , but you can just as easily make a simple rounded form.The advantage to using a mold is that you can add the shank while the clay is in the mold, so it maintains it’s shape.

-
Spritz the mold with water. Condition a small amount of clay.

-
Press the clay into the mold.

-
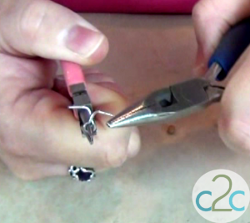
To create a shank, bend a 1″ piece of 20 gauge wire in half, leaving the bend rounded.

-
Close the loop of the shank and bend the wire ends out.

-
Push the shank down into the back of the button and small bits of clay over the gap in the clay and smooth.

-
Push the back of the mold to remove the button. Bake according to the directions.

-
I mixed a little brown acrylic paint into a bottle of Aleene’s Paper Glaze to make chocolate chips, but you can mix a small amount of both and apply dots with a toothpick.

-
It you want to make a holed button, don’t add the shank, remove the clay from the mold and make holes before baking.

For a comprehensive video tutorial of this project, check out How to Make Chocolate Chip Cookie Buttons.
Read NextThree Blind Mice Trinket Box

