Owl Paper Cup
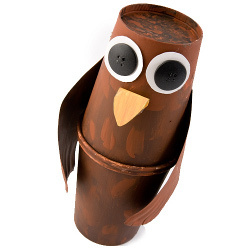
Make the cutest owl ever made with a paper cup, your kids will just love this Plaid project. An easy and fun project for the kids to make as they learn about animals or just feel like exploring with their set of paints.
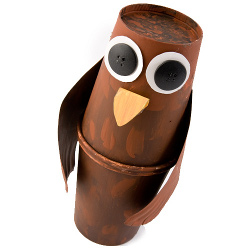
Materials:
- 44219 - Apple Barrel Brush Sets - Wood Brush Set, Flats
- 462 - FolkArt Artists Pigments - Burnt Umber 2 oz.
- 679 - FolkArt Artists Pigments - Turner's Yellow, 2 oz.
- 943 - FolkArt Artists Pigments - Burnt Sienna, 2 oz.
- 2 paper cups
- Paper plate
- Scissors
- Craft glue
- Wax paper
- 2 large black buttons
Instructions:
-
Cover work area with wax paper.
-
Glue edges of cups together. Hint: you can place several stones, rice, etc. inside for a “shaker” and also to weight.
-
Cut out owl wings, beak, and eyes from paper plate using pattern.
-
Glue edges of wings on either side of cups as shown. Let dry.
-
Paint beak with Turner Yellow. Let dry.
-
Paint entire owl with Burnt Umber and Burnt Sienna, mixing on same brush so effect will be “spotchy”. Let dry.
-
Glue on white circles for eyes. Glue buttons on top.
-
Fold beak in half and glue bottom side to cup.
Read NextHomemade Story Book for Kids
Your Recently Viewed Projects
Bronze Hazel
Feb 01, 2017
This owl is super cute. I love the idea of putting some rice or pebbles inside to make a 'shaker' out of it. When I made it with my kids we just used their regular poster paints and these worked perfectly. I would definitely recommend this as a rainy day craft.
Report Inappropriate Comment
Are you sure you would like to report this comment? It will be flagged for our moderators to take action.
Thank you for taking the time to improve the content on our site.

