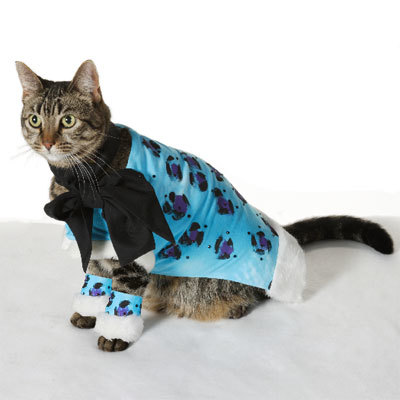
Leopard Kitty Outfit
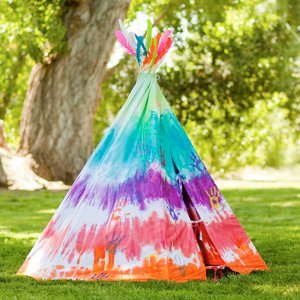
Tie dye has never been so fun. Not only can you make clothes for yourself, but you can dress your kitty now. Make your friend look fierce with tie dye and fabric paint from I Love to Create.

Materials:
- Aleene's® Fabric Fusion™ Permanent Dry Cleanable Fabric Adhesive™
- Tulip® One-Step Fashion Dye™
- Turquoise
- Tulip® Surface Cover™
- Tulip® Glam-It-Up!™ Fashion Art Tweezers™
- Tulip® Soft Fabric Paint™
- BI15793 Grape
- BI15801 Ebony
- Tulip® Cordless Heat Setting Tool™
- Tulip® Glam-It-Up!™ Iron-On Crystals™
- 25622 Purple
- 26589 Black
- Foil
- Iron
- Sewing pins
- Hook-and-loop – sew on – 12”
- Tape measure
- Pencil
- Brush – ½” flat
- Scissors
- Sewing machine
- White T-shirt or fabric
- Black fabric – ¼ yard
- Blow dryer (optional)
- Faux fur trim – 1½ yards
Pattern
Steps:
Dying Fabric:
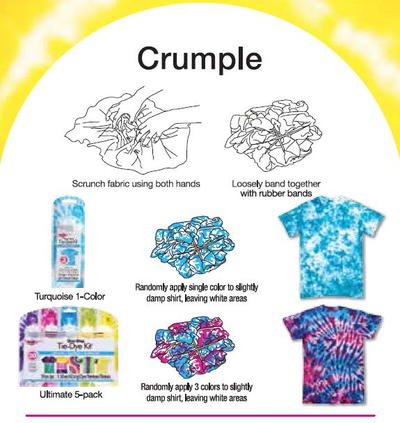
- Cover work surface with Surface Cover.
- Wash white fabric then place damp fabric on prepared work surface.
- Wearing gloves from dye box, fill Turquoise dye bottle with water to indicated line. Shake to thoroughly mix.
- Crumple fabric then squeeze dye onto fabric, squeezing and turning fabric. Let set 4 to 6 hours then wash in washer with small amount of laundry soap. Dry in dryer and iron smooth.
Painting Fabric:
- Place a clean Surface Cover on work surface and lay fabric on work surface. Squeeze a puddle of Grape Soft Fabric Paint on foil.
- Use the brush to paint abstract shapes about 1” apart randomly on fabric. Clean brush then dab Ebony paint around Grape sections as shown, creating leopard pattern.
- Let dry – a blow dryer will speed this step.
Assembly:
- Measure cat then enlarge pattern as needed to fit.
- Double dyed fabric, right side to right side, then pin pattern in place. Cut out.
- Sew a ½” seam around edges, leaving bottom edge open. Trim and clip seams, turn right side out then iron smooth.
- Measure around front legs and add 2”, then cut fabric to match. Sew along three sides, turn inside out and iron smooth.
- To create scarf, measure and cut black fabric into two 3” by 24” strips. Place strips right sides together then sew a ¼” seam around sides, leaving a 6” opening on one side. Trim and clip seams, turn right side out then iron smooth. Glue opening closed and let dry.
- Apply a thin bead of Fabric Fusion along inside edge on opening of jacket. Press edges closed. Repeat step with opening of leg cuffs. Let dry.
- Cut fur trim 2” longer then lower edge of jacket then glue strip along edge, folding and gluing excess to back. Cut trim to about 1” wide then glue around neck opening and bottom of leg cuffs. Let dry.
- Sew hook-and-loop tape where indicated on pattern.
- Turn on Cordless Heat-Setting Tool following package instructions. Working in small sections at a time, use Fashion Art Tweezers to position crystals where shown or desired. Touch tip of hot tool to top of Iron-On Crystal, hold for about five seconds then remove heat. Let crystal cool then touch with fingernail making sure it has adhered, if not add a few more seconds of heat. Add crystals to all pieces.
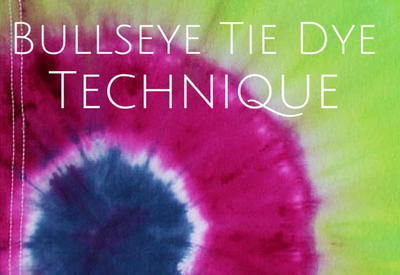
Read NextTie Dye Dollar Store Flowers