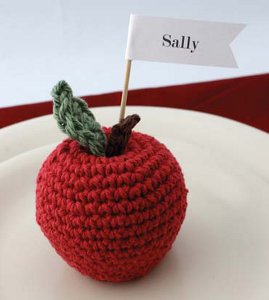
Apple Place Holder
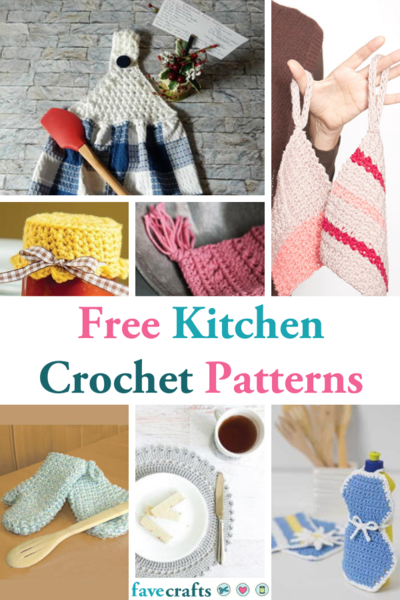
This great crochet pattern from Lily Sugar n' Cream is perfect for any dinner party. It is a cute way to reserve seats and add a festive touch to your home decor.
Materials:
- Lily® Sugar‘n Cream® (70.9 g/2.5 oz; 109 m/120 yds)
- Main Color (MC) (01530 Country Red) 1 ball
- Contrast A (01222 Country Green) 1 ball
- Contrast B (01130 Warm Brown) 1 ball
- Note: 1 ball of MC will make 3 Apples.
- Size 3.5 mm (U.S. E or 4) crochet hook or size needed to obtain gauge.
- 1" x 3" [2.5 x 7.5 cm] piece of paper. Toothpick. Glue. Stuffing.
- A 16 sc and 18 rows = 4" [10 cm] gauge.
Instructions:
Apple
- Beg at top of Apple with MC, ch 2. Stuff as you go.
- 1st rnd: 6 sc in 2nd ch from hook. Join with sl st to first sc. 6 sc.
- 2nd rnd: Ch 1. 2 sc in each sc around. Join with sl st to first sc. 12 sc.
- 3rd rnd: Ch 1. 1 sc in each sc around. Join with sl st to first sc.
- 4th rnd: Ch 1. (1 sc in next sc. 2 sc in next sc) 6 times. Join with sl st to first sc. 18 sc.
- 5th rnd: Ch 1. (1 sc in each of next 2 sc. 2 sc in next sc) 6 times. Join with sl st to first sc. 24 sc.
- 6th rnd: Ch 1. (1 sc in each of next 3 sc. 2 sc in next sc) 6 times. Join with sl st to first sc. 30 sc.
- 7th rnd: Ch 1. 1 sc in each sc around. Join with sl st to first sc.
- 8th rnd: Ch 1. (1 sc in each of next 4 sc. 2 sc in next sc) 6 times. Join with sl st to first sc. 36 sc.
- 9th to 12th rnds: As 7th rnd.
- 13th rnd: Ch 1. (1 sc in each of next 4 sc. Draw up loop in each of next2 sc. Yoh and draw loop through all loops on hook – sc2tog made) 6 times.
- Join with sl st to first sc. 30 sts.
- 14th rnd: As 7th rnd.
- 15th rnd: Ch 1. (1 sc in each of next 3 sc. Sc2tog) 6 times. Join with sl st to first sc. 24 sts.
- 16th rnd: As 7th rnd.
- 17th rnd: Ch 1. (1 sc in each of next 2 sc. Sc2tog) 6 times. Join with sl st to first sc. 18 sts.
- Lightly stuff Apple.
- 18th and 19th rnds: As 7th rnd.
- 20th rnd: Ch 1. (1 sc in next sc. Sc2tog) 6 times. Join with sl st to first sc. 12 sts.
- 21st rnd: Ch 1. (Sc2tog) 6 times. Join with sl st to first st. 6 sts. Fasten off,leaving a long tail. Finish stuffing Apple. Thread tail through rem sts and draw tightly. Gently shape work to look like an apple.
Leaf
With A, ch 5.
- 1st rnd: 1 sc in 2nd ch from hook. 1 hdc in next ch. 1 dc in next ch.(2 hdc. Ch 2. Sl st in 2nd ch from hook. 2 hdc) in next ch. Working intoopposite side of ch, work 1 dc in next ch. 1 hdc in next ch. 1 sc in last ch.Join with sl st to first sc. Fasten off, leaving a long tail for stitching.
Stem
With B, ch 7.
- 1st row: 1 sc in 2nd ch from hook. 1 sc in next ch. Sl st in each of next 4 ch. Fasten off, leaving a long tail for stitching.
- Sew Stem and Leaf to top of Apple as shown in picture.Handwrite or use a computer to add message to place card. Adhere toothpick to end of place card with glue. Gently roll place card around toothpick once. Poke end of toothpick into top of Apple.
Your Recently Viewed Projects

Thanks for your comment. Don't forget to share!
smeb5 4909276
Mar 15, 2014
I like the selection of you patterns, but every time I print one off I have to end up writing in some of the directions. I don't know if it's my computer but I don't have this trouble with other patterns for other websites.
Report Inappropriate Comment
Are you sure you would like to report this comment? It will be flagged for our moderators to take action.
Thank you for taking the time to improve the content on our site.