Shrink Plastic Lettering
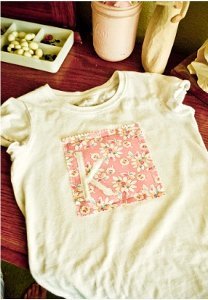
Add lettering to a plain T-shirt with this tutorial from Tiffany Windsor. Easily add personalized letters to your favorite wearables. The result is completely washable!


Materials:
- Sizzix Big Shot
- Sizzix Alphabet Set
- Oven or heat gun
- Shrink plastic – clear or colored
- T-shirt (plain or decorated)
- Needle and thread – (to match t-shirt)
Instructions:
This is a quick and easy project. Just grab your Big Shot and alphabet dies! Cut your plastic about ½” larger than the letter. Lay onto die, layer with the cutter pads and run through your Big Shot. Don’t worry that the plastic may crinkle slightly as once you shrink it you will not see the imperfections.


Punch holes with hole punch. Remember that your plastic will shrink to about 40% of its original size. Also note on this example, I used clear shrink plastic which is cool because the color of the t-shirt shows through the lettering.


To shrink, place on non-stick sheet, place in oven and shrink according to package directions or use heat gun. If using the heat gun, I like to use the tip of a wooden skewer inserted into hole to keep letters from flying away during the shrinking process.
Sew each letter into place on t-shirt. To wash, just turn wearable inside out and toss in the washer. I also put this tee into the dryer but you need to be sure that nothing snags the letters or you will find yourself re-sewing!
Tiffany’s Designer Tip: To determine spacing for my lettering, I lay them on the sticky side of a piece of tape and then lay the word over my wearable. This is also a great way to store letters and words for future use.

