Fall Table Setting
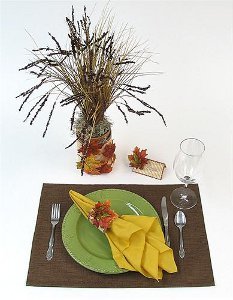
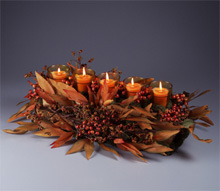
Spice up your table this fall with this Fall Table Setting tutorial. This DIY table setting will have your table looking like autumn once you've finished. Creating simple place mats, napkin rings, and a fabulous centerpiece, this table setting is sure to impress your guests. Full of texture and rich fall colors, this is the perfect project to show off at your next dinner party. It could even be the setting for your Thanksgiving table. It's an easy craft that will have your table looking charming in no time at all.

Materials:
- CraftBond™ glue spots, 3D popup-medium
- CraftBond™ glue spots, thin-medium
- CraftBond™ double sided tape, permanent-1/2"
- CraftBond™ gel pens
- CraftBond™ wet & dry dualtip pen
- X-ACTO® designer series 12" rotary paper trimmer
- X-ACTO® designer series 12" x 12" self healing cutting mat
- X-ACTO® designer series 6" precision tip scissors
- X-ACTO® designer series 12" metal ruler
- X-ACTO® designer series scallop 4 pack decorative edge scissors
- 12" x 12" scrapbook paper: gold stripe, rust stripe and leaf print
- 6 1/2" tall glass container with 4 1/2" diameter opening
- Two bush stems of grass with brown seeds, approx. 20" tall
- Three bush stems of grass without seeds, approx. 18" tall
- Fall silk floral leaves, ranging in size from 1 1/2" to 4", five for jar, two for each napkin ring and placecard
- Fall berry cluster, one per napkin ring and placecard
- 2 5/8" x 3 1/2" x 7 7/8" green dry floral foam
- Spanish moss
- 14" length of 1/2" wide brown trim
- Serrated knife
Instructions:
-
Use serrated knife on X-ACTO® Designer Series 12" x 12" Self Healing Cutting Mat to trim floral foam to snuggly fit into jar. Discard pieces/crumbs and set aside.
-
Use X-ACTO® Designer Series 12" Rotary Paper Trimmer to cut papers: 5 1/2" x 12'' and 3" x 5 1/2" rust stripe; 5" x 12 " and 3" x 5" gold stripe paper. Wrap long rust stripe paper around jar and attach with CraftBond™ Double Sided Tape, Permanent to back of jar. To completely cover jar, piece at back using smaller piece rust and Double Sided Tape.
-
Use X-ACTO® Designer Series Scallop Decorative Edge Scissors to trim 1/4" from long edges of gold stripe paper. Similarly, wrap paper around jar, on top of rust stripe. Use Double Sided Tape to hold and piece as needed.
-
Use X-ACTO® Designer Series 12" Metal Ruler and 6" Precision Tip Scissors to measure and cut 14" length brown ribbon. Apply CraftBond™ Wet & Dry Dualtip Pen to back of ribbon and attach by wrapping around mouth of jar, trimming ends with 6" Precision Tip Scissors to fit. Arrange five leaves on front of jar and use CraftBond™ Glue Spots, 3D Popup-medium to attach.
-
Insert bush stems of grasses into foam inside jar, interspersing grasses with and without seeds. Cover foam inside jar by placing Spanish moss into jar and gluing around stems of arrangement, using Wet & Dry Dualtip Pen.
-
For each napkin ring, use Rotary Paper Trimmer to cut papers: 2 3/4" x 8" rust stripe paper and 2 1/4" x 8 " floral stripe paper. Use Decorative Edge Scissors to trim 1/4" from long edges. Use Double Sided Tape to attach floral stripe to rust stripe paper. Roll paper into cylinder, overlap slightly and secure with Double Sided Tape. Use Glue Spots, 3D Popup-medium to attach two layered leaves to napkin ring. Use CraftBond™ Glue Spots, Thin-medium to attach berries to leaves.
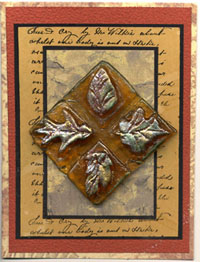
- For each placecard, use Rotary Paper Trimmer to cut papers: 4 x 4 1/2" rust stripe paper and 2 1/4" x 3" gold stripe paper. Fold rust stripe in half to make 21/4" x 4" horizontal placecard. Use Decorative Edge Scissors to trim 1/4" around all edges of gold stripe paper. Use Double Sided Tape to attach gold stripe paper to front of placecard. Use Glue Spots to attach leaf and berries. Use bronze CraftBond™ Gel Pen to personalize.
Read NextVintage Doily Pumpkins

