Funky Colored Beads
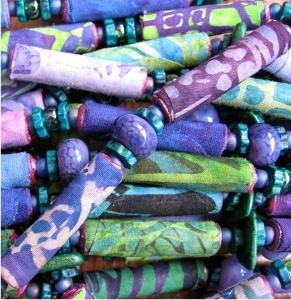
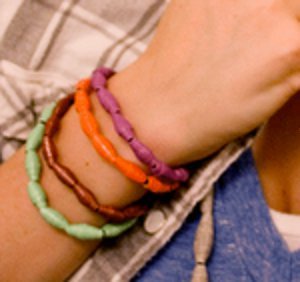
These Funky Colored Beads are great way to add some color to your outfit! You can make your own glass beads using this tutorial from Delphi Glass. Handmade glass beads make great gifts and are a fun way to create one of a kind jewelry patterns.

Materials:
- Fireworks Bead Making Kit
- Fireworks Torch Heads
- Mandrel and Rake Sets
- Bead Release 8 oz.
- Fiber Blankets
- Shaping Marver Sets
- Bottle Holders
- Work Surfaces
- Italian Glass Rod Assortment Pack (28 rods/pack)
- Scrub sponges (available at hardware and grocery stores)
- UV Glasses
- Mastering the Glass Bead Video from Delphi Glass
- MAPP (Methyl Acetylene Propadiene) Gas Canisters (available at most hardware and grocery stores)
- Screwdriver
Instructions:
Safety
- Review safety procedures. When working with glass, protect feet and legs by wearing pants and closed top shoes. Eye protection is essential. Use caution while working with hot torch and glass to ensure proper and safe use. Work area should be free from curtains or other combustible materials. Make sure work area is also well ventilated.
Video
- Watch the Mastering the Glass Bead video. 40 minute video features Karen Stavert, one of the nation’s most respected glass beadmaking artists and instructors. She delivers an educational and enthusiastic class on how to crate a multitude of different beads.
Tools and Supplies
- Review bead tools and understand their uses.
- Fiber Blanket: used to slowly cool the completed bead
- Bottle Holder: Assembly clamps on the edge of any table to hold the MAPP Gas tank securely in place without slipping
- Bead Release: a thick liquid coating that prevents glass from sticking to metal
- Fireworks Torch Head: Designed exclusively for Fireworks, this unique torch head has a self-igniting system for easy use. Special regulator dial at the base of the nozzle allows you to adjust air flow for truer, clearer and more vibrant colors. Easy on-off switch eliminates the need to light a match, making use safer, and students more confident.
- Rake: Use to manipulate molten glass by dragging, raking, feathering or swirling the surface. It can be used to make air bubbles inside the bead or poke holds through the glass. Fireworks rake has a bent tip for a comfort grip.
- Mandrels: Stainless steel rods used to wrap molten glass around to create a bead. The mandrels have a low heat transfer, keeping fingers cool while working in the direct open flame.
- Glass Rods: The included assortment of translucent and opaque Italian glass rods are 104 COE (coefficient of expansion) and heat evenly and quickly in the torch flame.
- Scrubber: Helps to remove bead and mandrel release residue.
- Marver: Roll or press glass into the ridges of this 2” x 4” textured surface to make interesting patterns. Experiment by rolling bead at different angles. Warm marver before using by holding 6” from the flame for approximately 15 seconds.
- Heat Resistant Work Surface: Protects your table or counter top.
Set Up
- Place heat resistant work surface on a counter or table top. Place all tools on the work surface for easy access.
- Prepare the mandrels by quickly dipping them into the mandrel release, 2”-3” deep and twirl out to insure a thin, clean, even coating. Secure mandrels upright and allow them to air dry for 15-20 minutes or dry the mandrels slowly in the torch flame. Mandrels are dry when they turn a light gray. Mandrel release must dry completely before mandrels can be used.
- Attach the torch head to the MAPP Gas tank by screwing the threaded opening onto the tank. Secure the tank to the edge of the table or counter top, using the bottle holder attachment. Wrap the bottle band around the MAPP tank and insert the “L” bracket between the tank and the band. Using a screwdriver, tighten the locking screw until snug. Position the tank so one arm of the “L” bracket is on the table top, secure to the table using the “C” clamp. The torch head should be directed away from you.

Igniting the Torch
- The source of heat is the MAPP Gas tank and torch head. Ignite the torch by turning the control valve at the rear of the torch head slowly counter clockwise, releasing the gas. When you hear a slight hissing sound, gently squeeze the trigger.
- Adjust the flame height with the control valve knob, providing a “blue” flame length of 1” and adjusting the airflow opening to regulate the gas to air mix.
- Turn off the torch by turning the control valve clockwise, until the flame is exhausted. Do not attempt to handle the torch head until it has sufficiently cooled down.
Basic Bead Techniques
- Begin by warming a glass rod in the flame. NOTE: Wear UV safety glasses. Starting 3”-4” from the flame, gradually bring the tip of the glass towards the blue flame. Work the glass in the flame until a hot molten ball forms. In your second hand, warm your coated mandrel using the same procedure used to warm the glass rod.

- When molten and glowing, wrap the glass evenly around the heated mandrel. While rolling the mandrel away form you, drape the glass on the mandrel from the top down. Do not pull cool glass. Pulling glass may remove the mandrel release resulting in residue inside your finished bead.

- Heat more glass as you roll. When sufficient glass is wrapped on mandrel, separate the glass rod from the bead by directing heat to the joint and pulling away.
- Place the glass rod on the work surface to cool.
- Continuously roll the mandrel with your bead in the flame to shape.

- Using the smooth surface of the marver, briefly take the bead out of the flame and roll on the marver surface to shape your bead based. The bead will cool and start to harden upon contact with the marver. When this occurs, place the bead back into the flame to soften and roll again on the marver until the desired shape is reached.
- To increase the bead size or to add another color, begin by heating another glass rod. Keep the base bead warm near flame while heating the glass rod.
- One the glass glob is molten, add it to the base bead. Turn the mandrel, adding glass until you are satisfied with the size and shape of the bead. The bead should not be larger than 10 mm in diameter to prevent cracking during cooling.
- Keep rolling the mandrel in the flame until a well balanced bead is formed, using the marver surfaces as desired.
- Holding the bead at an angle, roll it against the marver edge to bevel the end. If the glass becomes too hard to shape, return the bead to the flame to soften the glass.

Bead Cool Down
- Cool the bead by removing it slowly from the flame and allowing the red glow to disappear, 10-15 seconds.
- Place the bead and mandrel between the layers of the fiber blanket to cool. Do not remove the beaded mandrel from the blanket for 60-90 minutes to allow sufficient cooling to take place. If not, the bead may crack.

- After the bead has cooled, remove from the mandrel. Hold the bead with the scrubber and turn the mandrel to loosen. The bead release residue will flake ways as you slide the bead off. If the bead is difficult to remove, soak it in water.
Tool Care Instructions
- Proper bead making technique is to heat glass in the flame while working in direct heat with the tools. If a tool is used to hold hot glass, make sure it is not placed directly in the flame. Hot metal tools will stick to the glass. If you are using a tool to hold the glass, you want the metal warm, but not hot. It is acceptable to warm metal tools by quickly placing it near the flame.
- If you are using a metal tool to poke, scrape or rake the glass, they should be as cool as possible. If it becomes too hot, switch it with a backup tool or immerse the metal tool in water to cool it down.
Read Next101+ Free Beading Patterns

