Sparkling Nativity

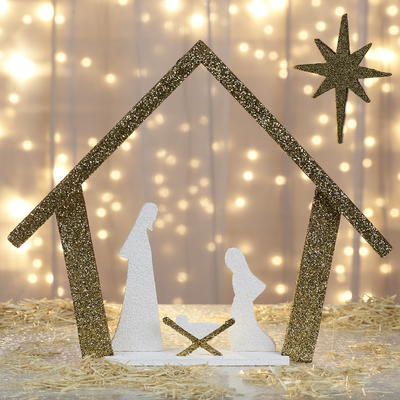
This stunning Sparkling Nativity from Floracraft is the perfect DIY Christmas craft for those looking to add a touch of glam to their Christmas decorations. This gorgeous nativity is made of Floracraft foam, glitter, toothpicks and craft sticks. It has a stunning modern design with a traditional religious motif. You will love displaying this gorgeous nativity on your mantel or as a decorative accent anywhere in your home. This easy craft is a true showpiece - it will add a bit of joyous sparkle to any room you choose to display it in.

SeasonWinter
HolidayChristmas
Materials List
- FloraCraft® Make It: Fun® Foam Sheets: 1”x12”x18” and ½”x12”x12”
- White and Gold Acrylic Paint
- Gold Glitter
- Iridescent and Gold Fine Glitter Dust
- Clear Spray Sealer
- Craft Sticks
- Toothpicks
- FloraCraft® StyroCutter® Plus
- Low-Temp Glue Gun
- Serrated Knife
- Ruler
- Sequin Pins
- Monofilament Line
Project Instructions
-
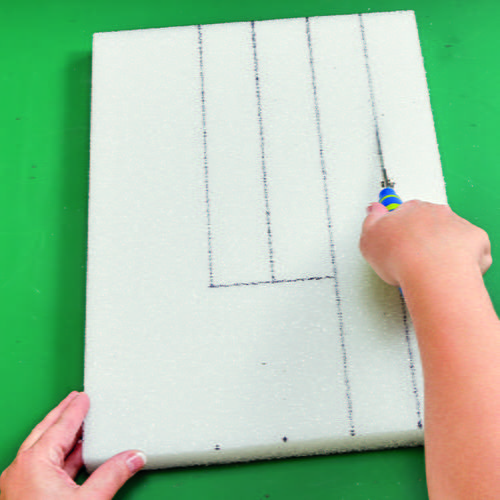
Cut two 2”x18” and two 2”x12” pieces from the 1” foam sheet for the roof and walls. Cut one 4-½”x12” piece from the ½” foam sheet for the base
-
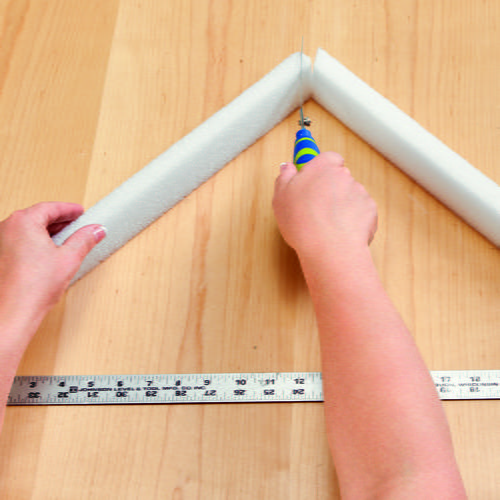
Lay the roof pieces on the 1” edge angled end to end to create the roof shape. Cut angles in the roof piece ends so that they come together flush at the peak of the roof. The bottom corners of the roof should measure about 24” apart. Glue the roof pieces together. Insert a toothpick between the pieces for added support.
-
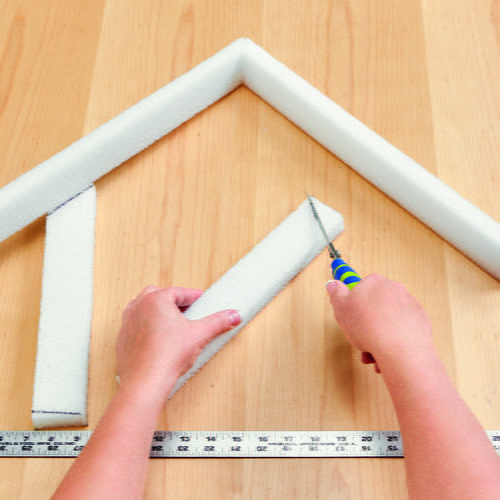
Lay the two wall pieces under the roof about 4” in from each end. Angle the walls in slightly at the bottom. The gap between the walls should be about 10-½” at the bottom. Lay the roof over the tops of the walls and trace the pitch of the roof on each wall. Cut the marked angles in the walls so they come together flush with the roof. Glue the walls in place. Insert a toothpick between the pieces for added support. Draw a line straight across the bottom of each wall piece so they stand flat against the table. Cut a ½”x ½” notch out of each inside corner of the walls. This is where you will insert and attach the base.
-
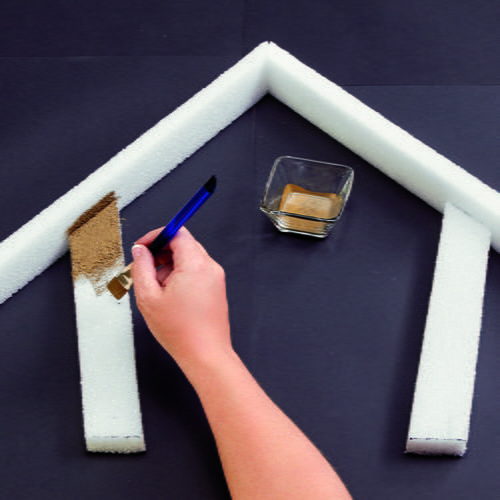
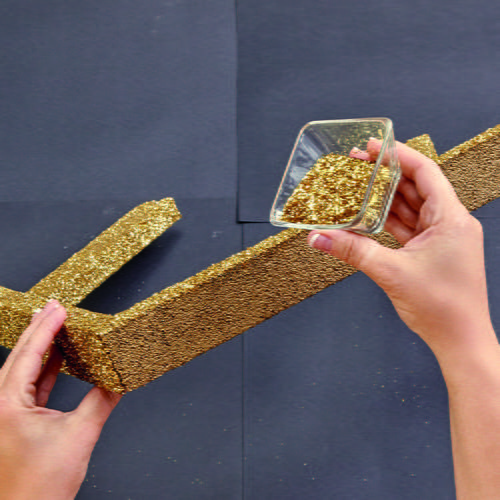
Paint the roof and walls gold. While the paint is still wet sprinkle with gold glitter. The paint will secure the glitter in place as it dries. Once completely dry; spray with a clear sealer to help prevent glitter from flaking off.
-
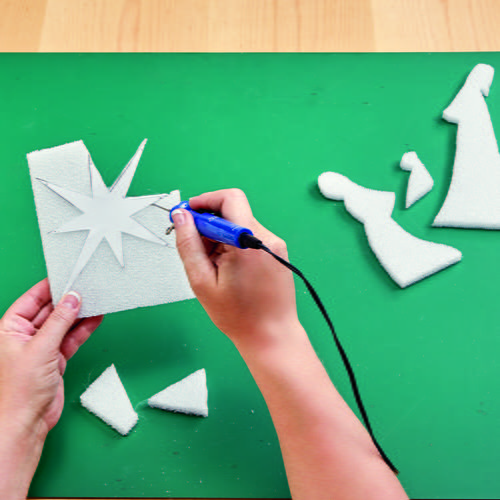
Cut out the paper templates and pin them to the remaining ½” foam sheet. Follow the instructions on the StyroCutter® Plus packaging to cut the shapes from the foam.
-
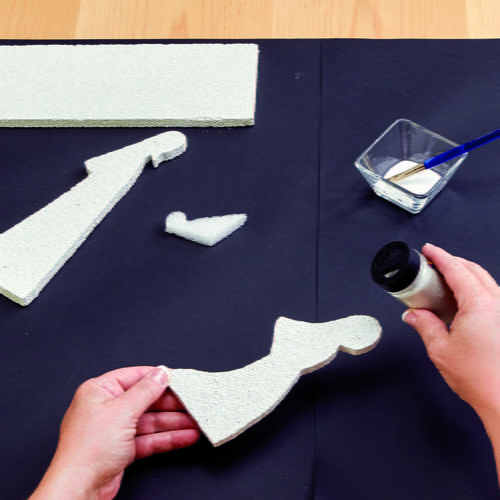
Paint the base and the Joseph, Mary and Baby Jesus silhouettes white. While the paint is still wet sprinkle with iridescent glitter. Paint the craft sticks and the star gold. While the paint is still wet, sprinkle with gold glitter. Let dry completely.
-
Glue the walls and roof to the base.
-
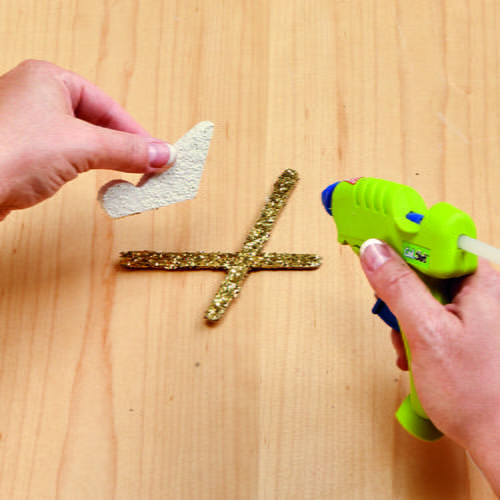
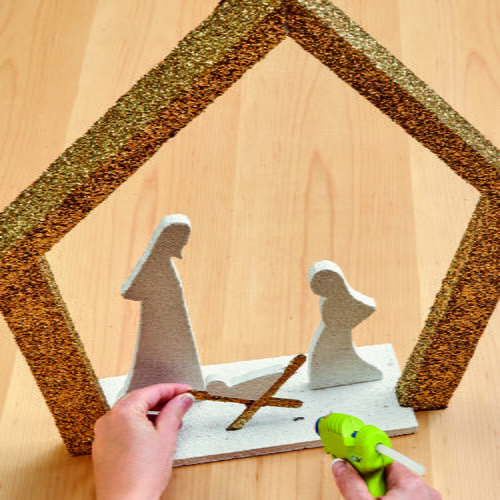
Crisscross two craft sticks under the baby silhouette. The foam cutout should nest between the craft sticks as shown. Glue to secure the craft sticks together.
-
Press the craft sticks into the base at the front of the nativity. Secure in place with glue. Glue the other two silhouettes standing on either side of the baby. Hang the star above the nativity with monofilament line.
Celebrate With More Christmas Craft Ideas
If you enjoyed making the Sparkling Nativity, here are three more Christmas crafts that you might want to try:
1. Glittery Reindeer Ornaments: Create your own glittery reindeer ornaments using craft foam, googly eyes, and glitter. These adorable decorations will add a festive touch to your Christmas tree or gift wrap. You can even personalize them by adding names or dates with a permanent marker.
2. Felt Christmas Tree Advent Calendar: Make a fun and interactive advent calendar using felt and other embellishments. Each day leading up to Christmas, your family can add a new decoration to the tree, building anticipation for the big day. This craft is not only cute and festive, but also a great way to create lasting memories with your loved ones.
3. Hand-painted Christmas Ornaments: Personalize your Christmas tree with hand-painted ornaments featuring your favorite holiday designs. Whether you choose to paint intricate snowflakes, jolly Santas, or colorful stockings, these unique decorations will add a special touch to your holiday decor. Get creative with different shapes, colors, and patterns to make each ornament one-of-a-kind.
These Christmas crafts will keep you busy and entertained throughout the holiday season, while also adding a touch of sparkle and creativity to your home. Enjoy crafting and spreading Christmas cheer!
Read NextDecorate A Christmas Crate
Your Recently Viewed Projects
Marilyn B
Nov 08, 2017
Wonderful detailed instructions! I have always wanted to make so,etching like this, and I think you could even make it larger by following these instructions and doubling, or increasing or lessening the dimensions, as desired. I would also consider adding some tiny rice LED lights entwined in the structure or even in front of it. Hang a pretty acrylic, glass or crystal star from some clear fishline in the center for an alternate look for,the star, or to add to the center of the star. So nice!
SissieSass
Dec 13, 2016
I always thought it would be hard to make a nativity scene that I liked, but you have it outlined in such a way that makes it fairly simple. Can you use tissue paper to make the people in different colors? I would love to make several of these as gifts for my Christian friends.
vrelf 7243826
Nov 06, 2016
This is lovely! I am already to make it, but I can't find the figure's silhouettes. Where can I find the? Thanking you, Virginia
Editor Dana
Nov 08, 2016
Hi there Virginia! You can find the template in our Holiday eBook. It is on pages 25 and 26. Hope that helps! -Editors of FaveCrafts http://www.favecrafts.com/Christmas-Crafts/Floracraft-Holiday-Crafts-12-Easy-DIY-Projects
Report Inappropriate Comment
Are you sure you would like to report this comment? It will be flagged for our moderators to take action.
Thank you for taking the time to improve the content on our site.

