This project was submitted by one of our readers, just like you.
Tin Foil Ornaments
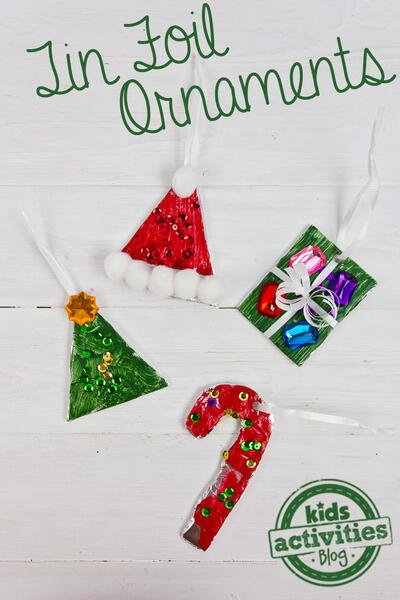
"There is no Christmas activity more fun than trimming the Christmas tree together as a family. However, making these tin foil ornaments might come in a close second. DIY ornaments are a great way to spend time together as a family and the ornaments make beautiful keepsakes to put on the tree year after year. These beautiful tin foil DIY ornaments are so easy to make. They sparkle and shine as they reflect the tree lights!"
Primary TechniqueGeneral Crafts

Materials List
- Paint and paint brushes
- Scraps of cardboard (Thick corrugated cardboard from a box is ideal but even thin cereal box cardboard will work.)
- Aluminum foil
- Glue
- Scissors
- Ribbon
- Glitter, sequins, beads, rhinestones, etc. for decoration
- Hole Punch
Instructions
-
Cut out festive shapes from your cardboard. We just drew ours freehand – they don’t need to be perfect. You could also use Christmas cookie cutters as a template. Simply place the cookie cutter on the cardboard, trace a line around the outside, and cut.
-
Cover the shapes in tin foil. Again, they don’t need to be perfect. In fact, if the tin foil becomes crinkled, this will give a lovely mottled effect when it comes time to paint the ornaments.
-
Paint the ornaments. Acrylic paint would adhere well to the foil however we used basic kids’ craft paint and it worked just fine.
-
Apply glue to the ornaments and add decorations such as beads, sequins and glitter.
-
Once the ornaments have dried, punch a hole at the top (or simply pierce with the pointed end of a pair of scissors if you don’t have a hole punch).
-
Thread through some ribbon or string, and then they are ready to be hung on the tree.
Read NextCrochet Snow Globe Amigurumi


