Coat Hanger Christmas Tree
Learn how to make a wire hanger Christmas tree with this beautiful tutorial!
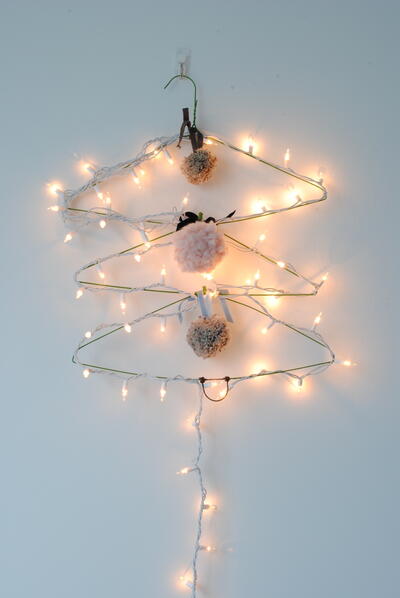
From the Designer: "If you’re anything like me, then you probably have a few wire hangers lying around from the dry cleaners and have absolutely no idea what to do with them. Some dry cleaners will take them back to reuse them but I’ve come up with a fun and festive craft that also allows you to reuse those pesky wire hangers without having to make a trip back to the dry cleaners. The end result will leave you with a space effective Christmas tree that’s especially great for those of us in small apartments."
Time to CompleteIn an evening
Main MaterialRecycled Materials
Primary TechniqueGreen Crafting

SeasonWinter
HolidayChristmas
Project TypeMake a Project
Materials List
- 3 wire hangers
- Hot glue gun
- Christmas string lights (at least 15 feet long or longer depending on the distance between where you’ll be hanging your tree and the nearest outlet)
- 24 gauge floral wire (either white or green depending on what color your string lights are)
- Plier
- Wire cutter
- Sharpie
- Green and brown paint
- Paint brushes
- Ornaments
Instructions
Note: Click any image for larger version.
-
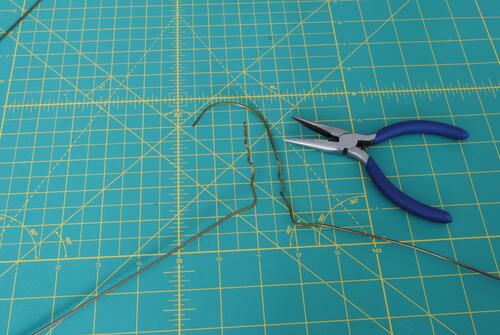
Use your pliers to untwist the hanging portion of two of your hangers.
-
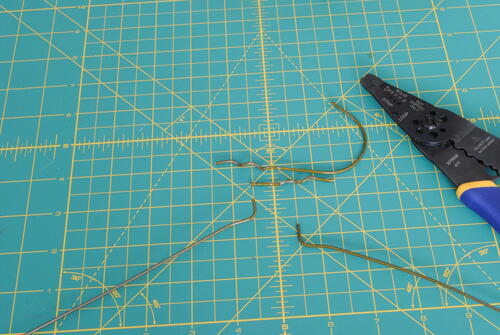
Using your wire cutters, find the correct gauge and cut off both sides of the hanging portions you untwisted in Step 1, leaving about ½”.
-
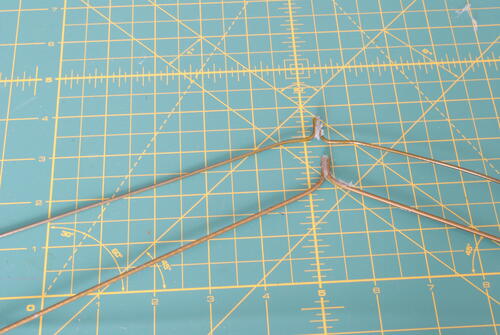
Using your hot glue gun, glue the top ends of the hangers you cut closed in Step 2.
-
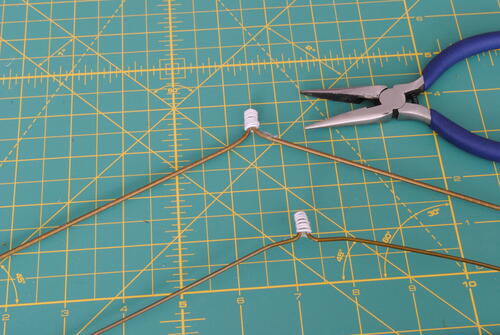
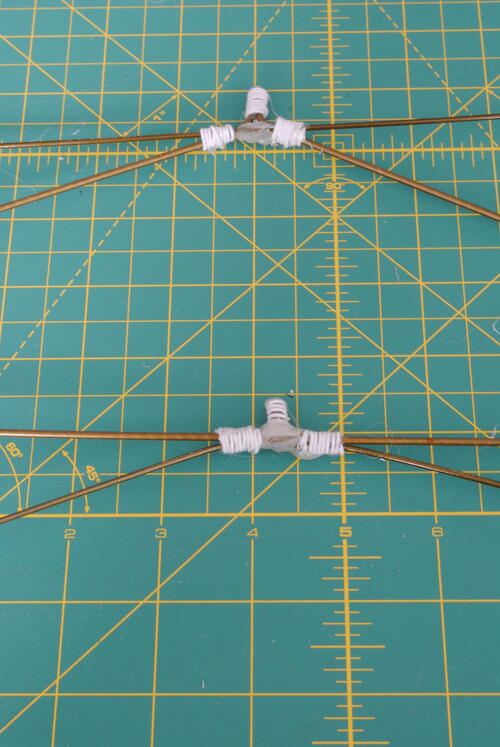
Twist floral wire around the ends you glued closed in Step 3, making sure they are secured tightly by pressing them with your pliers. Cover any sharp ends with hot glue.
-
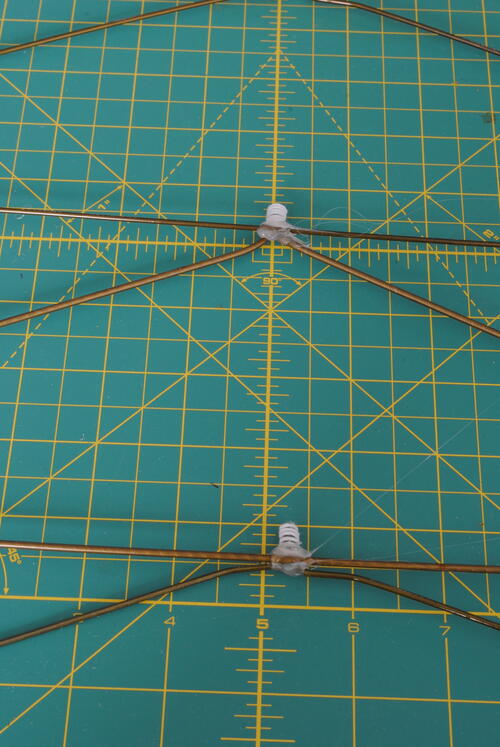
Find the center at the bottom of each of your hangers and make a small mark using a sharpie. With your fully intact hanger at the top, glue the top end of one of your cut hangers to the center bottom mark you made. Then glue the top end of your last hanger to the center bottom mark of the middle hanger.
-
Use your floral wire to wrap around each side of the joins you glued together in Step 5. Cover any sharp ends with hot glue.
-
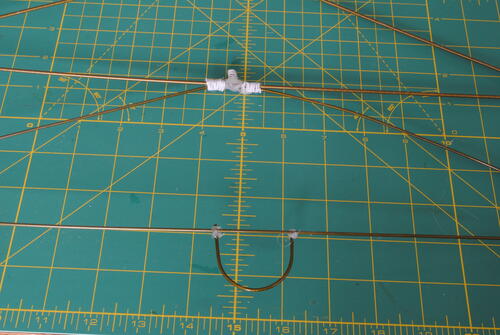
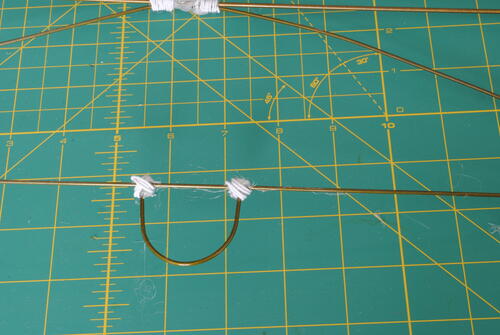
Take one of the hanging portions of the hangers you cut. Trim the ends so that they are even. Hot glue it to the bottom of your last hanger, making sure it is evenly spaced on each side of your center bottom mark. (This is something I unfortunately neglected to do while I was making mine and I wound up about 1” off.)
-
Take your floral wire and wrap it around the joins you glued in Step 7, going diagonally in either direction.
-
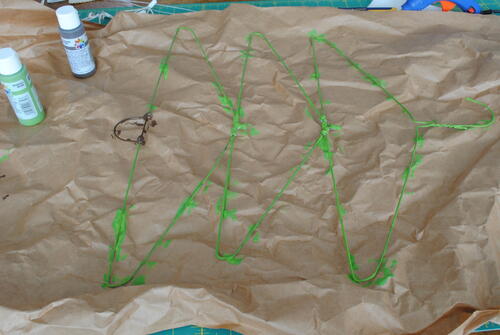
Lay down your craft paper and place your tree on top to paint. I needed about two coats of paint to cover my tree evenly. Let your tree dry in between coats.
-
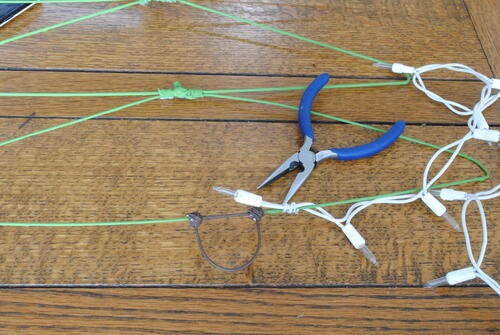
Starting on the right side of your tree stump, begin attaching your lights by cutting 2-3” long pieces of floral wire and wrapping it around the cord. Press down lightly with pliers to make sure pointy edges are not sticking out. Continue going all the way around your tree, securing your lights with wire every 2-3 bulbs or as needed. I did not have one continuous strand of lights that was long enough, so I had to connect two strands together and sort of finagle it to hide the point at which they were attached towards one of my center hanger joins. This will later be concealed by an ornament.
-
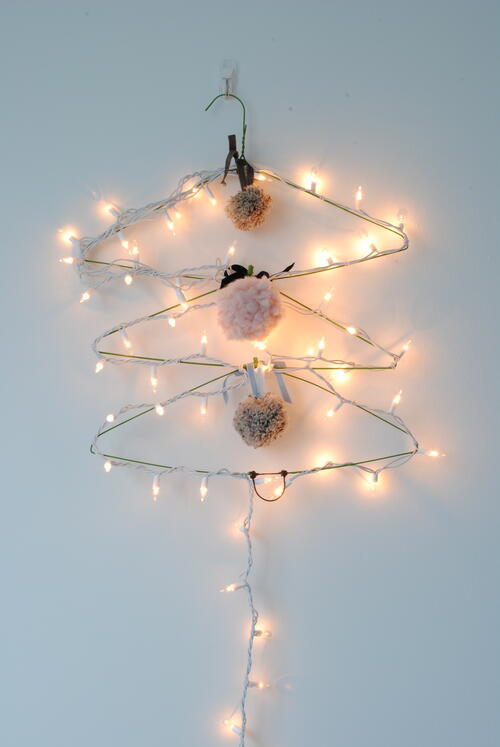
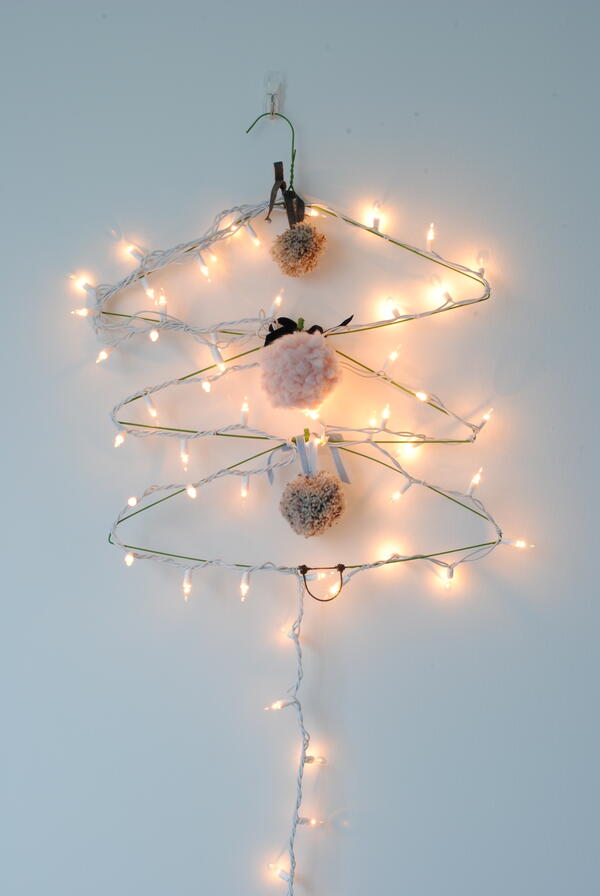
For my tree, I decided to hang pom pom ornaments I made out of yarn last year from each hanger join for an added touch. Another option would be to hot glue clothes-pins to each join so that you can hang cards from them. Plug in your lights and enjoy!
BONUS! Check out this twist on the idea of a Christmas Tree from Coat Hangers by Vina
I have made several of these trees. I take the six wire hangers and intertwine two at a time, fitting with the hook inside. I tie them with the twist ties from bread or trash bags at the point of where the hanger meets. After all are tied together, I then wrap a strand of twinkle lights, (this is usually 23 or 35 light strand), leaving the plug end at the bottom. I then wrap garland around the exterior of it, starting at the top and it can be anchored with thin wire if needed. This exposes the lights and they will be covered, you can use any color lights or garland to suit your taste. I hope this isn't confusing. Hope it turns out like you want it!
Why You'll Love This Recycled Craft
1. Eco-Friendly: By reusing old wire hangers that would otherwise end up in the trash, you're reducing waste and giving them a second life as a festive Christmas decoration. It's a simple way to be more environmentally conscious and reduce your carbon footprint during the holiday season.
2. Space-Saving: For those living in small apartments or tight spaces, this craft project is perfect for adding a touch of holiday cheer without taking up valuable floor space. The compact size of the Coat Hanger Christmas Tree makes it a great alternative to a traditional tree, allowing you to still enjoy the holiday spirit without sacrificing space.
3. Budget-Friendly: With just a few supplies needed, including wire hangers, garland, ornaments, and lights, this DIY project is a budget-friendly way to decorate for the holidays. Instead of spending money on a real or artificial tree, you can create a unique and personalized Christmas tree for a fraction of the cost. Plus, since you're using materials you already have on hand, it's a great way to save money and still have a beautifully decorated home for the holidays.
Up Next:
Read NextCute Clay Snowman Decor
Editor Dana
Aug 26, 2020
Hi everyone! This tutorial has been updated with photos and more detailed instructions. I hope that helps! Enjoy!
Weberme
Nov 16, 2018
This coat hander Christmas tree is a cute project to make but I am a little confused too on how to put the hangers together. Can you add some pictures or a video? How big does it turn out? I am totally confused.
RevNelson
Sep 21, 2013
I would like to have seen a picture, do I straighten all the hangers or are we to over lap the hangers?
Monica815
Sep 13, 2011
If you have any dollar stores, you can also check them out for cheap garland. Try Dollar Tree, Dollar General, Family Dollar, or local thrift stores might have some as well.
storknurse
Dec 10, 2010
I have made several. They last for years, are great for kids rooms. I uses pink lights and white garland. Use mini ornaments for more interest. Storknurse2002
kellysartsncrafts
Dec 09, 2010
This is the first year I had the ability to create christmas crafts for decorating. Ironically, I have a ton of wire hangers that I just hate to throw out and was trying to figure out how to use them for crafts - all I could come up with at the time was a christmas tree and a mobile. Low and behold when I visited this site there it was, my idea for a hanger christmas tree. Go figure. Thank You!!!!
allywithrow 256575 8
Nov 29, 2010
Crafter 7933947 You can find garland cheap at Michael's. They usually have things like that around Christmas. Q & A By the 11 Year Old Craft Master.:D
Deb S
Oct 04, 2010
I found 2 websites with step by step instructions. 1-kaboose.com and 2- all free crafts .com. They also have a picture of the tree.1 is more detailed than the other. Type in recycled coat hanger christmas tree. I hope this helps.
Crafter 7933947
Sep 02, 2010
Where do you find garland cheap. I haven't been able to find any garland that is low priced in order to make a little profit with my trees
Ray Stegall
Mar 13, 2010
Has anyone got a picture they can post. Sometimes a picture speaks a thousand words. Or email me. raylenesteg@aol.com
Crafter 17133
Feb 15, 2010
Thanks for the advice Crafter 14656. I will try the 8 racks. Great site.
Crafter 14656
Jan 09, 2010
I have made several also I use racks after I hook the rack togather it has an A shape Tie both ends the top and center togather do this to all the racks You will have A shapes I use floral wire You then hook the togather putting one in to the other and wire togather untill you have a tree shape Then tie all the tops togather and all the centers togather Then I put the lights on I use wire to tie the lights on here and there I use the set of lights starting at the top of the tree with the plug end at the bottem of the tree Put a drop of hot glue on the top point and attach the garland I also use hot glue here and there to glue the garland to the frame I have also hot glued small ornaments to the…Read More garland They are beautiful Hope It Helps I dont have a picture of it as I work Gwen K
Member 19768
Nov 21, 2009
would like a picture of this one, It helps to see what I am supoosed to do.
Report Inappropriate Comment
Are you sure you would like to report this comment? It will be flagged for our moderators to take action.
Thank you for taking the time to improve the content on our site.

