This project was submitted by one of our readers, just like you.
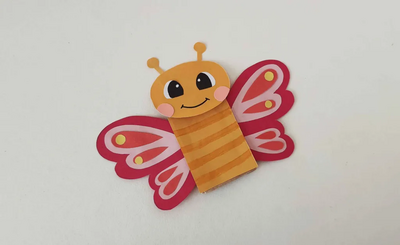
Paper Bag Butterfly
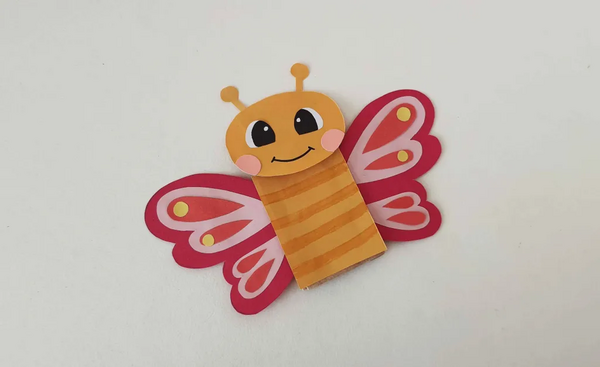
"I don’t know a single kid that doesn’t try to catch a butterfly when they see one fluttering around, but they are not easy to catch! This Paper bag Butterfly is one you won’t have to chase down with a net. I always connect butterflies to spring in my mind. Maybe it has to do with all the flowers in bloom that the butterflies just can’t resist! But did you know that butterflies only have a lifespan of a few weeks? Thankfully, this craft should last you a little longer!"
Primary TechniqueOther

Materials List
- Construction paper
- Pencil – to trace the template
- Scissors
- Craft glue
- Sharpie or gel pen
- Paper bag
Instructions
-
Print and cut out the template patterns. Trace the patterns on the selected construction paper and cut them out nicely. The template includes the following patterns – head, antenna, blush, wing bases, wing patterns, and eye bases. Use a black sharpie to fill the eyes on the eye bases.
-
Glue the antenna pieces to the top of the head cutout.
-
Attach the eye cutouts near the top part of the head cutout and glue the blush cutouts to the right and left sides of the face.
-
Use a sharpie to draw the mouth-line.
-
Find the wing base and glue the medium wing patterns on top.
-
Glue the teardrop patterns on top of the medium wing cutouts. The two largest teardrops will go on the top wing and the smaller ones on the bottom.
-
Glue the small round dots onto the round end of the largest teardrops on each wing. You can add more details to the wings if you want to.
-
Grab your paper bag and cut out a piece of paper large enough to cover the side of the bag under the flap. This will be the body of the butterfly.
-
Use a colored sharpie or marker to add horizontal stripes to the body base paper, then glue this paper to the bag.
-
Glue the head of the butterfly to the flattened bottom of the bag.
-
Glue the wings to the sides of the paper bag to complete the craft
Read NextFamily Portrait Planters


