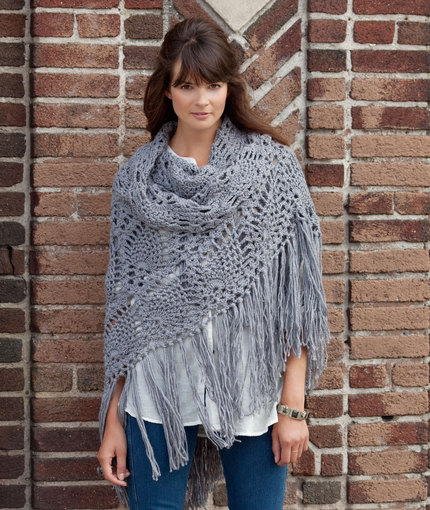
Granny Square Tunic and Matching Purse
Granny square crochet patterns are such fun to do and look fantastic when assembled. Use these free crochet patterns from Patons to create a granny square tunic with matching purse.

Materials:
- Yarn: Patons® Grace (50 g) Sizes XS (S-M-L-XL)
Tunic (Blue): 11 (12-14-15-16) balls
Purse: (Blue) 3 balls - Size 3.25 mm (U.S. D or 3) crochet hook or size needed to obtain tension. 1 zipper 10 ins [25 cm] long, 2 pipe-cleaners and ¼ yrd [0.3 m] of lining fabric for Purse.
Sizes:
Bust measurement
Extra-Small 32 ins [81.5 cm]
Small 34" [86.5"]
Medium 36" [91.5"]
Large 38" [96.5"]
Extra-Large 40" [101.5"]
Finished bust measurement
Extra-Small 34 ins [86.5 cm]
Small 36" [91.5"]
Medium 38" [96.5"]
Large 40" [101.5"]
Extra-Large 42" [106.5"]
Purse: Approx 7 x 10½ ins [18 x 26.5 cm].
Gauge:
8½ V-sts and 12 rows = 4 ins [10 cm]
1 Motif = 3½ ins [9 cm] square.
Abbreviations:
Sc2tog = Draw up a loop in each of next 2 sc. Yoh and draw through all 3 loops on hook - Sc2tog made.
Instructions:
The instructions are written for smallest size. If changes are necessary for larger sizes the instructions will be written thus ( ).
MOTIF [make 10 (10-11-11-12)]
Ch 8. Join in ring.
1st rnd: Ch 1. 15 sc in rnd. Join with sl st in first sc.
2nd rnd: Ch 6 (counts as dc and ch 3). *Miss next sc. 1 dc in next sc. Ch 3. Rep from * 6 times more. Join with sl st in 3rd ch of ch 6.
3rd rnd: Ch 1. *(1 sc. 1 hdc. 1 dc. 1 hdc. 1 sc) all in next ch-3 sp. Rep from * around. Join with sl st in first sc.
4th rnd: *Ch 5. (Miss next sc, hdc, dc, hdc). 1 sc in next sc. Rep from * around. Join with sl st in first ch of ch 5.
5th rnd: Ch 1. *(1 sc. 1 hdc. 3 dc. 1 hdc. 1 sc) all in next ch-5 sp. Rep from * around. Join with sl st in first sc.
6th rnd: Sl st in next hdc. Ch 1. 1 sc in same sp as last sl st. Ch 4. * Miss next 2 dc. 1 sc in next dc. Ch 4. (Miss next hdc, 2 sc). 1 sc in next hdc. Ch 4. Miss next 2 dc. 1 sc in next dc**. Ch 7. (Miss next hdc, 2 sc). 1 sc in next hdc. Ch 4. Rep from * twice more, then from * to ** once. Ch 7. Sl st in first sc.
7th rnd: Ch 1. (4 sc in next ch-4 sp) 3 times. *(3 sc. Ch 2. 3 sc) in next corner ch-7 sp. (4 sc in next ch-4 sp) 3 times. Rep from * twice more. (3 sc. Ch 2. 3 sc) in next corner ch-7 sp. Join with sl st to first sc. Fasten off.
Joining Motifs:
Sizes XS, M and XL only: Place 2 motifs with RS facing tog.Working through both thicknessess, proceed as follows: Join yarn with sl st to any corner ch. Ch 1. 1 sc in same sp as last sl st. (Ch 1.Miss next sc. 1 sc in next sc) 10 times. Fasten off.
Sizes S and L only:With RS of 2 motifs facing, proceed as follows: join yarn with sl st to any corner ch of First motif. Ch 1. Sl st to corner ch of second motif. *Ch 2. Miss next sc of first motif. Sl st in next sc. Ch 2. Miss next sc of second motif. Sl st in next sc. Rep from * to corner sc of both motifs. Fasten off.
Foundation rnd for Body: Size XS only: With RS of work facing, join yarn with sl st to any motif corner sc. Ch 1. 1 sc in same sp as last sl st. *Work 21 sc across top of motif. 1 sc in joining sp between motifs. Rep from * around. Join with sl st to first sc. 220 sc.
Sizes M and XL only:With RS of work facing, join yarn with sl st to any motif corner sc. Ch 1. 1 sc in same sp as last sl st.Work 20 sc across top of first motif. [(1 sc in joining sp between motifs. Work 21 sc across top of next motif ) (4-1) time(s). 2 sc in joining sp between motifs. Work 21 sc across top of next motif ] (2-4) times. (1 sc in joining sp between motifs. Work 21 sc across top of next motif ) (0-3) times. 1 sc in joining sp between motifs. Join with sl st to first sc. (244-268) sc.
Sizes S and L only: With RS of work facing, join yarn with sl st to any corner sc. Ch 1. 1 sc in same sp as last sl st.Work 20 sc across top of first motif. [2 sc in joining sp between motifs. Work 21 sc across top of next motif ) (4-2) time(s). 3 sc in joining sp between motifs. Work 21 sc across top of next motif ] (1-3) time(s). (2 sc in joining sp between motifs.
Work 21 sc across top of next motif ) (4-1) time(s). (3-2) sc in joining sp between motifs. Join with sl st to first sc. (232-256) sc.
FRONT
All Sizes: **1st row: (RS). Ch 3 (counts as dc). Miss next sc. [(1 dc. Ch 1. 1 dc) all in next sc - V-st made. Miss next 2 sc] 35 (37-39-41-43) times. V-st in next sc.Miss next sc. 1 dc in next sc. Turn. Leave rem sts unworked. 36 (38-40- 42-44) V-sts.
2nd row: Ch 3 (counts as dc). V-st in each V-st to end of row. 1 dc in top of turning ch. Turn.
Last row forms pat.
Cont in pat until work from foundation rnd measures 13 ins [33 cm], ending with RS facing for next row.
Armhole shaping: 1st row: Sl st in first dc. (Sl st in next dc, ch 1 sp, dc) 3 times. Sl st in next dc. Ch 3 (counts as dc). Miss next ch 1 sp and dc. V-st in each V-st to last 4 V-sts. 1 dc in next dc of next V-st. Turn. Leave rem sts unworked.
2nd row: Ch 3. 1 dc in ch-1 sp of next V-st. V-st in each V-st to last V-st. 1 dc in ch-1 sp of last V-st. 1 dc in top of turning ch. Turn.
3rd row: Ch 3. Miss first 2 dc. V st in each V-st to last dc. Miss last dc. 1 dc in top of turning ch. Turn. 26 (28-30-32-34) V-sts.**
Work 3 (3-3-5-5) rows even in pat.
V-neck shaping: ***1st row: Ch 3. V-st in each of next 12 (13-14-14-15) V-sts. 1 dc in ch-1 sp of next V-st. Turn. Leave rem sts unworked.
2nd row: Ch 3. 1 dc in ch-1 sp of next V-st. V- st in each V-st to end of row. 1 dc in top of turning ch. Turn.
3rd row: Ch 3. V-st in each V-st to last dc.Miss last dc. 1 dc in top of turning ch. Turn.
Rep 2nd and 3rd rows until there are 6 (7-8-9- 10) V-sts.
Cont even in pat until armhole measures 7½ (7½-8-8½-8½) ins [19 (19-20.5-20.5-21.5) cm], ending with RS facing for next row. Fasten off.***
With WS of work facing, join yarn to top of turning ch and work from *** to *** as given above for Right Front, noting RS rows become WS.
BACK
Work from ** to ** as given for Front omitting references to leave rem sts unworked.
Cont even in pat until armhole measures 2 rows less than Front, ending with RS facing for next row.
Back neck shaping: Next row: Ch 3. V-st in each of next 6 (7-8-9-10) V-sts. 1 dc in next dc of next V-st. Turn.
Leave rem sts unworked.
Next row: Ch 3. V-st in each V-st to end of row. 1 dc in top of turning ch. Fasten off.
WithWS of work facing, join yarn with sl st to top of turning ch. Ch 3. V-st in each of next 6 (7-8-9-10) V-sts. 1 dc in first dc of next V-st. Turn. Leave rem sts unworked.
Next row: Ch 3. V-st in each V-st to end of row. 1 dc in top of turning ch. Fasten off.
SLEEVES
Make 3 Motifs.
Join Motifs in a row as given for Size S of Front.
Foundation row:With RS of work facing, join yarn with sl st to right corner sc. Ch 1. 1 sc in same sp as last sl st. Work 25 sc across top of first motif. (4 sc in joining sp between motifs. Work 23 sc across top of next motif ) twice.
Turn. 80 sc.
Next row: (WS). Ch 3 (counts as dc). (Miss next sc. V-st in next sc. Miss next sc) 26 times. 1 dc in last sc. Turn. 26 V-sts.
2nd row: Ch 3 (counts as dc). V-st in each V-st to end of row. 1 dc in top of turning ch. Turn.
Last row forms pat.
Rep last row 13 (3-3-3-3) times more.
Proceed as follows:
1st row: (RS). Ch 3. 1 dc in first dc. V-st in each V-st to end of row. 2 dc in top of ch 3. Turn.
2nd row: Ch 3. Miss first dc. 1 dc in next dc. V-st in each V-st to last dc. 1 dc in last dc. 1 dc in top of turning ch. Turn.
3rd row: Ch 3. Miss first dc. V-st in next dc. V-st in each V-st to last dc. V-st in last dc. 1 dc in top of turning ch. Turn.
4th row: Ch 3. V-st in each V-st to end of row.
1 dc in top of turning ch. Turn. 30 sts V-st. Rep last row 10 (8-4-2-2) times more.
Sizes S, M, L and XL only: Rep last (12-8-6- 6) rows (1-2-3-3) time(s) more. (30-32-34-34) V-sts.
All Sizes: Shape Top: 1st row: Sl st in first dc. (Sl st in next dc, ch 1 sp, dc) twice. Sl st in next dc. Ch 3 (counts as dc). Miss next ch 1 sp and dc. V-st in each V-st to last 3 V-sts.Miss next dc and ch-1 sp of next V-st. 1 dc in next dc of same V-st. Turn. Leave rem sts unworked.
2nd row: Ch 3. 1 dc in ch-1 sp of next V-st. Vst in each V-st to last V-st. 1 dc in ch-1 sp of last V-st. 1 dc in top of turning ch. Turn.
3rd row: Ch 3. Miss first 2 dc. V-st in each V-st to last dc. Miss last dc. 1 dc in top of turning ch. Turn.
Rep 2nd and 3rd rows until there are 6 V-sts.
Fasten off.
FINISHING
V-Neck Edging: Sew right shoulder seam.
With RS of work facing, join yarn with sl st to corner of left front neck edge. Ch 1. Work 34 (34-37-37-40) sc down left front V-neck edge. Work Sc2tog at bottom point of V-neck.Work 34 (34-37-37-40) sc up right front V-neck edge and 4 sc down right back neck edge, 38 sc across back neck edge and 4 sc up left back neck edge. Fasten off.
Sew left shoulder seam. Sew in sleeves. Sew side and sleeve seams.
Body Edging: With RS of work facing, join yarn to any corner sc of Motif.
Work as given for Foundation rnd for Body for appropriate size, to last 2 sts. (2 sc in next sc) twice. Join with sl st in first sc. 220 (232-244- 256-268) sc.
Next rnd: Ch 1. 1 sc in same sp as last sl st. *Miss next 2 sc. (2 dc. Ch 3. Sl st in top of dc - Picot made. 3 dc) all in next sc.Miss next 2 sc. 1 sc in next sc. Rep from * around, ending with 1 sc in last sc. Join with sl st in first sc. Fasten off.
Sleeve Edging: With RS of work facing, join yarn to corner sc of first Motif.
Work as given for Foundation row for Sleeve, working (sc2tog) twice evenly across. Join with sl st in first sc. 66 sc.
Next rnd: Ch 1. 1 sc in same sp as last sl st. *Miss next 2 sc. (2 dc. Picot. 3 dc) in next sc. Miss next 2 sc. 1 sc in next sc. Rep from * around. Join with sl st in first sc. Fasten off.
PURSE
Make 12 motifs.
Join 3 motifs in row as follows: Place 2 motifs with RS facing tog. Join yarn with sl st to any corner ch sp. Ch 1. 1 sc in same sp as last sl st. (Ch 1. Miss next sc. 1 sc in next sc) 11 times.
Fasten off.
Join 2 rows for Front or Back in same manner as given for joining Motifs.
Note: Ch 2 does not count as st.
Gusset and bottom: (worked in one piece).
Ch 4.
1st row: (RS). 1 hdc in 3rd ch from hook. 1 hdc in next ch. Ch 2. Turn.
2nd row: 1 hdc in each of next 2 hdc. Ch 2. Turn.
3rd row: 2 hdc in each of next 2 hdc. Ch 2. Turn.
4th to 6th rows: 1 hdc in each hdc to end of row. Ch 2. Turn.
7th row: 2 hdc in first hdc. 1 hdc in each hdc to last hdc. 2 hdc in last hdc. Ch 2. Turn.
8th to 11th rows: As 4th to 7th rows.
12th row: 1 hdc in each hdc to end of row. Ch 2. Turn.
Rep last row until work from beg measures 20 ins [51 cm], ending with RS facing for next row.
Next row: (Yoh and draw up a loop in next st) twice. Yoh and draw through all loops on hook - Hdc2tog made. 1 hdc in each hdc to last 2 hdc. Hdc2tog over last 2 hdc. Ch 2. Turn.
Next 3 rows: 1 hdc in each st to end of row. Ch 2. Turn.
Next 2 rows: Hdc2tog over first 2 hdc. 1 hdc in each hdc to last 2 hdc. Hdc2tog over last 2 hdc. Ch 2. Turn. Fasten off at end of last row.
Lining: Before joining Front, Back and sides tog, mark WS of lining according to the shape of each piece with ¾ ins [1.5 cm] seam allowance on side and bottom edges and ½ ins [1 cm] seam allowance to top edges. Cut out lining pieces. Sew bottom seam of Front, Back and sides tog using french seam (see diagram). Sew sides using french seam. Stitch along top of Front, Back and sides lining ½ ins [1 cm] from edge. Press lining to WS along this stitching line.
Joining Front, Back and Gusset:WithWS of Front and Gusset tog, join yarn with sl st to top left corner of Front. Ch 1. Working through both thicknessess, work 1 row of sc down left side of Front, across bottom and up right side of Front. Do not turn.
Next row:Working from left to right instead of from right to left as usual, work 1 reverse sc in each sc to end of row. Fasten off.
Repeat for Back.
Handles (make 2).
Ch 80.
1st row: (RS). 1 hdc in 3rd ch from hook. 1 hdc in each ch to end of ch. Turn.
Next 3 rows: Ch 2. 1 hdc in each hdc to end of row. Turn.
Fold Handle lengthwise and insert pipecleaner, working through both thicknessess, work 1 sc in each hdc and foundation ch to end of row. Fasten off. Sew handles to Front and Back as illustrated. Sew in zipper.
Read NextSimply Savvy Crochet Ruana Pattern
Your Recently Viewed Projects
mrsjt63 3666946
Jan 26, 2021
Any one help please. I just can't see how to make 256 stitches from joining the moffits, even if I join all ewleven it doesn't make 256. someone please explain i'm going crazy
brendakenny 055852 6
Aug 16, 2017
HELP! I am an experienced crocheter but I am stumped! I have joined all 12 motifs (I am making the XL size) - as I assume they are all joined together first? However, when I start the foundation row, by following the pattern, I end up using only 9 motifs!! Is the pattern incorrect or am I being dim!!
blessed4431 329130 7
Jan 05, 2015
Can anyone tell me if they actually got this pattern to work. I dont want to start a project that is impossible. The rating is based on what I have read
geochick
Mar 15, 2014
Hi there, this is my first crochet project and I was wondering if anyone could help me out on this part of the pattern that I don't understand: FRONT All Sizes: **1st row: (RS). Ch 3 (counts as dc). Miss next sc. [(1 dc. Ch 1. 1 dc) all in next sc - V-st made. Miss next 2 sc] SO where it says "miss next sc" and V st in next sc, what sc is this when so far I only have a chain of 3. Am I supposed to be building off something else?
millie0921 3055652
Mar 27, 2013
I know a little about crocheting and trying to figure out what the numbers in parentheses mean like (4-1 times)? Can someone help me?
brendakenny 055852 6
Aug 16, 2017
The numbers in parenthesis are for all the other sizes e.g. S, M L XL pattern would say something like DC in each of the next 5 stitches - these 5 stitches would be for the first size, then in parenthesis(7, 9, 11) would be for M L XL sizes. Does this help?
johnbernadetteocon nor 0880386
Mar 14, 2013
I have crocheted the 11 motifs for the medium size but when I begin joining following the instructions I do not end up with 244 chains. Even by counting the instructions manually I come to much less. Whilst I have not been crocheting that long I'm wondering am I missing something? Am I joining all the 11 motifs to begin the back? Thanks for any help I can get.
JessiCAN
Apr 25, 2011
@ Mrs L B: Patons Grace is a sport weight yarn, so a yarn labeled with a 2 would be a good substitute. However, I'd bet that a 3 would work as well if you can get the right gauge. Hope this helps! -- Editors of FaveCrafts
Mrs L B
Apr 23, 2011
I would love to make this sweater but with a 3/4 sleeve. I haven't seen Pattons Grace yarn here in Cedar City, UT and was wondering what weight yarn would be comparable (2 or 3?) Thank you for the help.
jniblett
Apr 02, 2011
Crochet is my fave. projects. I've copied several of the free patterns on this site. I'm so THANKFUL for your free patterns and also the others who are so sweet to share their time and love of needle work of all kinds with us THANK YOU!! jniblett
Report Inappropriate Comment
Are you sure you would like to report this comment? It will be flagged for our moderators to take action.
Thank you for taking the time to improve the content on our site.


