This project was submitted by one of our readers, just like you.
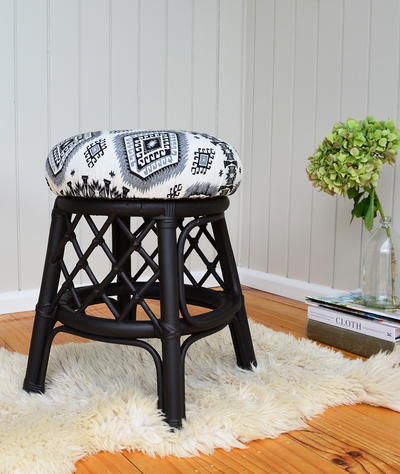
Crazy Easy Reupholstered Stool

Crazy Easy Reupholstered Stool
In the Designer's Words: "It’s amazing what you can do with a little fabric and a staple gun, you can turn an otherwise old, shabby, piece of furniture into a beautiful, “brand new”, modern piece, I love it! In this post I will share with you the steps on how to reupholster a stool (or any chair for that matter) the super easy way!! Honestly, this technique is so simple, anyone with a staple gun could do it!"
Estimated Cost$11-$20
Time to CompleteIn an evening
Primary TechniqueFurniture Projects

Project TypeMake a Project
Materials List
-
Old stool/chair
- Fabric (upholstery fabric or heavy non stretch sewing fabric)
- Screw driver
- Scissors
- Staple gun
- Pencil
- Paint (optional)
Instructions
-
Find a stool or chair you want to recover. This technique will work for recovering all kinds of seating including bar stools, computer chair or dinning chairs, so it doesn’t need to be a stool. If you need to find an old stool I highly recommend hitting up your local secondhand stores. Your bound to find a gorgeous, well made chair that just needs a little upholstery TLC.
-
The next step is to unscrew the seat from the base. Making sure you keep the screws safe until we need them at the end. Don’t do what I would did and put them somewhere “safe” then forget where the “safe” place was.
-
This step is optional, but if your stool needs a repaint then this is the time to do it. Start, by washing it down, sanding, applying a primer then apply few coats of paint. Sorry for the light instructions on the painting, stay tuned as I have a post in the pipe line on painting old furniture. Sign up for my newsletter if you like and then it will be emailed directly to you.
-
To reupholster the seat, start by removing the old fabric. Usually the fabric is stapled to the underside of the seat, so you will need a flat head screwdriver or similar tool to leverage these staples out.
-
To cut out the new fabric for the seat, place the upholstered stool in the centre of the fabric, making sure there is enough to cover the top and approx 1/3 of the underside of the seat and then cut out. Doesn’t matter if the fabric isn’t cut perfectly straight, it will get trimmed up after it’s stapled to the seat.
-
Place the cushion top upside down in the centre of the fabric. Fold in and staple at the four opposite sides. This secures the fabric in place so it doesn’t slip while you are stapling your way around. Turn up the right way and check that the fabric is sitting straight and looks good before carrying on with the stapling. Once you are happy with the fabric position start stapling around the entire base, making sure the material stays smooth and taut. Keep each staple close together and the same width apart the whole way round. Trim the excess fabric off about 3-4cm away from the staples.
-
The next step is to cut a circular piece of fabric to cover the whole underneath of the seat. It gives a professional finish by hiding away all the staples and raw edges of fabric. You can use any fabric for this, it doesn’t need to be the same as it won’t be seen. To cut this piece out, place your seat in the middle of your chosen fabric. Trace around the seat with a sewing pencil so you have a circle, then cut out the circle 2-3cm inside the line you have traced. To attach this circle piece, lay it on the underside of the seat right side out so it covers the staples and fabric edges. Then staple into place.Lay this circle of material on top of your stapled fabric so that it covers the edges nicely and staple into place. And there you have your newly reupholstered stool cushion!
-
The last step is to put the stool back together. Place the reupholstered cushion top onto the base of your stool, adjust into position, then secure into place with the original screws using a drill or screwdriver and your all done!
Why You'll Love This Recycled Craft
Looking to add a personal touch to your home decor? Here are the top 3 reasons why you should try the Crazy Easy Reupholstered Stool project:
1. Affordable Transformation: With just a few supplies - fabric, a staple gun, and a stool or chair - you can completely transform the look of a piece of furniture without breaking the bank. Instead of buying a brand new stool, save money by giving your old one a stylish makeover.
2. Creative Expression: Have fun choosing a fabric that reflects your personal style and complements your home decor. Whether you prefer bold patterns, bright colors, or neutral tones, the possibilities are endless. This project allows you to unleash your creativity and tailor the design to your taste.
3. Eco-Friendly Upcycling: By reupholstering an old stool or chair, you are participating in sustainable crafting practices. Instead of contributing to waste by throwing away furniture that is still functional, give it a new lease on life. Upcycling allows you to reduce your environmental footprint and showcase your commitment to repurposing materials.
Overall, the Crazy Easy Reupholstered Stool project is a fun and rewarding way to breathe new life into old furniture, personalize your space, and contribute to a more sustainable lifestyle. Give it a try and unleash your inner DIY enthusiast!

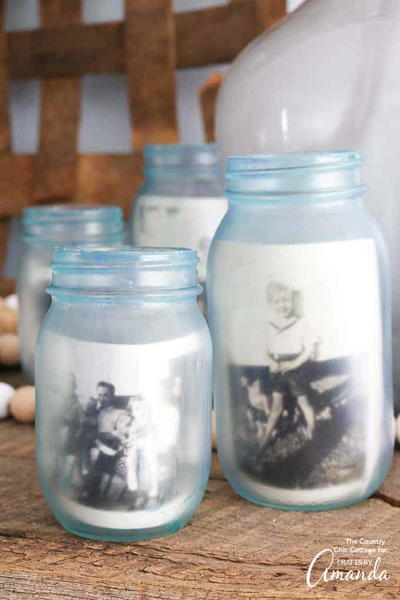
Read NextSuper Simple Etched Mason Jar