Crafty and Cushy Tattooed Easter Eggs
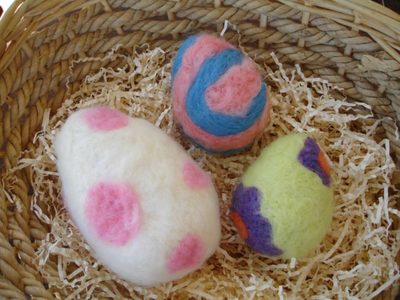
Now here is a new way to decorate your Easter eggs. Tattoo them! They are so cute and easy to make and they will last forever. You can hang them, display them or even give them as a gift. If you are already into felting then you can even turn yours into a work of art.

Materials:
- Felting needle
- Felting wool
- Styrofoam eggs (the larger sizes work best)
- Felting mat (I used a dense piece of Styrofoam that came from a packing box)
Steps:
- Felting is a very simple process. First decide on which colors of the felt you want to use and what kind of design you want to create. To get started think about how you would normally decorate a real Easter egg.
- Pull apart the felt and lay it in small sections on the egg.
- With a quick stabbing motion insert the needle in an up and down movement to push the felt into the egg. Don’t over due it! Too much will simply create a hole in the Styrofoam and mush your felt. Move the needle all over the area. Avoid going to deep into the Styrofoam. The goal is to push it into the egg with medium force.
- Work in small sections laying your felt out as you go. You can actually lay out your design on the egg as you go. Give the needle a few stabs. If you don’t like it simply lift off the felt and reposition.
Tips
- I let my 12 year old son make one. He is an experienced crafter but I recommend supervision since a large, very sharp object is involved.
- Use the felt sparingly. You can always add more for a deeper color. It is easier to add than take away.
- Don’t push the needle in and out in one spot too long. It breaks down the Styrofoam and makes a dent. Less is more!
- There are a few places to find the supplies. Here is one of them. www.clover-usa.com
Terri O is an Emmy award winning television personality. Learn more about her work here.
Read NextEaster Cardboard DIY Wreath


