No Sew Easter Egg Book
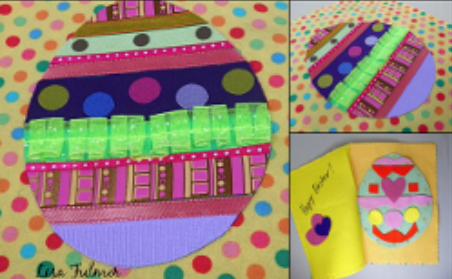
Add a few handmades to your child's Easter basket this season. Easy Easter crafts are a quick and easy way to get in the spirit of this lovely spring holiday. Make a No Sew Easter Egg Book from Lisa Fulmer out of fabric and felt but save your needle and thread for another day.

Materials:
- Print and solid fabrics
- Fusible web
- Iron and ironing pad
- Matching colors of felt
- Variety of ribbons
- Cardstock trimmed to one small and one large egg shape
- Aleene’s Fabric Fusion Peel-n-Stick Sheets
- Rotary cutter with pinking blade
- Cutting mat and ruler
- Scissors
- Fabric marker
- Sewing machine and/or embroidery floss and needle
- Aleene’s Original Tacky Glue
Instructions:
-
Trim pieces of print fabric for cover and solid fabric for inside pages to 9″ x 12″ with rotary cutter.
-
Fold each piece in half to 6″ x 9″ and press the fold.
-
Sandwich some fusible web between the wrong side of print fabric cover and one of the solid fabric pages and press with dry iron on high heat until fused.
-
Optional – machine stitch around the edges of the cover after fusing.
-
Peel bottom liner off a sheet of Fabric Fusion and apply the sticky side to a piece of fabric.
-
Use cardstock template to trace a small egg shape on the top liner of the Fabric Fusion, then trim the liner/fabric into the egg shape.
-
Peel back the top liner and carefully finger-press ribbon strips across the fabric egg on the sticky side, nested closely together.
-
Trim the edges of the ribbons flush with the edge of the fabric egg.
-
Use another sheet of Fabric Fusion to adhere the ribbon egg in position on the book cover.
-
Use cardstock template to trace the large egg shape on to several pieces of felt and trim out.
-
Use scraps of the Fabric Fusion to adhere a felt egg to the center of each page.
-
Optional – machine stitch or hand embroider around the edges of the eggs to further secure them to the page on both sides.
-
Trim out various shapes and strips of different colors of felt for decorating the eggs – kids can glue the shapes in place permanently when desired.
-
Write a greeting or special message inside the front cover with fabric marker and glue felt shapes around it to embellish.
- Lay the page spreads on top of the cover spread with folds aligned in the center, then machine or hand stitch down the fold line.

