Pretty Pink Petal Topiary
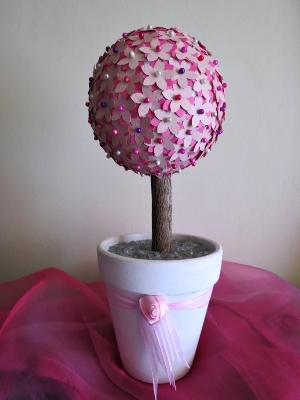
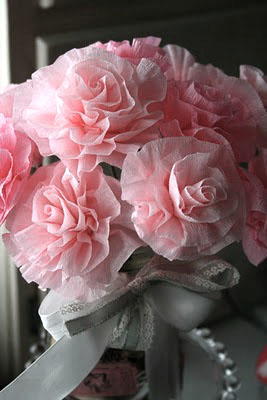
Get ready for spring with this precious Pretty Pink Petal Topiary. Made with lovely pink flowers, this cute topiary is a great way to bring the beauty of spring into your home. This DIY topiary would make a wonderful mantel decoration or would be a fun way to decorate your table or bay window for the spring season. Since these topiaries are made with little paper flowers, this is a simple and budget-friendly way to decorate for a bridal or baby shower, and you can easily make a whole forest of topiaries in all your favorite colors.

Materials:
- White polystyrene ball with a diameter of 115mm (4.5”)
- 7” tree branch pencil
- 11cm x 11cm (4.3” x 4.3”) white terracotta pot
- 2 sheets of beige pink scrapbook paper
- Five A4-sheets of dark pink sugar paper
- Large petal palm punch from XCut, code XCU 261811
- Colored pearl head sewing pins (white, pink, purple and dark pink)
- Decorative glass sand or glass pebbles to fill the pot
- Pink candy striped ribbon
- 1” pink ribbon rose
- Polystyrene glue
- Clear drying craft glue
Instructions:
- Insert sharp end of the tree branch pencil into the polystyrene ball to make a hole. Remove pencil from the hole, put a few drops of polystyrene glue into the hole and put the pencil into the hole again. Allow the glue to dry thoroughly.

- Punch petal flowers from the beige pink scrapbook paper and from the dark pink sugar paper you need to punch enough flowers to cover the whole ball.

- Push a sewing pin gently through the centre of a scrapbook flower. Then push the pin through a sugar paper flower so that you have added the sugar paper flower to the back of the scrapbook flower. Do the same with the other flowers.

- Affix petal flowers by gently pushing the sewing pins into the polystyrene ball. Make sure that the polystyrene ball is thoroughly covered.
- Fill half of the pot with decorative glass sand or glass pebbles.
- Push the bottom part of the pencil into the glass sand or pebbles, and keep it upright while filling the rest of the pot with the glass sand or pebbles, so that the “tree” will stand upright in the pot.
- Tie the ribbon around the pot. Cut the ribbon ends to the correct length and then dovetail the ribbon ends.
- Use the craft glue to adhere the ribbon rose.

Read NextNo Sew Fabric Flower Bouquet

