Buttons Mirror Frame
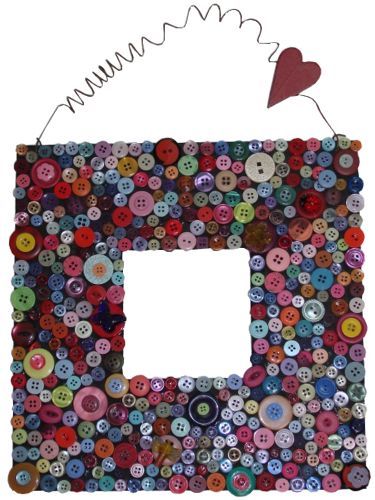
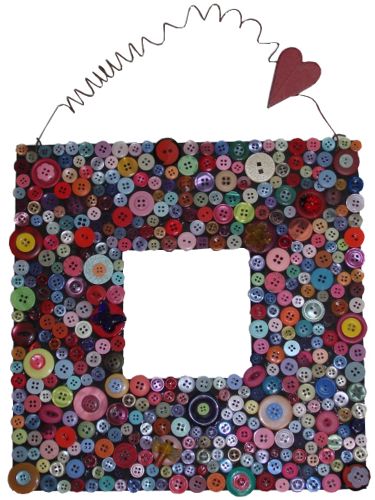
Heidi Borchers for Inspired at Home shows us how to create a whimsical mirror frame decorated with buttons in various colors and sizes. This decorating idea is a great excuse to raid your button stash and makes a wonderful gift. Use specific colors for a color scheme or a variety of bright colors.
You can also listen to this project as you craft, read by Heidi Borchers. ![]()
Materials:
- Wood framed mirror
- Acrylic paint - black
- Brush – ½ “ flat
- Aleene’s® Platinum Bond Glass & Bead Adhesive
- Buttons – assorted sizes, colors and shapes
- Wire - 18 gauge - 24”
- Wax paper or newspaper- to cover workspace
- Drill with 1/8” drill bit
- Pencil
Instructions:
- To create the holes to attach the wire, drill a hole through each top corner of frame approximately ½” in from each corner.
- Paint frame black. Let dry completely.
- To glue each button onto the frame, place a small drop of glue onto the back of each button, then place button onto the frame. Repeat until the entire frame is completely covered. Glue additional buttons and shapes on top of other buttons. Let glue dry.
- To shape the wire, loosely wrap around pencil to form a coiled shape, leaving about 2“ at each end. Insert end of each wire into each hole. Bend wire over and twist to hold.
- Glue wood heart onto the wire. Leave frame in place on work surface while glue dries completely.
Heidi’s Designer Tips: Love those buttons? Then keep gluing to cover the sides of the frame. Want to change-up the look? Black and gold buttons would make a dramatic look. All white creates a perfect look for feminine.
Read Next15 Old Picture Frame Crafts
Your Recently Viewed Projects
Report Inappropriate Comment
Are you sure you would like to report this comment? It will be flagged for our moderators to take action.
Thank you for taking the time to improve the content on our site.

